Teacher String Art Project

This Teacher String Art Project is a simple project beginners can confidently make. If you've been pressed for a handmade gift for your childrens' teachers (or anyone, really), look no further than this tutorial. All you need is a wood block, your stencil, nails, and embroidery floss!
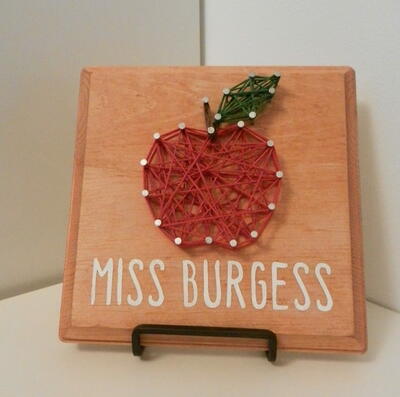
From the Designer: "I am going to show you a great Teacher Appreciation gift idea. String art has been around for a while, but I want to show you how you can use your Cricut to make a stencil. Having a stencil to use as a guide will make all of your string art projects easier! You could add a picture hanger to the back of this project, go get a small stand for it like we did. I love how crisp and clear the lettering turned out. This would make a great gift for a teacher."
This tutorial was originally featured on Shawn Mosch's blog.
Materials
• Unfinished wood square
• Wood stain
• Removable vinyl
• Weeding tool
• Cricut machine
• Cricut cutting mat
• Contact paper
• Paint
• Painters Tape
• Paper plate
• Foam brush
• Nails
• Hammer
• Embroidery floss in red, brown and green
Instructions
I started with a blank wood piece that I purchased at the local craft store. Choose a stain that you like, or even paint this blank piece. For this project, we decided to go with a nice walnut stain. Apply the stain per the directions.
1. Making the stencil
- I used Cricut Design Space to create this stencil. First, I measured the blank wood piece that I was going to apply the project to. Next, I inserted a square using the Shapes button in Cricut Design Space. Then I changed the size of that square to match the size of my wood blank. Now, I had a template to use so that I could design the stencil so that everything fit exactly on the space of the wood blank.
- I searched in Cricut Design Space and found an apple image that I liked. The apple will be the part that gets filled in with string for this project. Next, I found a font and typed up the words. The words will get filled in with paint. After I had everything spaced out how I wanted it over the top of the square in Design Space, I clicked on the Attach button. Attach holds the placement and position of things in Design Space. It will also change the colors of all of the elements in the design to one color. This is fine, since for this project we do want to cut everything from the same color. If you were making a multi colored stencil you would follow the directions detailed out HERE.
- Click "Make it", and load your Cricut mat with removable vinyl into the Cricut. Make sure your cut settings are set to "Vinyl".
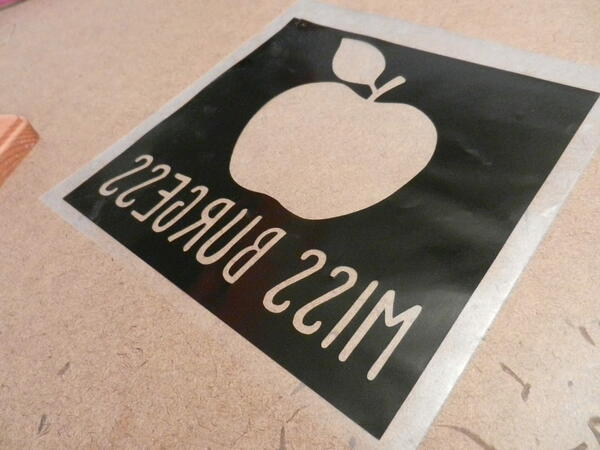
2. Weed the String Art Stencil
The next step is weeding the vinyl. Weeding is the process of removing the vinyl that you do not need. Since we are using this vinyl as a stencil, we want to weed away the apple and the letters. This will create opening inside of the square which we will use for guides for the project. I have shown this process in the photos below.
3. Use Clear Contact Paper to Transfer
Now that the stencil is all weeded, we have to place it on the blank wood piece. This process is called transferring your design. There are several companies that sell transfer paper, which allows you to more easily move your design to the project surface, but I want to show you a more inexpensive method. You can use clear contact paper as your transfer material.
4. Remove the Backing
- Remove the backing sheet from the clear contact paper. Place the sticky side of the clear contact paper on top of the stencil design. Smooth the clear contact paper down to ensure that it is really stuck down to the stencil design.
- Next, flip the whole thing over. Now start peeling the backing off of the removable vinyl as shown in the first image below. I like to place my finger on the clear contact paper to hold that down as I peel the backing away. You can see it peels pretty easily for the large areas, but you do have to be more careful when you get to the smaller parts like the letters. If any parts of the letters do not want to release from the backing sheet of the removable vinyl just use your weeding tool to slowly help them off of the backing so that they stick to the clear contact paper.
- Once the entire backing sheet is off, your piece will look like the image below. Remember, all of the surfaces exposed now are sticky.
- Carefully pick up the whole piece and line it up on your blank wood piece. I had my daughter help me with this part so that I could hold two corners of the stencil and she could hold the other two corners and we lined things up.
- Now you can start to smooth down the stencil to make sure that the removable vinyl is making good contact with the wood blank. I like to smooth from the center of the design out, so if you run into a bubble you can just peel things back and smooth again. A good, clean stencil needs a good seal between the stencil and the wood.
5. Remove the Clear Contact Paper
Now you can start to remove the clear contact paper, so that you are just left with the stencil on the wood blank. I started in a corner and just peeled back. If any parts of the stencil did not seem to be sticking, just press it down a little more as you go. When you are done, you should have just a wood blank with the stencil on it.
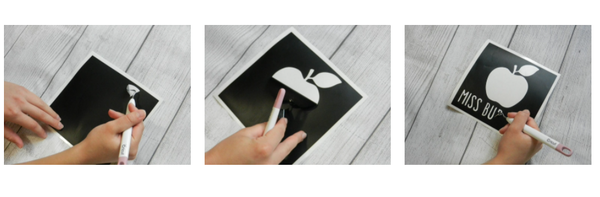
6. Painting the Stencil
- Now that we have the stencil on the blank wood piece, we can get ready to paint in the letters on this string art project. I tend to be a messy painter, so I like to add some painter’s tape to cover the areas around the area I will be painting. There is nothing worse than removing the stencil to find that a small bit of paint got on the edge or side of the wood blank.
- Squirt a small amount of paint on to a paper plate. Next dab your foam brush into the paint. Now dab that foam brush on to the paper plate. Yes, you heard me right. You want just a little bit of paint on your foam brush. It is better to do two thin layers than to do one thick layer of paint.
- DAB THE PAINT!
Do not brush the paint on to the wood blank. Dab it on in an up and down motion. The reason for this is that you do not want to push the paint under the stencil. If you go in an up and down dabbing motion it is less likely that you will accidentally push any paint under the stencil. This is also why you want to make sure that there is a good seal between the stencil and the wood blank. Again, it is better to do two thin layers of paint than try and put one thick layer of paint on. You will want to let the pain thoroughly dry, but while you do that, we can add the nails for the string art portion of the project.

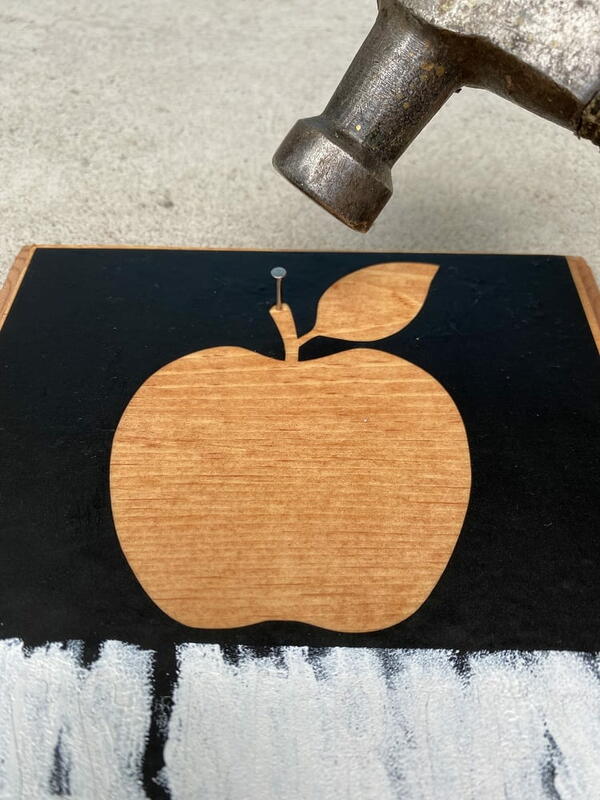
7. Adding the Nails
- Time to grab your hammer and nails. I like to use a pretty decorative nail for this. You can choose a nice gold or silver. Make sure it is a nail that has enough of a head on it to tie the string around it. Use the outline in the stencil as a guide for placing the nails. Make sure your nails are on the inside of the stencil and not going through the vinyl of the stencil.
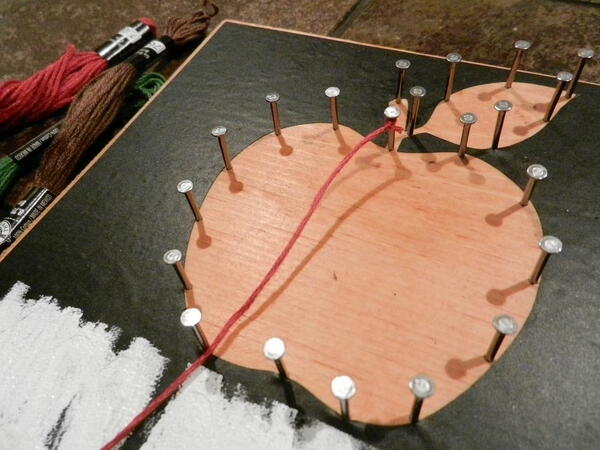
- Continue to place the nails around the outline of the apple. I think that these were spaced under an inch a part. There is no exact number of nails or spacing. If you do them closer together then you will just have more string to wrap around. Just make sure that they are not too close where you cannot get your fingers in there to work around the nails. Also, make sure that the nails are hammered into the wood well so that they do not wiggle around.

8. Adding the String
- In reality, we are adding the Embroidery Floss at this point not string. Embroidery Floss Art does not have same ring to it as String Art, so I guess that is why people will say string when they are really using embroidery floss.
- Tie the red embroidery floss on to the nail at the top of the apple. I did a double knot and then I cut the string close to the knot. You can turn the knot to kind of tuck it under where all of the string will criss cross around the apple. Now just bring the string down to a nail on the other side of the apple and wind it around the nail. Keep going, criss crossing the string from one end to the other. There is really no right or wrong way to do this. If you want the apple to look more filled in you can go back and forth more often and in different directions.
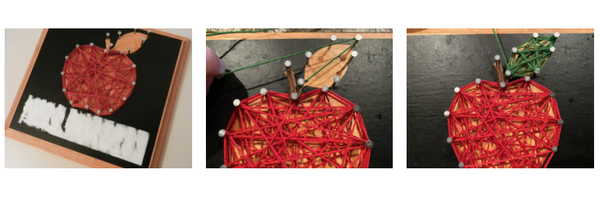
I ended the red back on the same nail that I started on so that all of my knots would be hidden at the top of the apple.
- Once the red is done, do the same process with the brown and green string. You can see in the images below how the apple starts to fill in with each color.
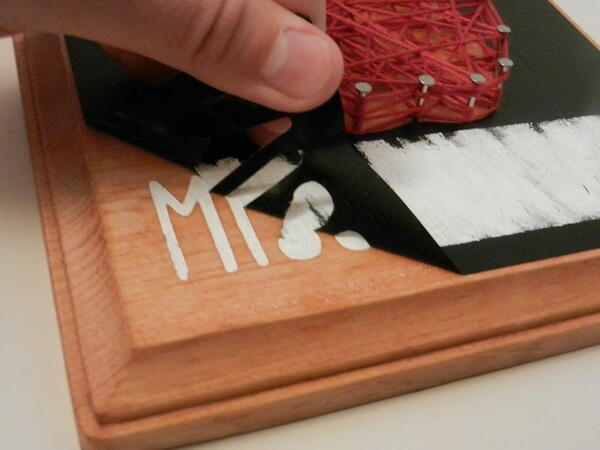
8. Remove the Stencil
Now all that is left to do is to remove the stencil after the paint has fully dried. Peel off slowly. As you peel back sections if you are worried about hitting the nails, you could take a pair of scissors and cut the stencil so that you can more easily peel if off around the nails.
The Finished Teacher String Art Project:
Voila! Your string art project is done!

Find more featured projects
Read NextKool Aid Dyed Yarn Plant Pot