How to Press Flowers 4 Ways
Flowers are such a pure form of natural beauty! Make these creations last with these flower pressing techniques.

Natural beauty is really unparalleled. That's why pressed flower crafts are so unique! Whether you're making homemade cards, decoupaging, or you just like pressing and framing flowers in glass, flowers are a great way to add a natural flair to your crafts.
There are four basic methods for how to press flowers that you can try. All of them take a little bit of time for the flowers to get perfectly pressed, but some methods -- like the microwave method -- are so simple, you'll be pressing flowers again and again.
“The best part about pressing flowers is that even the simplest, non-assuming flowers can make beautiful art. If you don’t have a garden full of flowers, gather some wild flowers on your next walk. To preserve your flowers and retain their color, once they’re pressed and adhered to your card, finish with a coat of decoupage medium. They’ll last for years.”
-Carolyn from carolynshomework.com
Table of Contents
Method 1: Pressing Flowers in a Book

Book pressing is definitely the most popular flower pressing method out there. It's so simple, and while it does take a long time to do, you won't waste your time building the same complicated contraption that is required for a flower press. The main benefit to using this method is that it is probably the most inexpensive method. The only real con to pressing flowers with books is that the pressure on the flowers may not be completely uniform, giving you uneven results.
Instructions:
- Sandwich the fresh flowers between two sheets of wax paper or newspaper.
- Place between pages of a large volume book. Dictionaries or encyclopedias work well.
- For multiple pressings in one book, leave many pages (about 1/4-1/8 inch) between pressings.
- Close the book.
- Stack several heavy books on top and wait several weeks.
Method 2: Flower Presses

A simple flower press is basically two boards, held together with a long bold and wing nut in each corner. This is the more "professional" method of pressing flowers because it has the most effective color retention and because flower presses have even, continuous pressure on the flowers. The downside of this method is that larger buds, like roses, have to be cut before pressing.
Here's What You Need:
Cardboard, two wooden boards, blotting paper (newspaper), flowers, four long bolts, and four wing nuts.
Instructions:
- Layer the flowers between two piece of plain paper.
- Take the flowers and play paper and layer them between two piecese of blotting paper (newspaper).
- Press the whole thing between two pieces of cardboard.
- Drill four holes in the corners of the boards and secure the whole thing together with the bolts and wing nuts.
- Leave the flowers for 2-3 weeks in the press.
Method 3: Pressing Flowers in the Microwave
Microwave pressing is one of the easiest methods out there. You can even buy a specially made microwave flower press! If you're looking to press flowers in a hurry, this method is the one for you; it is by far the fastest method. That said, it still takes a few hours to a full day to complete. This method is also tricky because it is much easier to overheat the flowers and make them too brittle.
Instructions:
- Sandwich the flowers between two sheets of blotting paper (or newspaper).
- Pad it with three or more sheets of paper towel.
- Place in a microwave.
- Take a microwave-safe casserole dish and place it on top. Ceramic tile also works well if your casserole dishes are too big to fit in your microwave.
- Microwave in short, 30-second intervals at medium to low-medium power.
- Allow the flowers to cool between heating so the steam can escape.
- Heating should take around three minutes in total.
- Leave the flowers in the microwave for a few minutes with the power off.
- Remove the flowers from the microwave and press them in a phone book or other large book for a few hours or up to a day.
Method 4: How to Press Flowers with an Iron

Much like the microwave pressing method, mentioned above, iron pressing flowers is a fast but delicate method. The benefit to iron pressing, however, is that you can have a little more control over the whole process. Be careful, though -- the heat can be hard to control, and because this method is faster than others, your flowers might not get as dry as you expect them to.
Instructions:
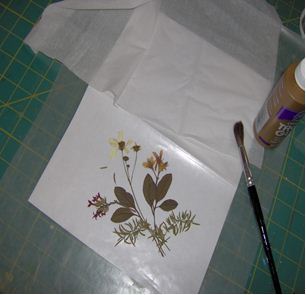
- Lay the flowers between two pieces of blotting paper (newspaper).
- Remove all water from your iron before using on the flowers. Moisture will cause the flowers to brown and make it harder for them to try.
- Heat the iron to its lowest setting.
- While the iron is heating, press the flower with a heavy book, flattening it.
- Remove the book and press the iron onto the top sheet of blotting paper for 10 to 20 seconds.
Note: Do not move the iron around. Keep it in one place. - Remove the iron and wait for the paper to cool down and then repeat until the flowers are dry and firm.
Drying Flowers

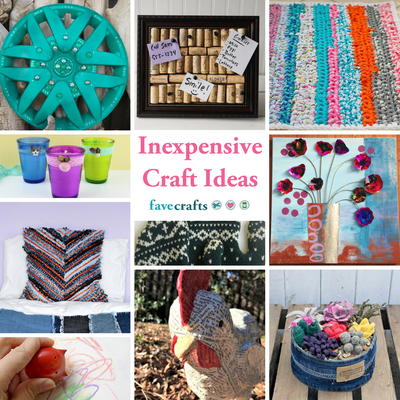
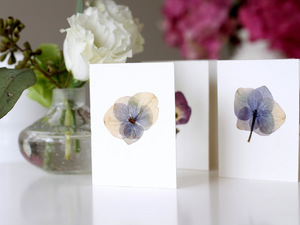
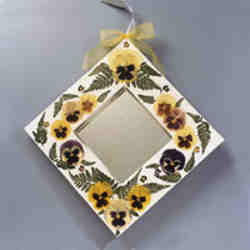
4 Pressed Flower Crafts
Try your hand at one of these four methods with the pressed flower crafts below!
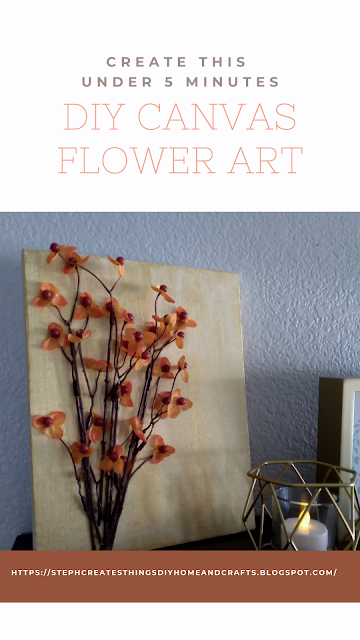
Read NextDollar Tree Canvas Flower Art Design
Your Recently Viewed Projects
Thanks for your comment. Don't forget to share!
marygretticoakley 4765668
Dec 04, 2017
Always wanted to press flowers and so glad I saw this thanks for all the great ideas
CScarnegie
Aug 25, 2017
FABULOUS article. I like to use parchment paper the best. Partially because I like the name but mostly because it gets the flowers nice and dry without ruining the book I keep them tucked in
cthomas 396
Aug 22, 2017
These are all super great methods to know! I love making things out of pressed flowers, but have a lot of trouble with color retention in book pressing, so I will have to try a flower press. I'd been holding out, but that's definitely going on my Christmas list this year.
Snakelady
Jan 21, 2011
Want to show off your pressed flowers to visitors - cut squares of wax sandwich paper same size as A4 paper. With wax side facing up, arrange your pressed flowers in pattern (or use flowers, petals, leaves etc to depict a picture or shape). Lay the second piece of wax paper on top (wax side down) and iron until the two pieces of wax paper are inseparable. The iron only needs to be warm and it may take a few minutes. Once cool, simply place in A4 frame and hang. Different sized frames may be used, or create a series of frames using one particular flower in each and hang in a row or create a patterned wall feature with the frames.
juststac
May 30, 2010
I really enjoyed this article I've experimented with several of these methods and have had minor successes I am now using my iron to see how I fair with that So far I'm happy with my results tho I still have to figure out which flowers press best this way I have just a regular clothes iron I set it on the highest setting NO STEAM and place the flowers between pieces of regular copy paper I am considering newspaper for larger area It doesn't take much time I just keep checking to see how they are looking and if they are still limp I press them a bit longer Yes its trial and error for now and I've browned up some flowers but everything takes practice My biggest challenges so far are pansies because their petals are so thin but I'll get it I hope this will help some of…Read More you out
Crafter 9783186
May 20, 2010
thank you for the information. I will save and use it this summer. Anne
Report Inappropriate Comment
Are you sure you would like to report this comment? It will be flagged for our moderators to take action.
Thank you for taking the time to improve the content on our site.