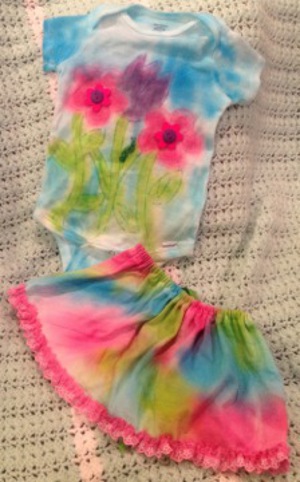
Tie Dye Baby Onesie and Skirt
Dress your little one up in some groovy clothes with this adorable Tie Dye Baby Onesie and Skirt from Cindi Bisson! This is a fun and colorful outfit for a little girl and you won't believe how easy it is to make! While this is a floral design, you can easily experiment with different tie dye techniques to get the look you want. Mix and match colors and textiles to create a unique wardrobe that is fun, funky, and colorful!
Materials:
- Tulip® Tie-Dye Kit Bright #27378
- Tulip® Fabric Markers 20 Pack #29355
- Gerber white cotton onesies
- White adult t-shirt size small
- 1/4” Green gross-grain ribbon
- 1/2” white eyelet trim
- Cotton balls
- Fan brush
- Small bowl
- Embroidery floss
- Needle
- Westcott® Titanium Bonded Scissors
- Buttons: pink floral, purple round buttons, small round green buttons
Instructions:
-
Wash and dry baby onesie and t-shirt.
-
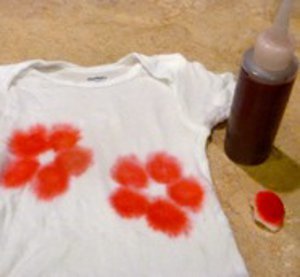
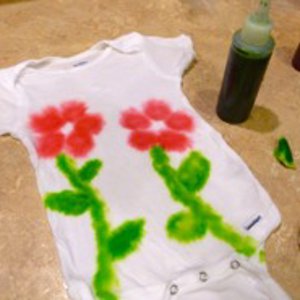
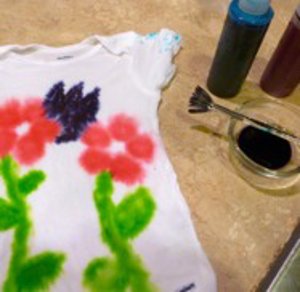
Dampen onesie. Mix dyes according to manufacturer instructions. Apply pink dye to cotton ball, apply directly to front of onesie to form 2 flowers.

-
Fold cotton ball in half, apply green dye, apply to front of shirt to create stems and leaves.
-
Mix small amounts of blue and pink dies in small bowl to create purple dye. Use fan brush to apply dye to onesie to create tulip shape.
-
Apply blue dye to cotton ball and sponge onto remaIning areas of onesie.
-
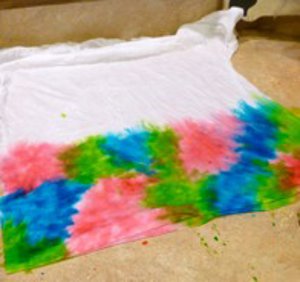
To create skirt, dampen white t-shirt. Sponge blue, green and pink dyes randomly onto bottom 1/3 of shirt, allowing some colors to overlap.
-
Measure and cut eyelet trim to fit around bottom of t-shirt bottom. Place into bowl with pink dye and let set for approximately 5 minutes.
-
Allow all dyed pieces to dry for several hours.
-
Rinse in cool water and dry. Wash in normal detergent and dry.
-
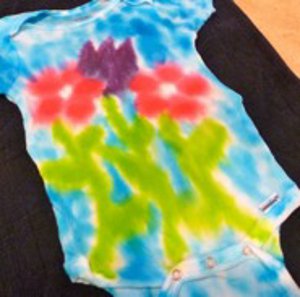
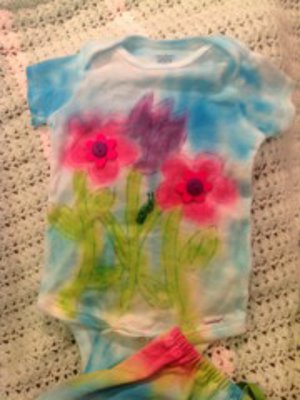
To embellish onesie, use Tulip Fabric Markers to add accents around flowers, leaves and stems.
-
Use embroidery floss to stitch buttons to centers of flower, and row of green buttons on leaf to create caterpillar. (*Note - be sure to stitch very securely to reduce choking hazard.) Add legs and antennae to caterpillar with fabric marker.
-
Cut approximately 5” from bottom of dyed tshirt.
-
Cut small hole in hem of shirt. Run ribbon through hem to create draw string for skirt waist.
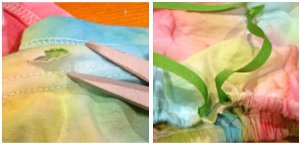
-
Use embroidery floss to stitch around opening for ribbon to avoid unraveling.
-
Use embroidery floss and straight stitch to sew dyed eyelet to bottom edge of skirt. Leave approximately 2” gap in back center.
-
Measure and cut green ribbon to fit in opening, stitch in place with embroidery floss using straight stitch.
- Tie bow with green ribbon, stitch in center of green ribbon.
Read NextTie Dye No-Sew Sock Bunnies