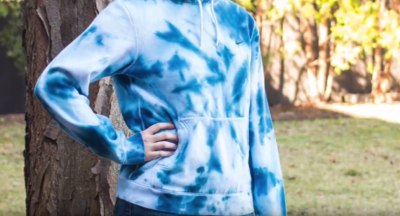
Snowflake Tie Dye Shirt
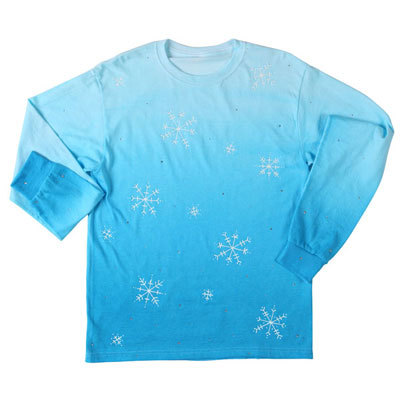
Bring a little tie dye to your winter wardrobe with the Snowflake Tie Dye Shirt. This unique tie dye design will carry the snow to you, whether or not your area gets snow in the first place. Kids will love this ice blue t-shirt pattern, and you could even make it a long-sleeve shirt as in the tutorial for cold winter weather. This is an easy design to make, no matter if you are a beginner or an experienced tie dyer. You will have fun painting the snowflakes and creating different designs for each of their unique crystal forms.
Primary TechniqueGeneral Crafts

SeasonWinter
Materials:
- Tulip® One-Step Tie-Dye Kit® Turquoise
- Tulip® Slick™ 3D Fashion Paint in White 1.25oz
- Clear Tulip® Glam-It-Up!™ Iron-On Crystals™
- White long sleeve T-shirt – 100% cotton
- Wide paintbrush
- T-shirt board or cardboard (cut to fit inside shirt)
- Bowl of water
- Chalk pencil
- Disposable plastic tablecloth
- Spray bottle
Instructions:
- Prewash T-shirt to remove sizing; do not use fabric softener. Leave damp.
- Cover work surface with plastic tablecloth.
- Mix Turquoise dye according to package instructions.
- Squeeze dye out in a horizontal line along the bottom of the shirt. Dampen wide paintbrush in a bowl of water then use the dampened brush to blend the dye upward towards center of shirt.
- Continue adding dye to shirt as needed, blending and brushing color and using less dye as you work your way up shirt to create an ombré effect. Use a spray bottle of water to fade/blend dye along with brush.
- Cover shirt with plastic tablecloth to keep damp and let sit 6 to 8 hours. Rinse thoroughly then wash and dry according to package instructions.
- Insert a T-shirt board or piece of cardboard inside shirt to prevent paint seepage. If desired, use a chalk pencil to draw different sized snowflakes on shirt, then trace over with White Slick paint (or freehand snowflakes with paint). Let dry
- Randomly add crystals around snowflakes and set with cordless heat-setting tool.
Read Next6 Shibori Tie Dye Techniques