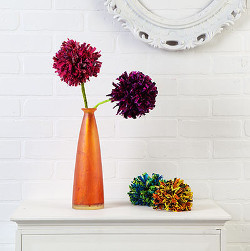
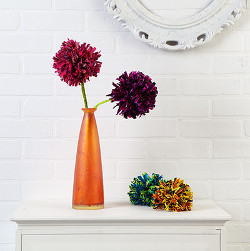
Puffy Tie Dye Flowers
Some people remember how to make paper flowers with tissue paper from their youth, but the rest of us need a little reminder. This Puffy Tie Dye Flower tutorial by Lauri Eaton for I Love to Create is perfect for an afternoon of home decor crafting with the kids. With cute little pom poms and wacky colors, these homemade paper flowers will brighten up your home in no time.
Materials:
- Tulip® SuperBIG™ One-Step Tie-Dye Kit™
- Aleene's® Fabric Fusion® Peel and Stick Tape™
- Tulip® Dye Zip Ties™
- Tulip® Surface Cover™
Miscellaneous
- Wire cutters
- (4) Assorted black and white cotton printed fabrics – ½ yard length each
- Heavy-gauge floral wire – straight lengths (for stems)
- 24-gauge floral wire for wrapping pompoms
- PattieWack PomPom Tool http://pattiewack.com/shop/pompom-tool/
- Scissors
- Plastic tablecloth
- Washer/dryer
- Masking tape
- Pastry racks (optional)
Instructions:
- Wash fabrics and leave damp. Tear each piece lengthwise into two equal pieces, for a total of eight pieces.
- Randomly combine different printed fabrics into three pairs, leaving the last two separate.
- Pleat, fold or scrunch each pair and secure with zip ties.
- Cover work surface with a plastic tablecloth and place pastry racks on top (if using). Lay damp fabrics on pastry cooling racks or directly on plastic tablecloth. Tip: Placing fabrics on pastry cooling racks before dyeing helps prevent fabric from sitting in pools of dye and spreading dye colors to unwanted sections.
- Mix One-Step Dyes according to package instructions. Colors used for this project: Yellow, Orange, Lime, Turquoise, Fuchsia, Red, and Purple.
- Use Yellow and Orange dye on first fabric set (one color per panel).
- Use Lime and Turquoise on second set, and Red and Fuchsia on third set.
- Apply Lime only on one of the single panels; this panel will be used for flower stems. Apply Purple on the other single panel.
- Allow dye to set for time recommended in package instructions, or overnight.
- Rinse fabrics under warm running water to remove excess dye, remove zip ties and dry in dryer.
- Tear all fabrics into ¼” strips, except stem fabric.
- Use PomPom Tool and 24-gauge floral wire to make poms from each color set, following instructions included with PomPom Tool and leaving a generous 6” to 8” wire tail on each.
- Tear stem fabric into 1” lengths and reserve.
- Twist two heavy-gauge floral wire lengths together for stem.
- Wrap wire tail of one pom tightly around wire stem, and continue wrapping pom wire down stem until wire is completely wrapped around stem.
- Secure at top with masking tape, and wrap tape all the way down stem.
- Lay out flat a strip of stem fabric. Remove liner from one side of Peel & Stick Tape and press exposed side of tape down the whole length of fabric strip.
- Remove remaining protective liner from tape on fabric strip. Starting at the base of PomPom, wrap fabric (adhesive side down) around wire stem, working downward until entire stem is covered.
- Repeat steps 14-18 with remaining pompoms.
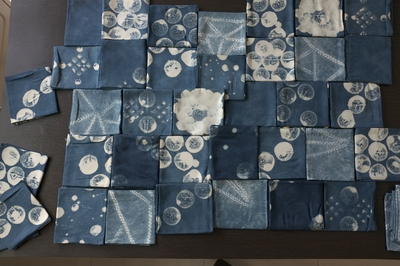
Read Next6 Shibori Tie Dye Techniques