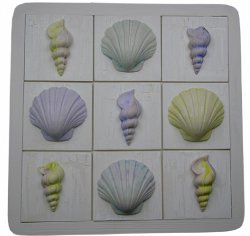
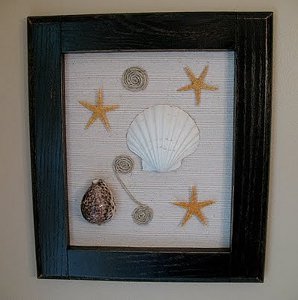
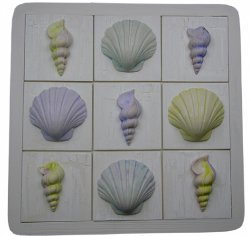
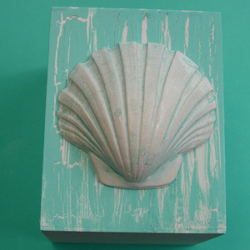
Seashell Beach Plaque
Celebrate summer with creative beach crafts! Decorate your home with a Seashell Beach Plaque from Tiffany Windsor - you'll feel like you're staying at a beach-front bungalow! You don't even have to go to the beach for shells - learn how to make your own.
Materials:
- Cool2Cast
- Seashell molds
- Measuring cups
- Plastic bag(s) – zip top for mixing Cool2Cast
- Water
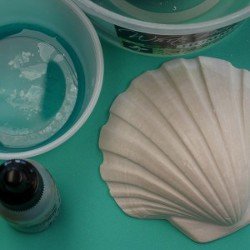
- Alcohol inks – desired colors
- Plastic cups (for mixing inks)
- Paint brushes (I use inexpensive kids brushes)
- Wood plaque
- Acrylic paint (lighter and darker colors for crackle)
- 1/2″ shader brush
- Crackle medium (I used Delta Crackle medium for weathered wood effect)
- Aleene’s Super Thick Tacky Glue
Instructions:
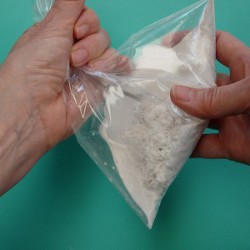
- Measure Cool2Cast into plastic zip top bag.
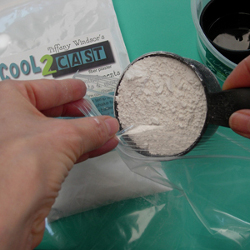
- Add water.
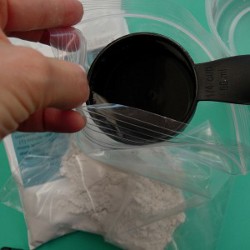
- Close bag tightly
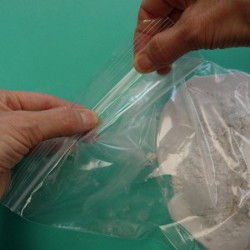
- Grab top of bag and hold securely. Shake for 1 minute.
- Pour mixed Cool2Cast into mold.
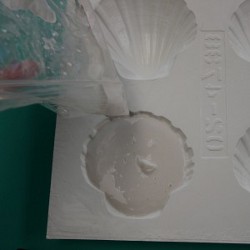
- Tap gently on mold to help Cool2Cast to settle and to bring any bubbles to the top.
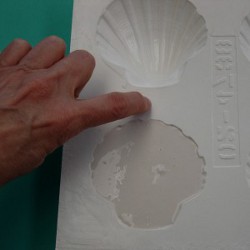
- Let set for approximately 1 hour. The plaster should be solid to the touch.
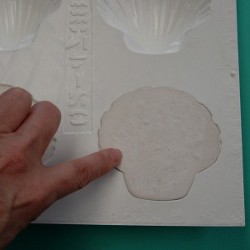
- Remove shell from mold.

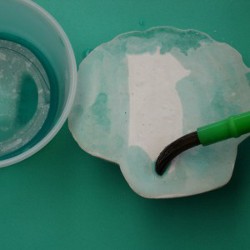
- To color your seashell, mix a small amount of water with alcohol ink. For lighter color, use more water, for darker color use less water. You can also use alcohol ink straight from the bottle for boldest color.
- Apply alcohol ink color wash with brush.
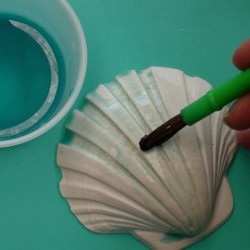
- Be sure to color the back of your shell too! Set aside to dry.
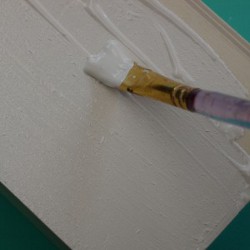
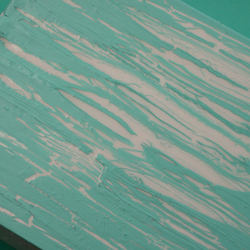
- Brush smooth coat of acrylic paint on wood base. Let dry.
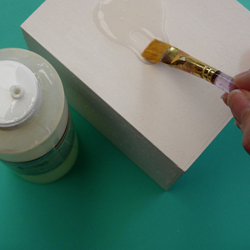
- Apply coat of crackle medium over paint. Let set according to bottle instructions until it begins to get tacky to the touch. (I found that it took about 30-minutes for my crackle to reach this consistency. (Remember, you do not let the Delta Crackle dry, it needs to be tacky to the touch in order for the next step to work.
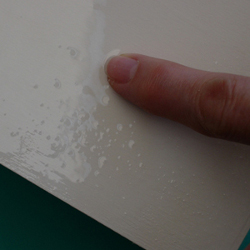
- Use your finger to test to see if crackle is ready. If the crackle holds your fingerprint, it is ready. (It should feel sticky.)
- Once the crackle is tacky, brush acrylic paint over crackle. You only want to stroke the paint once. Do not continue to stroke paint over and over in one place. Pick up more paint and brush on next area. Continue until entire area is painted.
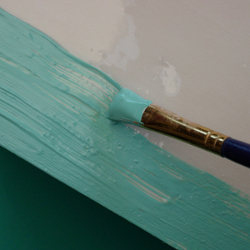
- You can watch paint start to separate and “crackle”.
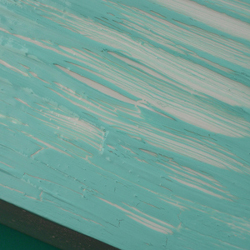
- The paint will continue to crackle as the crackle medium continues to dry. Let dry completely.
- Glue your seashell pieces in place.
For a comprehensive video tutorial, check out How to Make a Seashell Plaque from Cool2Cast.
Read NextFunky Framed Seashells