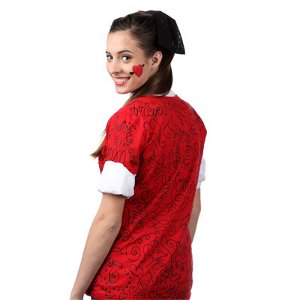
Dashing Doodle Tee Shirt
Speak your mind with this fun Dashing Doodle Tee Shirt from I Love to Create. Great for graduation parties, birthday celebrations, Valentine's Day and more, this tee shirt can show off messages from your friends, your Valentine, or your favorite quotes or lyrics. This is a great project for kids of all ages and a fun way to personalize a school tee.
Materials:
- Tulip® Mini Fashion Iron™
- Tulip® T-shirt Form
- Tulip® Body Art™ Stencils (Pop/Punk)
- Tulip® 3D Fashion Paint (Basic Black, Snow Cap White)
- Aleene's® Fabric Fusion® Permanent Dry Cleanable Fabric Adhesive Pen
- Tulip® Body Art™ Body Glitter (Neon Aqua/Neon Pink)
- Tulip® Glam-It-Up!™ Iron-On Crystals™ (Black)
- White tuxedo shirt
- Black headband
- Pressing cloth
- Red T-shirt
- Black cotton fabric – 1/3 yard
- Black bowtie
- White chalk pencil
- Paper towels
- Paper towels
- Straight pins
- Sewing machine
- Scissors
- Chalk pencil
Instructions:
Amore T-Shirt
-
Prewash and dry T-shirt; do not use fabric softener.
-
Insert Fashion Form between layers of T-shirt.
-
Use the chalk pencil to doodle words, squiggles and hearts on shirt, completely covering the front of the shirt and sleeves. Tip: If you make a mistake or are unhappy with your designs, use a damp sponge to dab chalk away then redraw designs.
-
Cover over chalk lines with Basic Black 3D Fashion Paint, practicing first on a paper towel if desired.
-
Let dry flat 4 hours.
- Turn shirt over and repeat on backside.
Bow Headband
-
Cut fabric into a 12” x 28” rectangle and fold long edges in to meet the center of fabric. Fold the long ends to where they overlap ½” in the center.
-
Sew across the overlapped fabric to create bow base.
-
Preheat Mini Fashion Iron.
-
Scatter crystals in a random pattern across the fabric, with the adhesive sides down. Carefully cover with pressing cloth.
-
Heat set crystals with Mini Fashion Iron, pressing down with even pressure for 20 – 30 seconds. Repeat until all crystals are set. Set aside.
-
Cut remaining fabric into a 4” x 6” rectangle and fold long edges in to meet the center of fabric, overlapping and gluing in place. (Pin in place if needed until glue has set.)
-
Pinch the bow base together in the center. Place the smaller glued fabric over the center and glue ends together to create center of bow. Pin in place until dry.
-
Glue finished bow to headband, pinning in place until dry.
- Remove pins.
Bowtie
-
If desired, first write selected words on bowtie with a chalk pencil.
-
Practice using 3D Fashion Paint on a paper towel before beginning project.
-
Use Snow Cap White 3D Fashion Paint to cover over words on tie (or to freehand create words).
- Let dry 4 hours before wearing.
Read NextEasy DIY Tank Top