Marilyn Monroe Sewn Dress
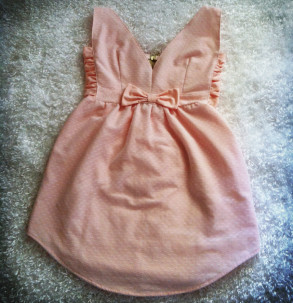
The only thing that makes free dress patterns even better is when they hardly require any store bought material. This Marilyn Monroe Sewn Dress will help you make the most out of your family's existing clothes and looks fashionable in any season. You will want to wear this dress as soon as you finish making it. Once you learn how to make barbie dresses, you will want to make a dress out of all your husband's old shirts. Create a Marilyn Monroe Sewn Dress for something completely original.
Primary TechniqueSewing

Sewn byEither Hand or Machine
Materials:
- A too large for you men shirt
- See through fabric (optional)
Instructions:
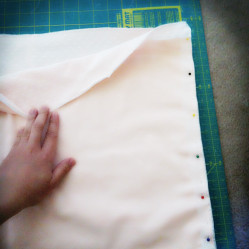
- Start out by dissecting your men shirt.
- Chop that sleeves off… but don’t just hack it off like a butcher though… You would never know when you need that extra quarter of an inch so it’s better to be safe than sorry.
- Remove the shirt collar as well as the bed where the buttons and the button holes are.
- Cut along the side seams to open the shirt up. Some shirts have this yoke that is sewn on. Carefully remove it as well then set it aside because you’ll need that later.
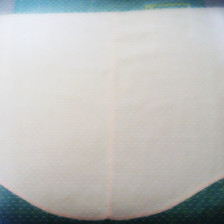
- Cut across underneath the armholes this will become the skirt of your dress.
The Skirt
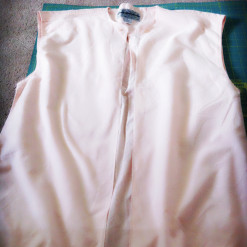
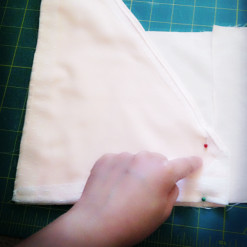
- Take the bottom front bodice of the shirt. Sew them right sides together so it becomes one piece.
- To create a much stylish look, cut some see through fabric to cover it leaving enough seam allowance. Sew along those edges with the see through fabric’s seam allowance folded in to shut. This will become the back of your skirt.
- Do the same thing on the bottom back bodice of the shirt…
- Take the two pieces then sew them right sides together.
- With the large stitch from your machine, sew along the top portion. Gather the edges by pulling a single thread to form a skirt. REMINDER: when gathering, you DO NOT CLOSE STITCH the ends so you can pull the thread.
The Front Bodice
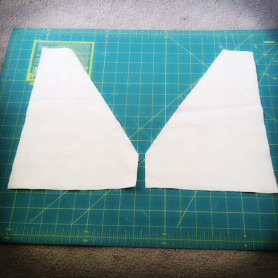
- Take one of the sleeves, it should give you two pieces for your front bodice.
- Measure from your shoulder to your under breast it should give you the length of the front bodice. Then take the width measurement by measuring your bust line then divide it into four. Transfer that amount down to your fabric.
- Again cover it with the see through fabric.
- Sew them right sides together.
- Take it to your dress form if you have any to create flaps to contour the boob (a lot easier that way). Once done, mark it with a chalk then take it to your machine and sew along the markings.
- Cut the flaps open.
- Next, take the MEN SHIRT’S top bodice.
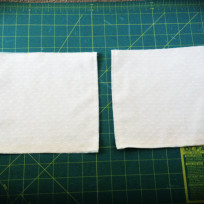
- Take the back of the shirt. We are cutting two pieces of rectangle out of it. The length should be as long as the width of your front bodice so go ahead and take that measurement.
- Take one of the rectangles and set the other one aside for later use. Again you want to cover it with your see through fabric then sew it on the bottom of your front bodice.
The Back Bodice
- Remember the measurement of your bust line? Again take that measurement and divide it by four this serves as your width. The length should be the measurement from your armpit down to your belly. Take the men shirt’s front bodice then transfer your measurement to the fabric. Use that square to cut the other half of your back bodice.
- Next, cover it with the lace!
- Pin down the zipper on!
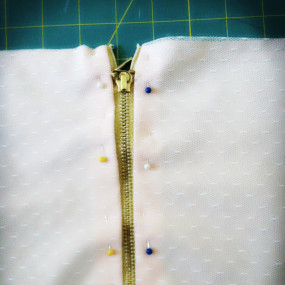
- Don’t forget to use your zipper foot.
- Now fold, pin and sew the top part of your back bodice to give it a finish look.
- Find that other half and divide it length-wise.
- Gather each on both sides.
- Next, attach it to each side of you back bodice
- Attach the back and the front bodice right sides together.
- Take your gathered skirt and turn it inside out. Slide your bodice inside the skirt. With them facing right sides together, sew along the raw edges.
- You can now chop that extra fabric and zipper tape off! And remember to serge or zigzag stitch the raw edges.
- Remember the yoke you took off? Find it because now’s the time!
- You have to fold it then chop that neckline off.
- And since yokes are double sided you are going to need one of them for the back straps! Set the other one aside because you’re gonna use that in a bit.
- Imitate the shape of the front straps. Do the same on the other strap.
- Cover it with your see though fabric!
- Sew them on to the dress once covered.
- Take the other half from the yoke and create a rectangle sewn like a tube. Leave an opening so you can turn it inside out. You're creating a bow!
- Close that opening with a straight stitch and find the center by folding the tube. Hand sew a basic stitch and gather the center then close it with 3-4 knots to secure.
- Create a small tube to cover the sewn part on the center.
- Stitch it on the center part of your dress.
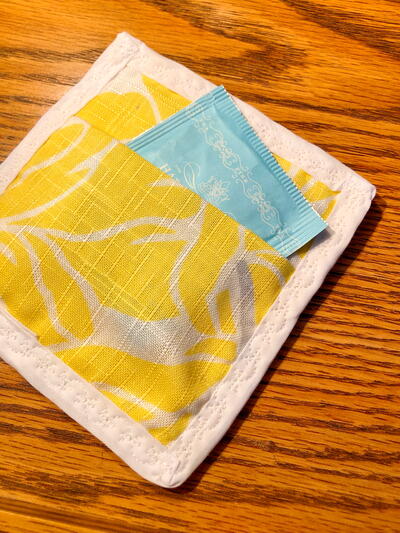
Read NextEasy Potholder With Pocket
Your Recently Viewed Projects
Thanks for your comment. Don't forget to share!
Member 5876070
Jun 17, 2016
This dress is adorable! Unfortunately I'm only just beginning to learn how to sew and these instructions are obviously not written for a beginner. Maybe in a few years I'll give it a try.
alanacross 7067960
Sep 04, 2014
I'm in the process of making this dress however I'm stumped when it comes to making the front bodice out of the sleeves. Do I cut these to come up with my pieces? I assume the small section of the sleeve (the wrist) is what goes on my shoulders? And of course a picture of the back of the dress would be helpful.
FaveCrafts Editor JL
Sep 05, 2014
Hi there, I will get in touch with the designer and see what she says. I will also modify the instructions based on her response. Thanks! - Julia from FaveCrafts
HannySquares
Aug 31, 2014
Worst. Instructions. Ever. But thanks for the idea. I can make something like it
FaveCrafts Editor JL
Sep 03, 2014
Hi there, is there a particular section that's giving you trouble? I can reach out to the designer on your behalf. Leave a comment below and let me know - thanks! - Julia from FaveCrafts
HannySquares
Sep 12, 2014
Thanks Julia The pattern instructions don't make the dress pictured. As in there are no clear instructions on how to create the ruched sides and there need to be more photos so we can see what the designer means especially for steps 13-17. I did create my own unique dress from my husbands old shirt so it wasn't a total disaster.
lynnroshon 8468634
Aug 31, 2014
Would really enjoy making this however, the instructions need to be a bit clearer with more pictures. I imagine once you have made this the instructions would seem adequate. Thank you. PS: Really enjoying your site.
FaveCrafts Editor JL
Sep 03, 2014
Hi there, Is there a particular section you need help with? I can reach out to the designer on your behalf. Thanks! - Julia from FaveCrafts
shaverkamp 3435451
Aug 09, 2014
The directions were not clear enough to make good sense. more pictures would be helpful.
crownnice 0971913
Aug 09, 2014
Would like to try this, but would prefer seeing a few more pictures of the finished project, especially from the back. Love the itdea!
Report Inappropriate Comment
Are you sure you would like to report this comment? It will be flagged for our moderators to take action.
Thank you for taking the time to improve the content on our site.