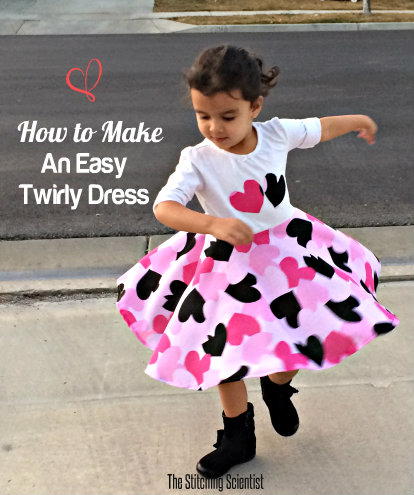
Perfect Patchwork Toddler Dress
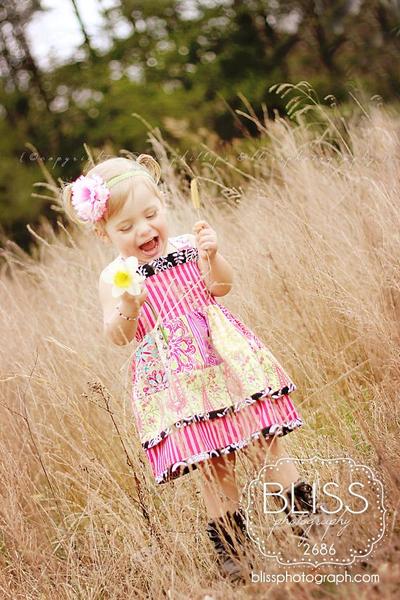
Your little one will feel oh so pretty when she's wearing this handmade Perfect Patchwork Toddler Dress. Free clothing patterns are a great option for growing kids - you don't want to spend money on something she'll grow right out of. Instead, discover the joys of free sewing patterns for kids. The bright and fun fabric is both eye-catching and adorable. And, since it's cotton, the dress is versatile and appropriate any time of year. Be sure to pick some decorative buttons to add to the front of the dress - it will give the piece a one-of-a-kind look and an extra dose of character.
Primary TechniqueSewing

Sewn byMachine
Materials:
- Quilters cotton fabric
- 2-3 packages of double fold bias tape (or make your own)
- Three 1" Buttons
- 1/8" elastic (You'll need three 2" pieces) or a skinny ponytail O cut in half
- Pins
- Iron
- Measuring tape or lip edge ruler
- Bias tape tool (optional)
Seam allowance: 3/8” unless otherwise stated
Instructions:
To make straps:
- Fold down small ends of straps and press. Sew fold down on both pieces. Pin your 2 strap pieces right sides together. Sew with a 1/4" seam leaving both ends open for turning. Turn strap right side out and press seams. Topstitch using a 1/8" seam all the way around. (This will close up the open ends). Repeat for other strap.
- Secure a safety pin to one ends’ side seam as shown.
- Insert safety pin into straps and feed all the way through until you reach the other end.
- Take off safety pin and continue with finishing your strap.
- Now take your strap loop piece. Iron in half length wise. Open it up and iron each side towards the center fold you just created. Then fold in half lengthwise again and iron. (Pretty much like you're creating a piece of double fold bias tape). Sew together with a 1/8" seam and then cut in half so you have two pieces, as shown below.
- Set all strap pieces aside for later use.
To make bodice:
- Take your bodice piece and fold the short end under 1/4" and iron. Fold over another 1/4" and iron again. Sew and repeat for other end.
- Set aside while we make the top ruffle.
To make bodice ruffle:
- NOTE: for sizes 3t and up you want to first sew both pieces together to make a long piece!
- Fold short ends of the ruffle piece 1/4" in and press.
- Then fold the entire piece in half length wise with wrong side together and press, then sew short ends closed with backstitching beginning and end.
- You can use a ruffling or shirring foot to ruffle along the raw edge or you can set your stitch length to 5.0 and baste a 1/8" seam. Do not backstitch. Pull along thread tails to ruffle by hand. Ruffle until the piece is the same length as the top edge of your bodice piece.
To ruffle your fabric with your machine:
- Set your sewing machine to the longest stitch length and the highest number tension. This way your machine should automatically gather your fabric! (If your machine doesn’t allow this setting you may set your tension to 2-3 and to the longest stitch length and sew. Then manually pull the upper thread to gather your ruffle.)
- Sew along the raw edge with a seam allowance of about ¼ inch very slowly.
- This should now be your gathered ruffle piece.
- Pin ruffle to top right side of bodice as shown below.
- Sew ruffle to bodice with a 3/8" seam and zigzag stitch or serge raw edges. Flip ruffle up and press. Topstitch with a 1/8" seam.
- We're done with the bodice for the moment. Now take the two pieces of the top layer of your skirt and pin with right sides together along one long side. You can place them however you like or how the fabric print asks for. Sew edge where pinned and zigzag stitch or serge raw edges.
- Topstitch with a 1/8" seam.
- Now take one of your bias tape (if you like to make your own bias tape please see the following tutorial) and sew it to the bottom of the skirt parts.
Bias tape tutorial:
- Cut fabric to the desired length (which should be your skirt panels’ width) and 2” wide.
- Use a bias tape tool as shown and insert fabric.
- Press the end that is coming out and continue to do so until your entire strip is pressed. Then fold in half with the raw edges being inside. Press again.
You should now have a two- old bias tape:
- Place bias tape (with right sides down) onto your wrong side of the skirt panels’ bottom hem.
- Sew right next to the first crease on the bottom hem edge as shown.
- Once all sewn on, flip the bias tape around the bottom hem towards the front and fold in.
- Sew with straight stitch close to the inner folded edge as shown.
To sew skirt:
- Pin short sides of the skirt piece with right sides together and sew over pins. Zigzag stitch or serge raw edge. Invert, iron the seam and you'll have a tube.
- In the same manner, add the other color of bias tape to the bottom edge of the bottom layer of the skirt. Again, pin the short sides of the skirt piece with right sides together and sew. Invert, iron the seam and you'll have another tube.
- With right side out, put the bottom layer inside the top layer of the skirt. Pin together and ruffle the top edge of the skirt piece. Ruffle until the skirt is the same size as the bodice piece.
- Now we're going to attach the bodice to the skirt. Pin the bodice to the skirt with wrong sides together as seen below. Put the skirt seam to the center back. Pin as if there wasn't a break in the bodice. Sew the bodice and skirt pieces together.
To make the skirt part sizes 3t and up:
- Since for those sizes we will have 2 instead of one piece we need to do this step a little different.
- Place both skirt pieces with right sides together and pin on both sides. Then sew and zigzag stitch/serge raw edges.
To attach skirt to bodice:
- After you gathered the top edge of the skirt, place it in front of your bodice with the side seams to each side (instead of centered for the smaller sizes). Continue as instructed.
- Flip the bodice up, iron the seam, and topstitch with a 1/8" seam.
- Now we'll add the straps. Fold each strap loop as shown below and pin inside back of dress. I pinned each strap loop about 1 1/2" out to each side of the center of the back. Sew in place.
- Then pin to bodice top edge with folds down and sew with backstitching beginning and end.
To sew straps on:
- Pin your straps to the inside of your bodice top edge, with the raw edges tucked under as you did with the back loops. Sew with backstitching beginning and end.
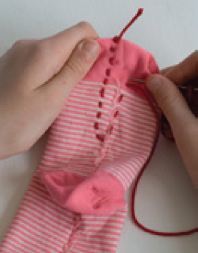
- Sew three buttons along one side of the back opening. I opted to hand-sew these. On the other side of the back bodice, pin your elastic pieces in a similar fashion to how you did the back strap loops and sew in place. I stitch over this a few times since it'll be getting pulled on.
- TIP: if you don’t have narrow elastic you can use a ponytail O. Cut it in half and seal the ends with fray check. Then pin and sew to bodice.
- Thread straps through the back strap loops and tie in a bow.
Strap Loops for all sizes: Cut 1 piece 3" X 9" (we'll cut it in half later to form two loops)
- Straps: Cut 4
- Bodice: Cut 1
- Bodice ruffle: cut 1 (given measurement up to 2t and cut 2 and pieced together for up to size 12)
- Under skirt: cut 1 up to size 2t and cut 2 up to size 12
- Over skirt: cut 1 each up to size 2t and cut 2 up to size 12
Binding measurements: cut 2 for front & 2 for back in 2” x under/over skirt width
- Front strap placing distance – measured from the center of each strap.
- Find the center of the bodice and place straps apart with the following distance
- 12m -2t = 6.5”, 3t – 5t = 7.5”, 6 – 9 = 8.5”, 10 – 12 = 10”
Fabric yardage: due to each piece being from a different print, please use the length measurement as your guide to purchase fabric. Example size 2t requires 4” for bodice which is 1/8” of a yard, then the underskirt requires 11” which is about 1/3” of a yard and so on.
Read NextVintage Handmade Handkerchief Doll
Your Recently Viewed Projects


Thanks for your comment. Don't forget to share!
fstpntr83
Dec 23, 2014
Where can I find the pattern for this? Also, the instructions seem to refer to pictures that aren't there.
FaveCrafts Editor JL
Dec 23, 2014
Thanks so much for pointing this out 0 I have corrected the pattern to make it more clear. Also, the designer did not provide any additional patterns. Thanks! - Julia from FaveCrafts
Report Inappropriate Comment
Are you sure you would like to report this comment? It will be flagged for our moderators to take action.
Thank you for taking the time to improve the content on our site.