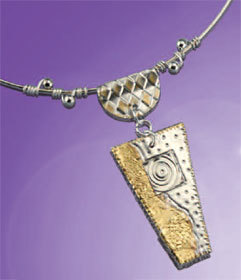
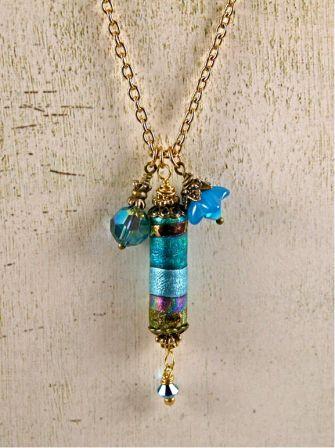
Eclectic Cylinder Pendant
In this friendly plastic craft from AMACO, colorful bands wrap around an eclectic cylinder pendant and compliment the Swarovski jewelry design. This easy jewelry ideas uses a bit of rubber tubing for a cheap cylinder base.
Materials:
- 8” length of 1/8” (4mm) Rubber tubing, sold by the foot at Hobby stores
- Large bowl of cold water
- Friendly Plastic 7” sticks: Gold/Black, Gold Spectra/Black, Swirl/Blue, Turquoise/Blue, Light Blue/black
- Matte knife
- Acrylic ruler
- Cutting mat
- Scissor
- Griddle set at 200-300 degrees
- Non stick baking sheet
- Silicone non-stick baking sheet liner, cut to size: 3”x 8 1/2”
- Craft blade or utility knife
- Round nose and needle nose jewelry pliers
- Wire cutters
- Needle tool
- Jewelry supplies and findings: head pins, wire, bead caps, spacer beads, chain, clasp, 8mm blue Swarovski crystal, two 4mm turquoise bi-cone Swarovski crystals, glass turquoise flower bead and jump rings
Directions:
- Using a cutting mat, ruler and blade, cut a 1/4” and 1/8” strip from each color of plastic stick. Then cut the strips in half using a scissor.
- Pre heat the griddle. Place the baking sheet onto the griddle. One at a time, in the color pattern shown, or one of your own. Place the plastic strips onto the baking sheet. Make sure each strip is stuck in place before adding the next. Try to press each strip tightly against the one before, to prevent any gaps. Continue until the desired number of the strips has been added.
- Allow the plastic to soften and seal together. If any gaps do appear, simply tap over them with your finger pressing the softened plastic together. When all the strips have softened and sealed together, remove the baking sheet from the griddle and allow the plastic to cool. Use the needle tool to press under the edges of the cooled plastic and remove it from the pan.
- Place the cooled plastic back on the cutting mat and trim off the uneven edges. Cut the plastic into 1” wide strips.
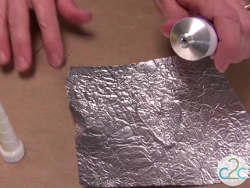
- Lay the silicone sheet onto the griddle. Position the plastic strip, right side down onto the center of the silicone sheet and allow the plastic to soften. You will notice as the plastic softens it becomes very shiny. It is important that you watch this process closely. As soon as the entire strip is shiny, remove the silicone sheet from the heat and lay it onto your counter or work surface.
- Carefully lay the rubber tubing along the top edge of the softened plastic strip.
- Moisten your fingers and hands with water, to prevent sticking to the plastic, and begin to roll it up and around the tubing. Continue until all of the plastic is wrapped around the tubing. Now you can use your fingers and palms of your hands to roll the cylinder back and forth on the silicone sheet, to secure and seal the overlap. Once you are happy with the look of your cylinder, pick it up by the extended ends of the tubing, pulling it straight and taunt. Quickly run it under the flow of cold water from the faucet. This will quickly harden the outside of the cylinder allowing you to lay it down, to finish the cooling process without the fear of it getting marred.
- Once the cylinder has cooled and the plastic has hardened completely, remove the rubber tubing by pulling on each of the exposed ends until the seal within the cylinder has been broken. You will know when this has happened, as the tubing will slide out.
- Place the cylinder onto the cutting mat and trim off the uneven ends, using a craft blade or a utility knife. I prefer using the craft blade for this. You do need to put a little muscle behind it in order to cut through the plastic. Just do it carefully. Continue to cut the cylinder into 1” beads.
- Assembling the components: Slid the 8mm crystal and spacer bead onto a head pin, form a wrapped loop to finish. Place the bi-cone crystal, flower and bead cap on a head pin, form a wrapped loop to finish. Lace a bi-cone crystal onto a head pin, then finish with a wrapped loop. Cut a 4” length of wire form a wrapped loop at one end. Lace on a spacer bead, bead cap, friendly plastic cylinder, bead cap and spacer bead, finish with a wrapped loop. Cut the chain to the desired length, and finish by attaching the clasp and jump ring.
- Attach the single bi-cone bead to the cylinder component using a jump ring. Attach each of the finished components to the chain using jump rings.
More Friendly Plastic Crafts:
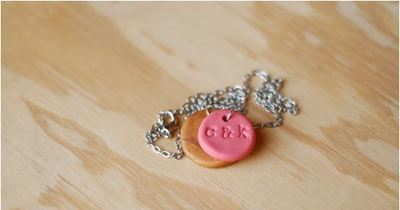
Read NextStamped Clay Pendants
Your Recently Viewed Projects

Thanks for your comment. Don't forget to share!
donnakristapovich 7186468
Mar 01, 2011
Friendly plastic is non-toxic and can be ordered on various internet sites including Ebay under the name Friendly Plastic. It comes in strips or pellet form. I have not found this at any craft stores in my area.
Crafter 5377005
Feb 26, 2010
i really like your necklace whare do you get the friendly plastic sticks ? i have gone to the craft stores around our area, no one has any idea what iam talking about ,do you have a picture of the friendly plastic sticks if so, could you please send me. a picture of them so i can show the ladies at the craft store so they will get them in ? thank you for your time. nancyfabric@yahoo.com
Report Inappropriate Comment
Are you sure you would like to report this comment? It will be flagged for our moderators to take action.
Thank you for taking the time to improve the content on our site.