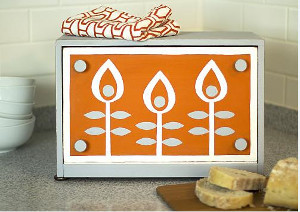
Restyled Red Shelf Home Decor Craft
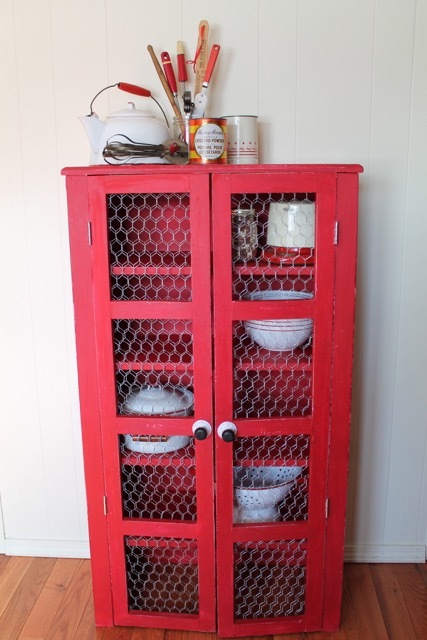
Give an old wood canned good shelf a vintage pie safe inspired upcycle with this Restyled Red Shelf Home Decor Craft. Create your own doors and add a dose of fresh paint for this DIY home decor. While some traditional home decor items may seem boring, this project is a fresh take. This is a one-of-a-kind design that is unlike anything you'll see in a store. Channel the look of an old country hideaway no matter where you live with this fabulous project. Even if you don't have any other red items in your home, this cabinet will look good. A little color is always a good thing, and this project shows that the bolder the look, the better the result.
Primary TechniqueWood Crafts

Materials List
- Wood shelf
- 1" X 2" pieces of wood to create door frame
- wood glue
- Nails
- MD Hobby & Craft Chicken Wire
- Md Hobby & Craft Metal Working Gloves
- Tin Snips
- Needle Nosed Pliers
- Staple Gun/Staples
- Hinges
- Decorative knobs
- Plaid Craft Folk Art Chalk Paint Base Color (White shown)
- Plaid Craft Folk Art Chalk Paint Top Color (Imperial Shown)
- Plaid Craft Wax Finish (Clear Shown)
- Plaid Craft Wax and Chalk Finish Paint Brushes
- Sandpaper
- Lint-free rag
- Soap and water (for clean-up)
- Paper plate
- Eye protection (when using tin snips cutting metal)
- Screwdriver or drill and screws
- Hammer
- Spring load clamps
To make the chicken wire a bit easier to use, I unrolled and then rerolled it back up in the opposite direction and clamped into place for a few minutes. By reversing the direction of the roll it helped cut down on some of the "springy-ness" of the material to make it easier to handle. I also found it was easier to cut my chicken wire a bit larger than needed for the door frame. I stapled it into place and then trimmed away the access and curled the sharp edges with the needle nosed pliers.
Instructions
-
Prepare shelf-thoroughly clean off shelving unit and repair any loose pieces, nailing and or gluing back into place.
-
Measure the opening of the shelves, and then create door frame using 1" X 2" pieces.
-
Apply base coat of Plaid Chalk paint to surfaces of shelf and door frame. Paint will dry quickly especially if the wood is "thirsty" but the manufacturer recommends allowing paint to cure for 2 hours before applying additional coats.
-
Apply top color of Plaid Chalk Paint. Allow to dry and cure as well.
-
Using sand paper, gently sand around areas you want to expose base color. For a vintage inspired piece consider places that would receive a lot of handling, or have something easily brush up against.
-
When finished sanding, wipe a rag over sanded surface to remove dust and debris from sanding.
-
Coat entire surface of shelf and frame with Plaid Crafts Folk Art Wax Finish. Allow to dry (approximately 1 hour) and then buff to desired sheen with lint free cloth.
-
Unroll MD Hobby and Craft Chicken Wire. The Chicken Wire rolls comes folded in half. The project as shown kept wired folded in half and had a double layer on the doors. Trim chicken wire to desired size using tin snip. Insert on the back of the wood door frames stapling into place with staple gun. Be sure to wear eye and hand protection as metal edges are sharp, and pieces go flying when they are being trimmed with tin snips. Use needle nosed pliers, to bend in any sharp edges.
-
Install hardware for hinges and attach doors.
-
Install knobs on front of doors.
Read NextWorld's Easiest Modern Breadbox