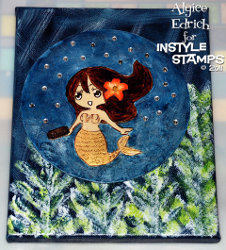
Little Mermaid Canvas Tutorial
With digital stamps, you can make this creative wall art piece from Alyice Edrich. Follow the step by step instructions of the Little Mermaid Canvas Tutorial and make your own wonderful piece of art. Digital stamps aren't just for scrapbooks!

Materials:
- 6 1/2" Wood Circle
- 8" x 10" Canvas
- 4 1/4" print out (Ariel from InStyle Stamps)
- 1/8" Mirror Beads
- 1/8" Green Bead (with flat side)
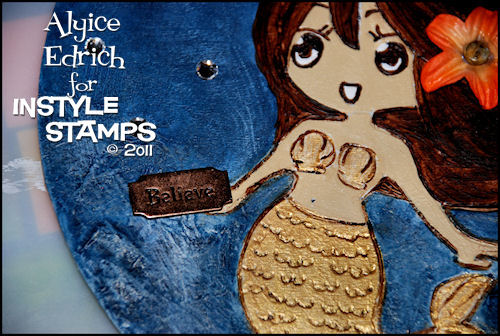
- 3/4" Copper sign (mine says "Believe")
- 1/2" silk or paper flower
- Copy Paper
- Tissue Paper - white
- Foam raisers
- Gesso - white
- Acrylic Paints: Buff Titanium, Navy Blue, Skyline Blue, Burnt Umber, Interference Gold (sparkly white), Transparent Gold, Cadmium Green Hue, and Titanium White
- Paintbrushes
- Graphite pencil
- Pen
- Wood burning tool
- Mod Podge®
- Aleexe's Jewel-It® bead adhesive (or Glue Dots)
- Acrylic spray sealer
- Paper towel
- Printer
Instructions:
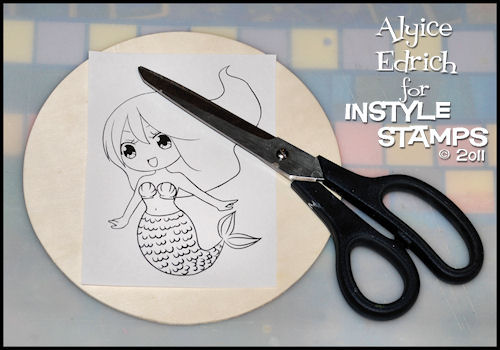
- Download your purchased digital stamp from InStyle Stamps.
- Print it out on regular copy paper. (It doesn't need to be resized for this project, but you do have the option if you want a different size.)
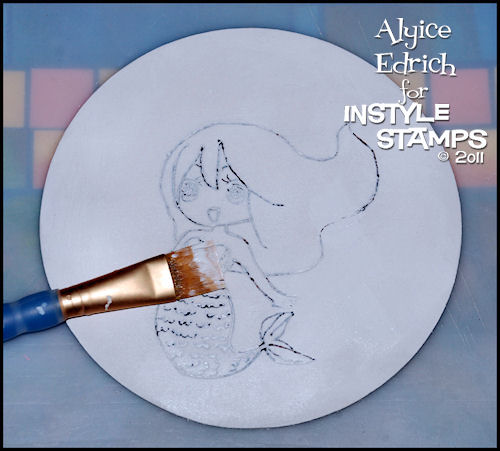
- Cut around the digital image to make sure it fits on your surface. In this case, the wood circle.
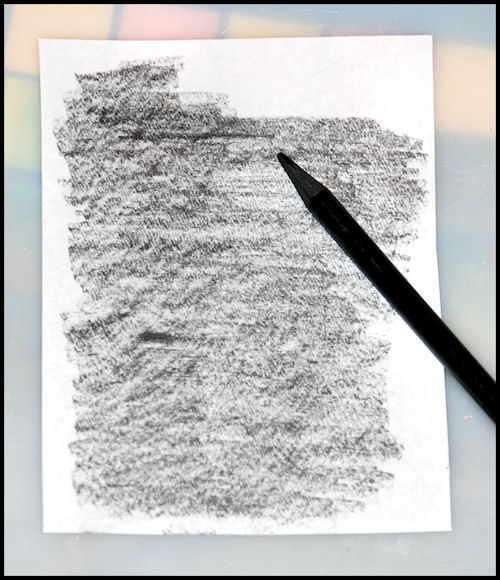
- Flip the print out over, and using a graphite pencil, shade in the entire backside.
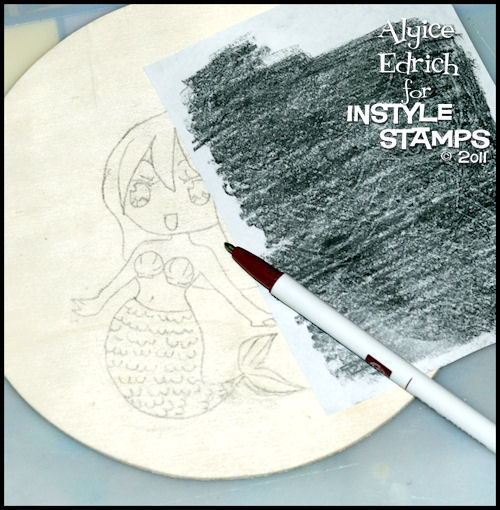
- Flip the print out over, place it on top of your wood and using your pen trace the design onto the wood circle. (To make sure your image is transferring, lift up the corner. If it's not transferring, remove and add more shading.)
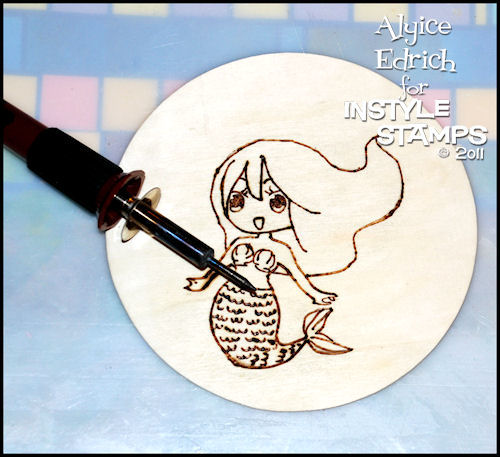
- Use a hot wood burning tool with a pointed tip to trace the outline you've just created. When the design has been completely burned, use a wet paper towel to remove any debris, then repeat to remove any of the leftover graphite.
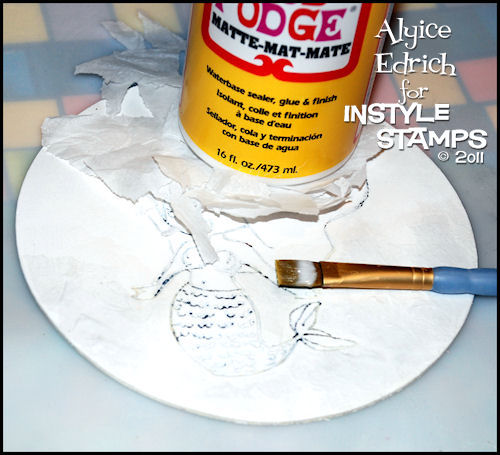
- Paint a thin layer of gesso over the surface of the wood and let dry.
- Rip tissue paper into various shapes and sizes, making sure you do not have any straight edges. Then use Mod Podge® to adhere the tissue paper to the bottom of the wood, surrounding the image and let dry. This will give the illusion of waves and add texture when you paint your image.
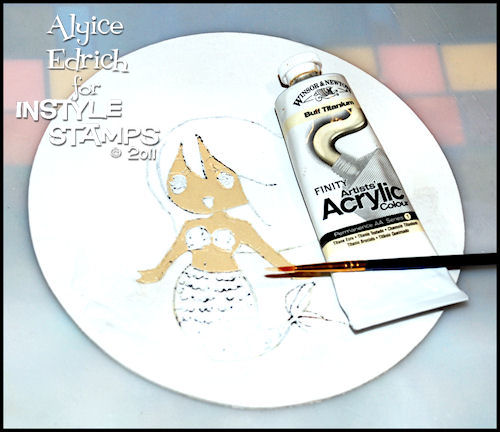
- Use Titanium Buff for the flesh (unless you prefer a different flesh tone) and let dry.
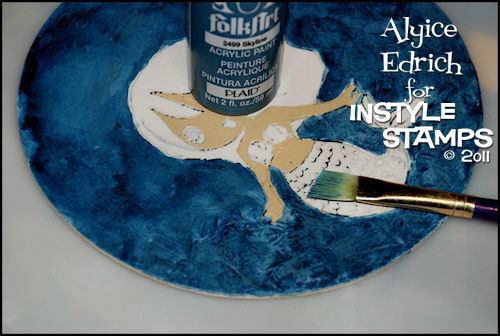
- Put a little Navy Blue into a dish and add some water to create a wash, then dab the wash around the image, and let dry. (Basically a wash is watered down acrylic paint.)
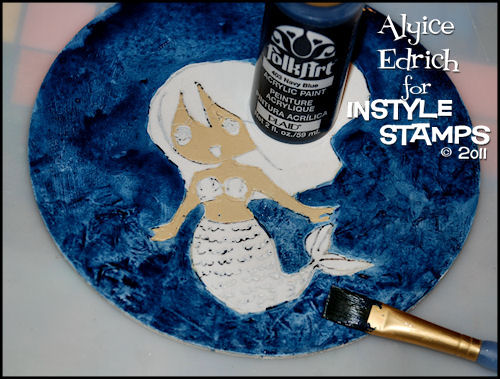
- Dry brush Skyline Blue over the Navy Blue and let dry. (To dry brush, you put a smidge of paint on your paintbrush then you dab your paintbrush on a paper towel, then you lightly brush the surface of your design.)
- Dry brush Interference Gold over the bottom half of your design. This should create a slight shimmer in your waves.
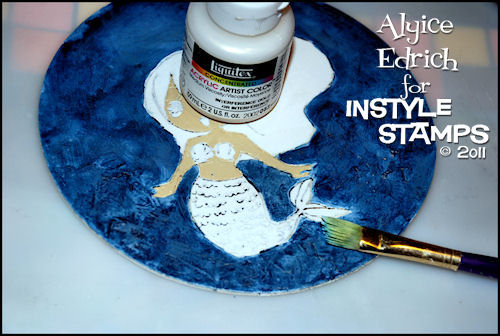
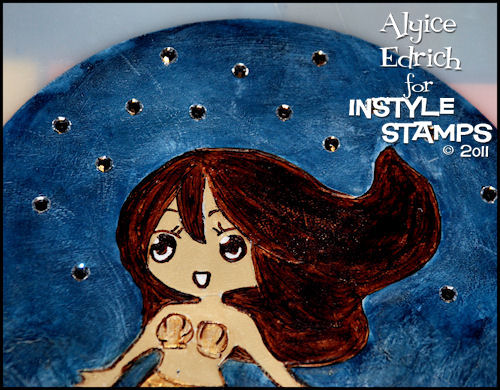
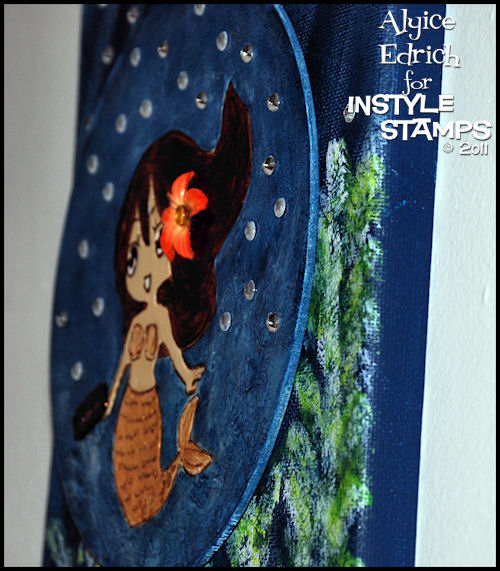
- Dry brush white over the entire background, then paint the hair, tail and breastplate white and let dry.
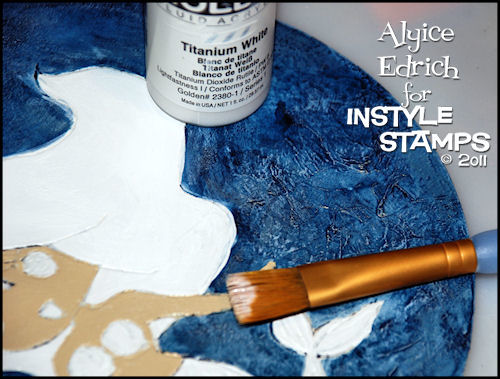
- Using a narrow paintbrush, paint the hair with Burnt Umber. If you brush in streaks, it can give the illusion of hair. (If you wanted to get really detailed, you could brush in some tan, some white, and some more burnt umber .)
.jpg)
- Paint the breastplate and the tail gold and let dry.
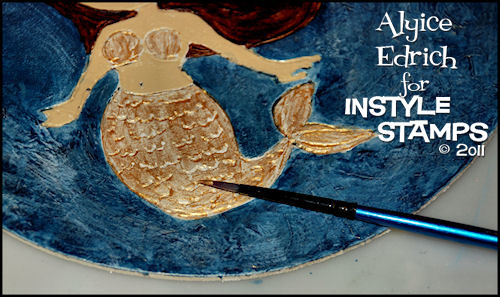
- Using a very thin tipped paintbrush, dipped in Burnt Umber, outline the image of the mermaid. While the outline is still wet, gently place a dry paper towel over the image and tap around the areas you outlined. This will pull some of the paint off the image and make the outline appear softer. (If necessary, go over anything may have smudged.)
- Paint the eyes with Burnt Umber and white.
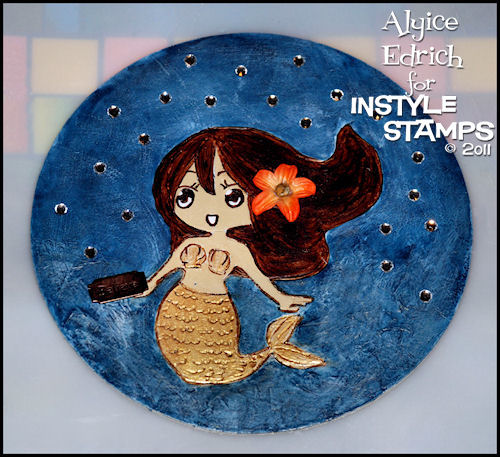
- Use a thin-tipped paintbrush to dab a little Jewel It® on the backside of a mirror bead, then adhere the bead to the top half of your background. Continue to do this until you have covered the entire top half of the image and let dry.
- Use a thin-tipped paintbrush to dab a little Jewel It® on the backside of the flower and adhere it to the mermaid's hair. Repeat the process to adhere the green bead to the center of the flower, and let dry.
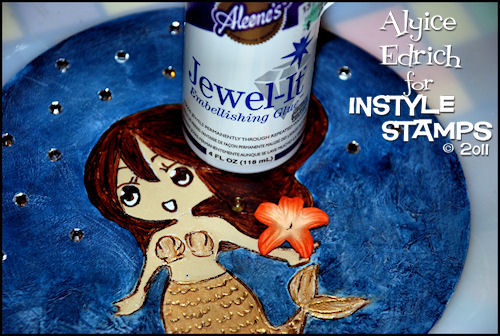

- Use a thin-tipped paintbrush to dab a little Jewel It® on the backside of copper sign and adhere it to the mermaid's hand, and let dry.
- Seal with acrylic spray sealer, and let dry over night.
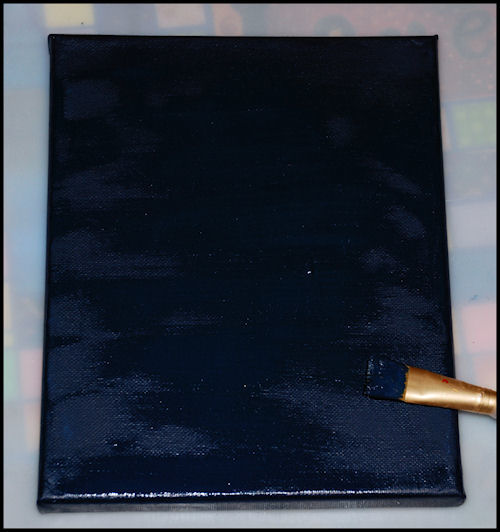
- Paint your canvas Navy Blue and let dry.
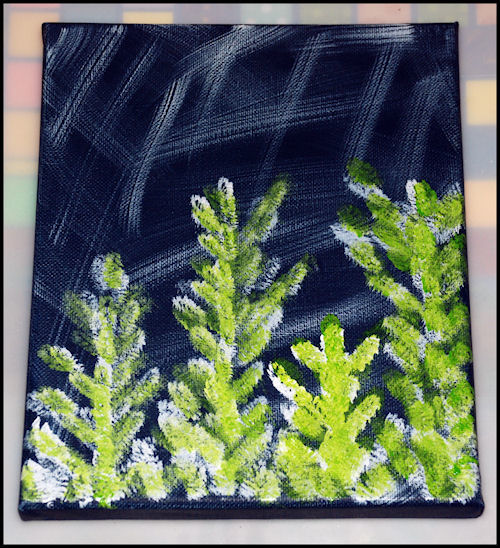
- Dry brush white streaks across the entire canvas.
- Dab a little more paint onto your paintbrush and dab a line from the bottom of the canvas, to the middle of the canvas. Next, angle your brush to the left and dab single brushstrokes on the right side of the line. Angle your brush to the right and dab single brush strokes on the left side of the line. Repeat four more times to create sea plants and let dry.

- Repeat step 24, on top of the white sea plant, using Cadmium Green Hue, and let dry.
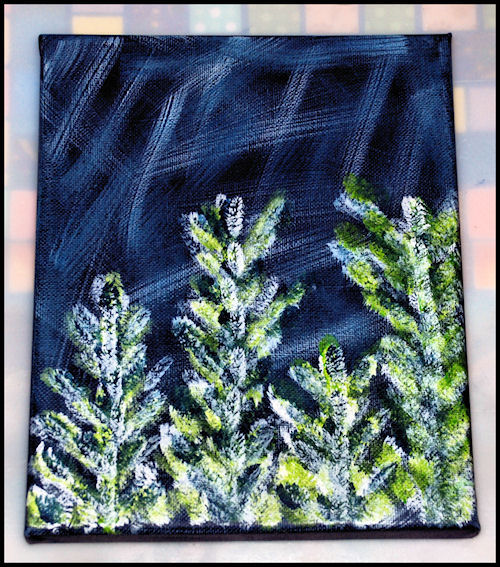
- Repeat step 25, on top of the white sea plant, using Navy Blue, and let dry.
- Repeat step 25, on top of the white sea plant, using white, and let dry.
- Dry brush Skyline Blue across the blue and white background, and let dry.
- Seal with acrylic spray sealer, and let dry overnight.
- Turn the wood piece over, sign, and place raisers on the back.
- Turn the wood piece right-side up and adhere to the painted canvas.
There you have it. A fun, whimsical mermaid canvas any little girl would adore!
FTC Disclaimer: Ariel anime was provided, free of charge, by InstyleStamps. This post was written while I participated on the InStyleStamps design team as a Chickie. www.InStyleStamps.com
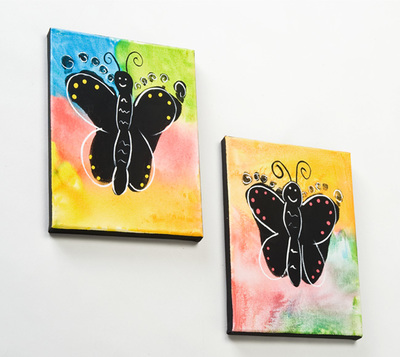
Read NextTie Dye Footprint Butterfly Canvas