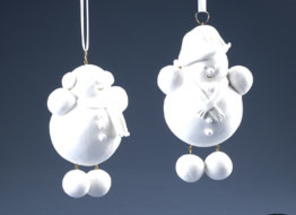
Cute Easy Clay Snowman Ornaments
Give a great gift or decorate your house with frosty the snowman. These cute ornaments will make anyone smile.

Materials:
- STYROFOAM™ Brand Foam:
- Balls: 2-1/2"; 1-1/2"; four 1"
- Air-dry ultra-light modeling compound
- Metal findings: eye pins, 1", five; large jump ring; small jump rings, two
- Narrow satin ribbon or cording
- Serrated knife
- Candle stub or paraffin
- Pencil
- Ruler
- Craft rolling pin or clay-dedicated pasta machine
- Metal teaspoon
- Needlenose pliers
- Craft knife
- Low-temp glue gun and glue sticks
- Thick, white craft glue
- Découpage medium (optional)
Steps:
- Wax serrated knife with candle stub or paraffin. Cut thin slices from top of 2-1/2" and bottom of 1-1/2" foam balls. Twist balls together to ensure snug fit; use glue gun to secure.
- For arms, press two 1" foam balls against body sides as shown and glue to secure. Note: Legs will be attached later.
- Roll small ball of modeling compound ("clay") into smooth 1/8"-thick pancake shape using craft roller or pasta machine. Place clay over top of head and use fingertips to gently mold it against foam. Use craft knife to trim excess clay from neck area to ensure smooth shape.
- Roll second clay pancake to cover snowman body and arms in same way, seaming clay at neck. Repeat to cover two remaining foam balls for feet.
- Look over snowman and be sure all clay seams are smooth; use back of teaspoon to smooth clay. If needed, spot glue clay edges with white glue; let dry.
- Refer to photo and use fingertips to mold details such as scarf, earmuffs, hat, buttons, etc. Use white glue to attach details; let dry.
- Roll tiny balls of clay for eyes and cheeks; flatten cheek balls and glue cheeks and eyes to face; let dry. Use craft knife to cut tiny "C" shape for mouth.
- Glue and insert eye pin into top of each foot. Glue and insert two eye pins into bottom of body, about 1" apart. Join eye pins in feet to body using two small jump rings, opening and closing rings with needlenose pliers.
- Glue and insert remaining eye pin into top of head. Attach large jump ring to eye pin. Seal ornament with découpage medium, if desired, and let dry.
- Tie ribbon or cord hanger through large jump ring.
®™ Trademark of The Dow Chemical Company ("Dow") or an affiliated company of Dow. For more project ideas, please see styrofoamstyle.com.
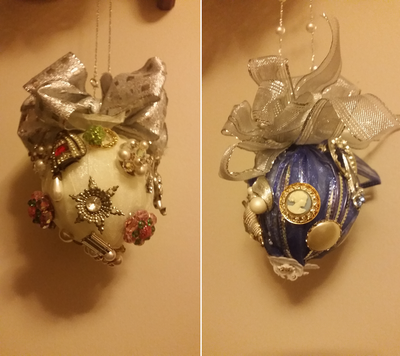
Read the 19 personalized ornament ideas for some great gifts.
Your Recently Viewed Projects
Thanks for your comment. Don't forget to share!
Report Inappropriate Comment
Are you sure you would like to report this comment? It will be flagged for our moderators to take action.
Thank you for taking the time to improve the content on our site.