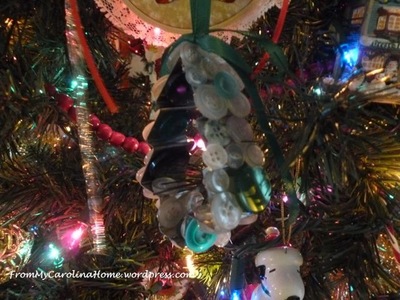
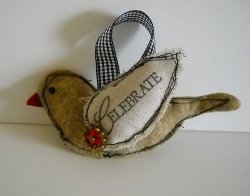
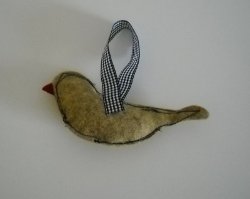
Scrappy Bird Ornament
Got leftover fabric and felt scraps? Make a Scrappy Bird Ornament from Melony Bradley! This sewing project is perfect for beginners. These ornaments look great on a tree and can be hung up in the spring, too!
Materials:
- Fabric and felt scraps
- Embellishments
- Sewing machine and thread
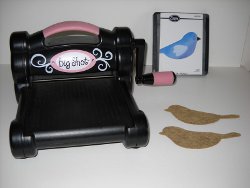
- Die cut machine
- Bird with Wings Bigz Die
- Disappearing ink fabric pen
- Aleene's Fabric Fusion
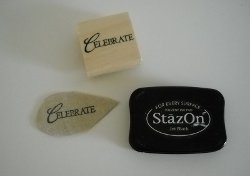
- Stamp
- Solvent or pigment ink
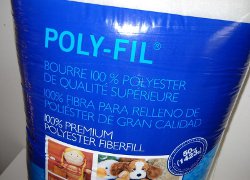
- Fairfield's polyfil fiber stuffing
- Ribbon
Instructions:
- First, you will need to cut two birds using the Bird with Wings Bigz Die and the BigShot Machine. I used felt from National Nonwovens.
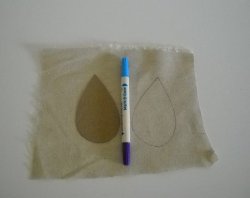
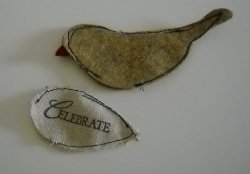
- Use the pattern provided in the patterns section of the magazine, and trace one wing on the fabric you will be using. I used osnaburg since it has a nice raw look to it. Use a disappearing ink fabric pen to trace.
- Use the die and smaller pieces of a wool felt to die cut a small portion of the birds head. You will need the beak piece so be sure to get that onto the felt.
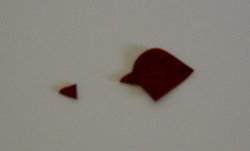
- Cut off the beak piece and glue it onto the whole bird die cut using Aleene's Fabric Fusion.
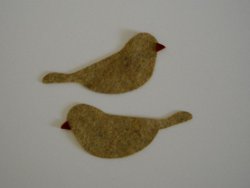
- You will need a "back" and a "front" piece so make sure you do not glue them to the wrong sides of the bird shape.
- Next, use solvent or pigment ink to stamp a holiday sentiment to the one side of the wing. Heat set this with an iron on a low-medium setting.
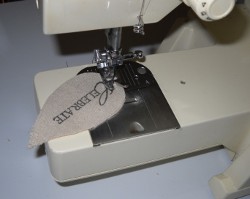
- Now its time to sew the pieces together. Start at the bottom of piece and sew with a straight stitch and a contrasting thread. You will sew 3/4 of the shape, leaving a small slit open for stuffing. Sew in a free form fashion. The point of these birds are the really scrappy look. Sew about 1/4 or more from the edge. Your fabric will begin to slightly unravel, adding to the scrappy look of the ornament.
- Lightly stuff your pieces using a small amount of fiberfill stuffing. I like Fairfield's polyfil fiber stuffing because it's soft.
- Just a couple of more steps to completing your scrap savvy bird. Once you have your stuffing in place, use the sewing machine to sew the opening closed. Cut a 6" piece of ribbon and glue it to the bird with Aleenes Fabric Fusion. Double over the glue the ends to the front of the bird ornament.
- To finish, use the fabric glue to glue the stuffed wing to the bird over the ribbon ends to hide them. Glue on assorted embellishments such as old earrings, buttons, etc. Glue a 6/0 pebble bead to the bird for the eye.


Thanks for your comment. Don't forget to share!
shilohdana
Feb 28, 2017
Goodness, how did I miss seeing this cute birdie ornament around Christmas time last year? I am going to have to get to work on making a few of these beauties for Christmas this year-2017! I don't own a cutter, so I will have to create my own pattern, which will be easy enough, and will allow me to make it any size I want! It would be quite charming to make the bird body out of burlap.
melaniekoekemoer 1 607310
Dec 20, 2016
Love the rustic look of this project. Free hand template will work perfectly for the rustic look. Embroider any word onto the project. A Happy Birthday can be a great gift topper
cj4swim
Dec 07, 2014
I don't understand why you didn't give a copy of your template of the bird's body and all. I don't want to buy a design cutter but I did make my own pattern of the bird.
FaveCrafts Editor JL
Dec 08, 2014
Hi there, Unfortunately the designer did not provide a template for the body. Since it's a pretty simple design, you should be able to just sketch it out free-hand. Thanks! - Julia from FaveCrafts
gesus4gives 771960 8
Sep 27, 2011
I made one of these and it was so simple!!! I did't have the design cutter, so I drew a pic on an index card and used that as a template. It turned out so cute!!! This one will be going to our little grand-daughter for her first ornament for CHRISTmas.
Report Inappropriate Comment
Are you sure you would like to report this comment? It will be flagged for our moderators to take action.
Thank you for taking the time to improve the content on our site.