Foam Gift Card Ornaments
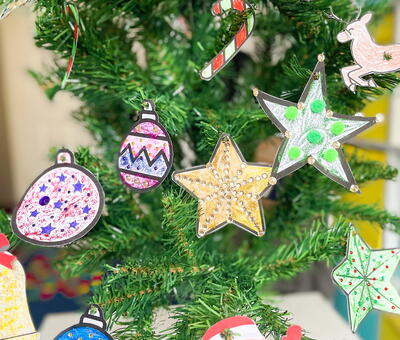
Give a gift card in a creative way, using gift card ornaments from Glue Dots to mask the surprise of your special gift. This easy Christmas craft uses craft foam and great holiday patterns to create a fun alternative to gift giving.

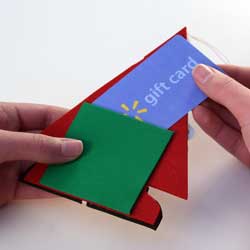
Materials:
For Santa Ornament:
- Mini Glue Dots
- Craft Glue Dots
- 1" Glue Lines
- 1 sheet each of red, white, black, green and skin-colored craft foam
- White embroidery thread
- 1, small red Pom Pom
- 1, small white Pom Pom
- Pink Blush-On or pencil
For Gift Ornament:
- Craft Glue Dots
- 1" Glue Lines
- 1 sheet each of white and green craft foam
- 1 sheet metallic red craft foam
- Scraps of the skin-colored craft foam from the Santa ornament
- Thin marker
Instructions:
For Santa Ornament:
-
Download the Santa pattern and cut it out using red foam.
-
Cut out the face, beard, mustache pieces, boots, spacer for the boots, back pock using the remaining colored foam.
-
Attach the white spacer to the black boots and boots to the Santa body using 1" Glue Lines.
-
Adhere the face to the body using 1" Glue Lines and add the blush color to the cheeks.Gift card ornaments using Glue Dots.
-
Attach the beard and mustache using Craft Glue Dots.
-
Cut the embroidery thread 8" and tie the two ends together and attach to the back of the ornament with Craft Glue Dots.
-
Attach Pom Poms for the nose and hat using Mini Glue Dots.
-
Use Mini Glue Dots to attach the eyes.
- For the gift card pocket: Cut out the back pocket using the green foam and place 1" Glue Lines around the sides and pocket bottom. Attach to the back and insert your gift card.
For Gift Ornament:
-
Download the Gift Pattern and cut out gift pattern pieces.
-
Cut out metallic red patterns and attach to the white gift using 1" Glue Lines.
-
Attach the gift ribbon and bow with 1" Glue Lines.
-
Cut out tag pattern from the skin-colored foam and make a hole at its top using a needle. Write the name of the person receiving the gift card and attach the tag to the gift with Craft Glue Dots.
-
Cut the embroidery thread 8" and tie the two ends together and attach to the back of the ornament with Craft Glue Dots.
- For the gift card pocket: Cut out the back pocket using the green foam and place 1" Glue Lines around the sides and pocket bottom. Attach to the back and insert your gift card.
Your Recently Viewed Projects
mulberrygalprinces s
Sep 29, 2016
What a truly great idea. I never know what to give my son and his family for Christmas so I always get them gift cards. She gets them from girly stores like Bath and Beyond and he gets Best Buys. The grand kids get ones to toy stores or movies or something like that. I can make these and put them on the tree for them to find.
firstgrandma6
Oct 25, 2010
The directions printed fine for me, but the patterns are so light that they do not come out on my printer.
The Editor of Fave Craftscom and AllF reeCrochetcom
Dec 09, 2009
There is an easy print button at the top of the page. It seemed to work fine for me.
guerine
Dec 09, 2009
when I try to print this pattern or any other the complete instructions dont print
Report Inappropriate Comment
Are you sure you would like to report this comment? It will be flagged for our moderators to take action.
Thank you for taking the time to improve the content on our site.


