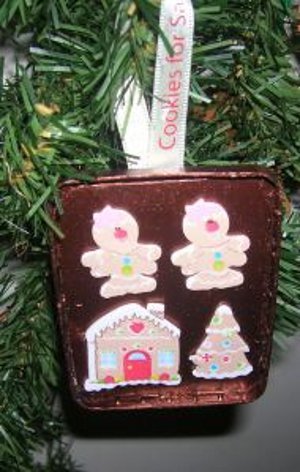
Cookie Sheet Ornament

Making Christmas cookies is a memory we all cherish, so why not make an ornament that immortalizes this activity? The Cookie Sheet Ornament is one of those homemade ornament ideas that will not see on anyone else’s tree. Unique, cute, and easy peasy, this Christmas craft idea is easy enough to make with kids. Great for DIY gift tags and hostess gift ideas for the holidays, this DIY ornament sure is something special. All you need to make this cute idea is some paint, foam, and tiny gingerbread men stickers. You could easily DIY the itty bitty cookies by using foam or felt.
Learning how to make ornaments for Christmas is a great tradition to start with your family every year. Instead of spending the money on new store-bought Christmas décor that will show up on every other tree in the neighborhood, make your own ornaments and memories at the same time.

Find more DIY Christmas ornament ideas in our list of 50+ Simple Homemade Christmas Ornaments.
How to Make Ornaments: Cookie Sheet Ornament
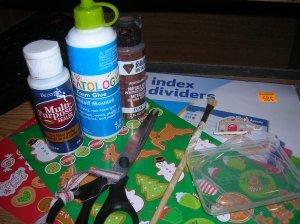
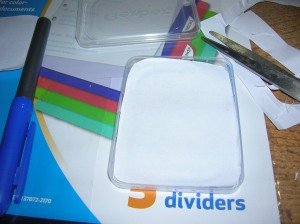
Materials:
- Rectangular plastic baby food lid, mason jar lid, or any lid you'd like
- Thin plastic
- DecoArt Multi-purpose Sealer
- FolkArt Copper Metallic paint
- Cookie stickers or mini gingerbread ornaments
- Paint brushes
- Foam glue
- Glue Dots
- Fine sandpaper
Instructions:
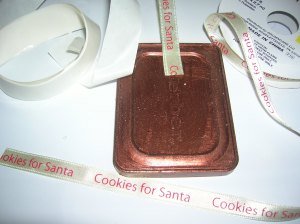
- Assemble supplies. Start with a clean plastic rectangle baby food lid (I used Gerber). The inside of the lid is not level and you need to make an insert. Make a template with paper.
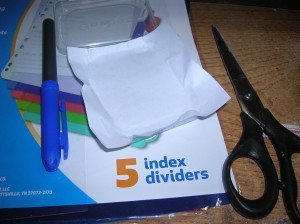
- Trace the template on a thin piece of plastic. Try looking for cheap plastic dividers or folders at dollar stores. Cut out and check fit.
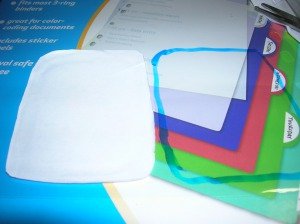
- Glue in place using a THIN layer of Foam Glue. Allow to dry at least overnight, if the glue is too thick it several days for the glue to dry.
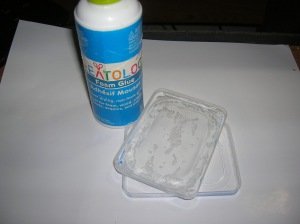
- Rough up surface with sandpaper (or emery board). Dust.

- Then prime with DecoArt Multi-purpose Sealer. Mix the sealer half and half with the paint per label instructions. Allow to dry thoroughly. Or follow directions on bottle for painting plastic. This is an essential step – without this base coat the paint will “skin” very easily and peel off the “cookie sheet”.
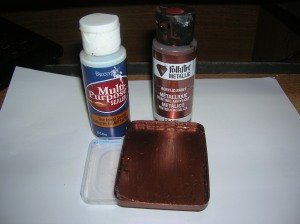
- Paint both sides (allow one side to dry completely before painting the other side) and edges of the lid with FolkArt Copper Metallic paint. Allow to dry for 1 hour.
- Apply a second coat of paint if needed. Allow to dry.
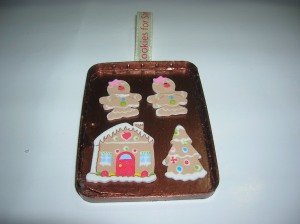
- Now you are ready to place your “cookies” on the sheet. Apply cookie stickers in a regular pattern. When placing stickers stick them lightly to the cookie sheet leaving an edge up until you get the placement right. When you are satisfied with how the arrangement, go back and stick them down tightly. Or use Glue Dots to adhere mini gingerbread ornaments to cookie sheet.
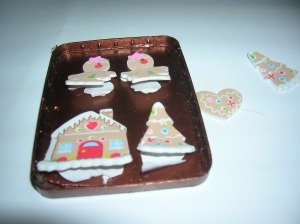
- Attach a ribbon hanger to the back.
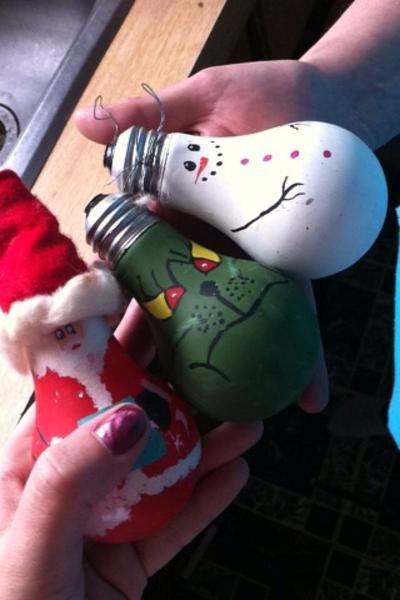
Read NextLightbulb Ornament Trio