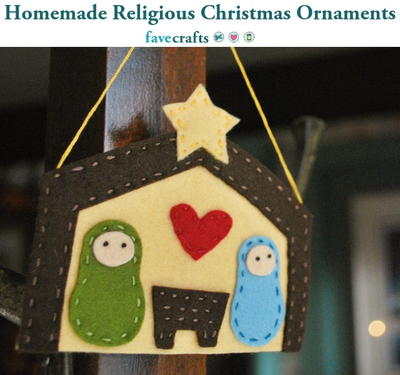
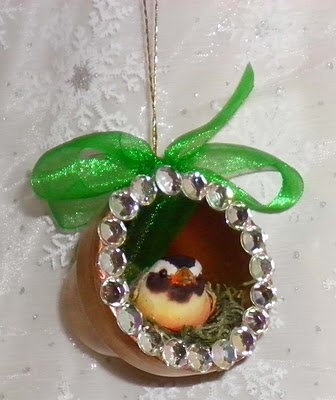
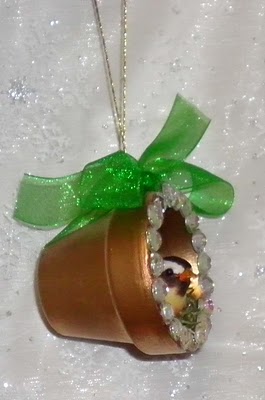
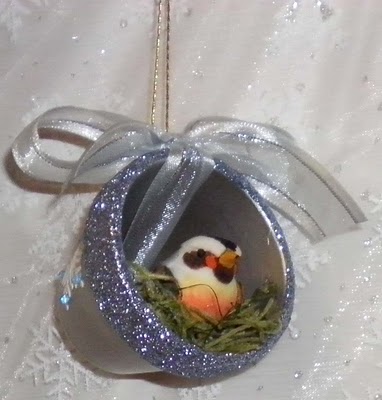
Bird's Nest Clay Pot Christmas Ornaments
Use tiny clay pots to create Christmas ornaments featuring nesting birds. You can decorate the clay pot Christmas ornaments in a variety of Christmas themes.
Materials:
- Tiny Terra Cotta Pots with Drainage Hole (Be sure to wash!)
- Gold Leaf Paint OR Silver Leaf Paint
- Glossy Acrylic Spray
- Elmer's Craft Bond Glue (If using the glitter Method)
- Aileen's Bead Glue OR E-6000 (If using the rhinestone method)
- Spanish Moss
- Tiny Birds
- Organza Ribbon
- Ultra Fine Glitter (If using the glitter method)
- Clear Flat-Back Rhinestones (If using the rhinestone method)
- Gold OR Silver Bead String
- Small Snowflake Scrapbooking Stickers (Optional)
Instructions:
- I bought the tiny pots at Michael’s for .58 cents each. Be sure to wash the pots with a grease-cutting dishwashing liquid (such as Dawn) and water. Don’t skip this step, or your paint could peel off. Make sure the pots are thoroughly dry before you start painting them.
- With a flat brush, paint the pots with Liquid Leaf in Classic Gold OR Liquid Leaf in Silver. You can purchase Liquid Leaf at Michael's for $5.99 a jar AND if you use a Michael's 40% off coupon, it's even better.
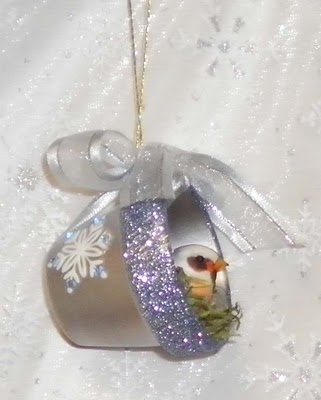
- If you decide to place glitter on the rim of the pot, paint a fairly generous amount of Elmer’s Craft Bond glue on the rim of the pot. Make sure you don’t forget the front part of the rim as well. I used the Martha Stewart ultra- fine glitter.
- After the pots have dried thoroughly, spray a coat of Clear Gloss Acrylic spray. This will prevent any nicks in the paint that may occur over time.
- At this point, you will need to string organza ribbon through your pot and tie in a pretty bow at the top of the pot’s rim. Michael’s sells pots that already have drainage holes in them, so you won’t need to drill anything.
- If you have decided to glue flat back rhinestones on the rim, use Aileene's Glass and Bead glue OR E-6000 to attach the rhinestones to the lip of the pot. I would highly recommend allowing the rhinestones to set for at least 24 hours.
- Using your low temp hot glue gun, glue a little Spanish Moss inside, and perch your little feathered friend on top. I snipped my moss into smaller pieces, however, this step is not required.
- Lastly, string and tie gold ornament thread under the ribbon and you have a sweet little ornament. You may also want to add a couple of snowflake stickers to the pot, however, this is up to you. You now have a sweet little bird ornament!
Read NextInitial Homemade Ornaments
Your Recently Viewed Projects

Thanks for your comment. Don't forget to share!
Weberme
Nov 23, 2017
I love birds and this is so super cute. I have got to get some small terra pots and spanish moss to make some for my Christmas tree. so easy and so simple and a great family project to make together or even aclass or group. Bring over your girlfriends and have fun making these bird nest clay pot ornaments. Thank you for a great idea.
mulberrygalprinces s
Sep 29, 2016
These are so cute and so easy. I think they would look great on my back and front porch. Since I have flat back sequins I will use them.i bought them on a close out in red and greens and had no idea what I would use them for. Now I know.
ellaruth
Apr 17, 2013
Step 5 has me a little confused. Do you tie a knot on the outside of the drainage hole and bring the ribbon through the top of the flower pot?
irisgrdnr77 529744 1
May 12, 2012
These are so cute! I definitely want to make a few for my Christmas Tree this year!
Report Inappropriate Comment
Are you sure you would like to report this comment? It will be flagged for our moderators to take action.
Thank you for taking the time to improve the content on our site.