Trendy Neon DIY Macrame Necklace Tutorial
Learn how to macrame a necklace with beads with this step-by-step picture tutorial.

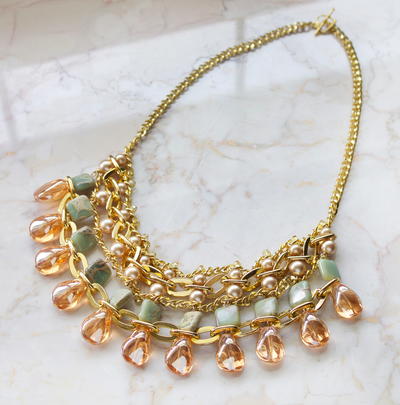
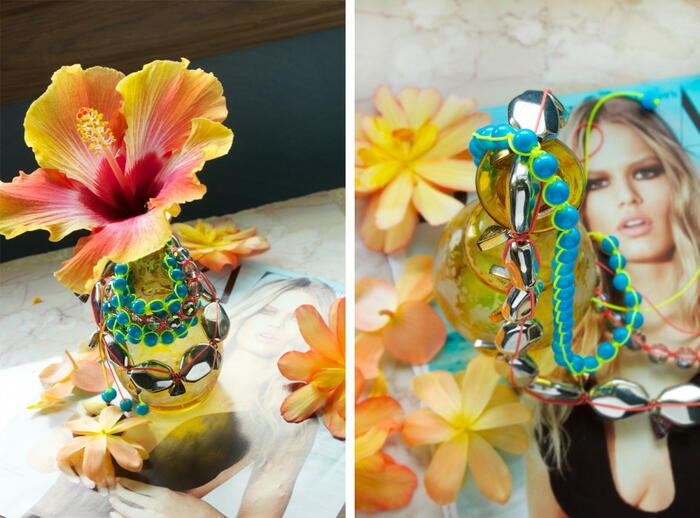
Calling all sun babes! Give this trendy neon DIY macrame necklace tutorial a try, and stand out at the beach this summer with a piece no one will believe you made yourself. The neon cord and bright blue beads really pop against the neutral colors, while the silver and gold beads give an elegant touch to this DIY statement necklace. You could also make this piece with a bright cord and all neutral-colored beads to add even higher contrast. The sliding closure makes this an accessory that can fit both adults and children. See what other macrame necklace patterns you can come up with based on this simple design.
From the blogger: "This macrame necklace definitely brings the heat, thanks to a mix of bright silver metallics, neon cording, and flashy faceted crystals. I really love any piece that makes a statement, and this DIY jewelry project inspired by South Beach totally tells a story. If you’ve never thought to use macrame knots in a more updated and sophisticated way, then now’s your chance!
This is sort of a weird mix of materials. Fancy crystals, acrylic geometric beads, bright blue glass rounds, eclectic triangle beads, and that neon cord! But, somehow, it totally works and it totally conveys that South Beach, Art Deco vibe! I took a trip to South Beach years ago and was fascinated with the architecture, bold bright colors, and 1920’s-inspired design elements. This necklace embodies that tropical mood. What’s more, this DIY necklace is adjustable because of the sliding closure. It’s also a simple square knot that creates the wrapped look, and I’ll show you all the steps.
Feel free to use this same technique to make a matching bracelet or more necklaces in different color combos for different outfits. Get inspired!"
Time to CompleteIn an evening
Main MaterialBeads

Materials List
-
Variety of beads
- For the shorter strand, I used 8mm Cousin Jewelry Basics blue glass rounds. You could also use plain silver crystals for a sparklier look instead of the opaque blue beads.
- For the longer strand, I used Cousin brand 10mm faceted mirror crystals and Cousin brand large silver acrylic beads
- Neon .8mm nylon cord
- 12X11m triangle glass beads
- 6mm jump rings
- Headpins
- Scissors
How to Macramé a Necklace with Beads
Need a quick refresh? Watch our fave, Candie Cooper, take you through all the steps of how to macrame. And don't forget to print out the instructions for those of you who work better with a step-by-step tutorial.
Directions
-
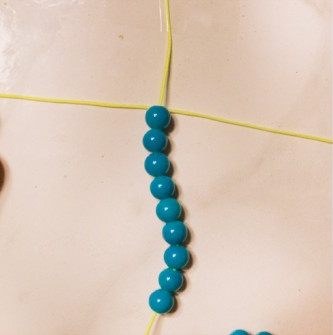
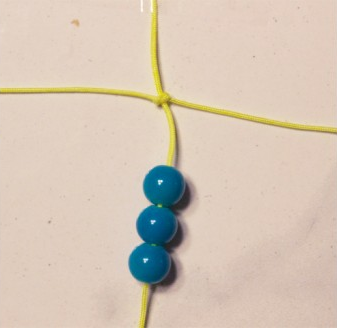
Cut a three foot piece of your nylon cord, and string on approx. 20″ of your glass rounds. At one end of the cord, create a “stopper” with a piece of tape, so your beads don’t slide off. Tape the other end of the cord about 8″ from the end to your work table.
-
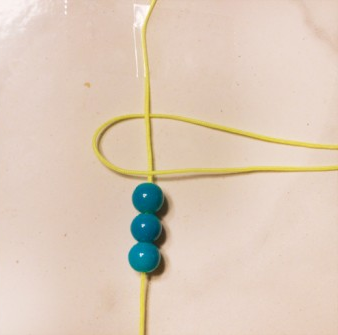
Cut about a 6 foot piece of nylon cord. Thread it under your taped cord, making sure the middle lies right under the strand to even everything out.
-
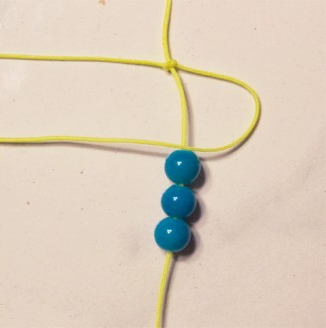
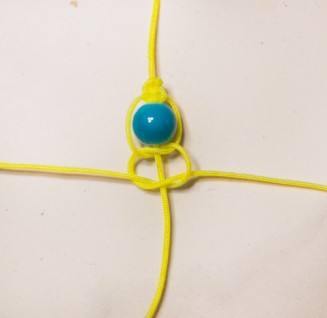
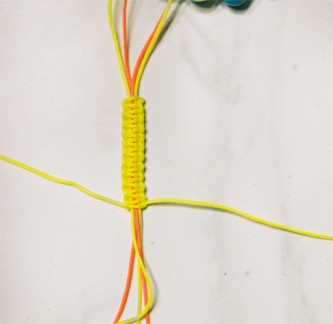
To start the knot series, take your leftmost side of the cord, and bring it over the middle strand. It should look like the picture below.
-
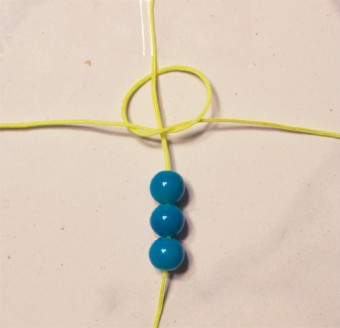
Now, take your rightmost piece of cord, threading it OVER the piece of cord you just brought over, UNDER the middle strand, and back OVER the lefthand loop, through the opening.
-
Pull tight.
-
Repeat the last 3 motions, except in reverse.
-
Take your rightmost piece of cord, and lay it to the left OVER the middle strand.
-
Take your leftmost cord OVER the piece of cord you just brought over, UNDER the middle, and then back OVER the righthand loop, through the opening.
-
Pull tight.
-
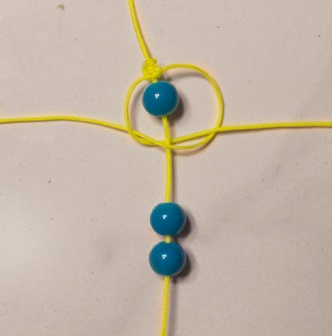
Slide a bead up close to the last knot.
-
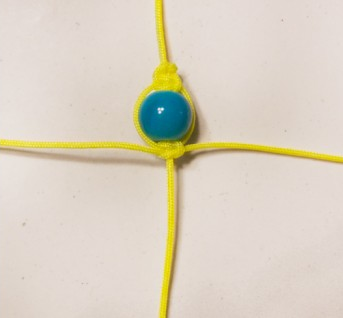
Now, repeat Steps 3-9 (the last two knots), catching the bead in the middle.
-
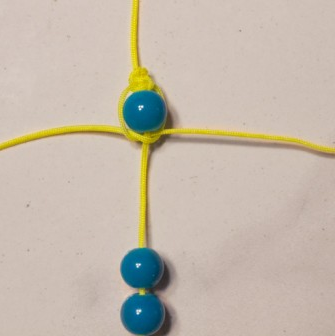
Your piece should look like this.
-
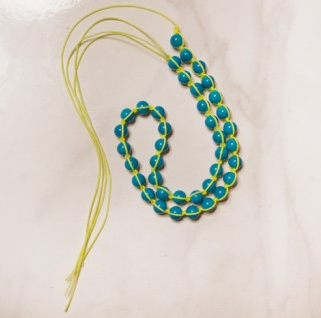
Keep adding beads and knotting until you’ve used all your beads.
-
Set this strand aside.
-
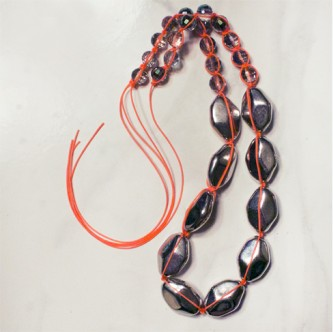
Create another longer strand with your 10mm crystals and acrylic silver beads. I used 10 acrylic beads and 12 crystals for this strand, and it was about 2″ longer than my previous strand. I also used a neon orange cord for contrast.
-
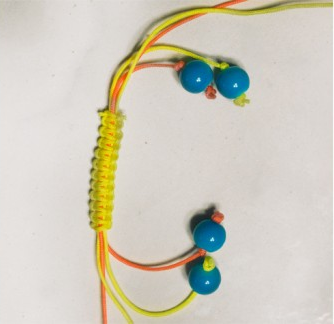
When you’ve knotted both strands, cut off the excess knotting cord – LEAVING THE CENTER STRAND INTACT – and burn the ends to secure.
-
Gather all four ends of string together.
-
Cut a 2 foot piece of knotting cord, and knot a long series, grouping all four strands within the knots. Make sure you don’t knot too tight, or your sliding closure will not work.
-
When finished, cut this excess string and burn the ends once again.
-
Finish off those excess cords by tying beads onto the very end, and burning the knots to hold securely. This should finish off the necklace.
-
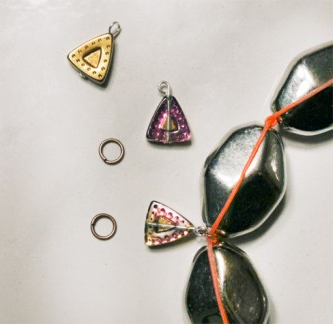
Optional: For decoration, I made charms by adding the triangle beads to headpins and creating top loops. I then added the loops to jump rings, and added the jump rings to the string between each large silver bead. There were 9 total. This added a little more interest, and I love the texture and shine the triangle beads provided.


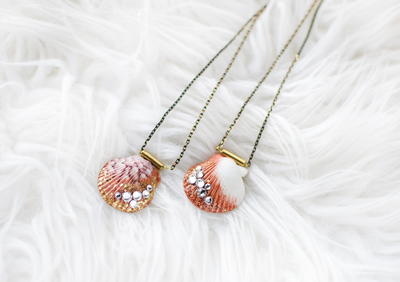
Read NextShimmer Seashell Necklace DIY