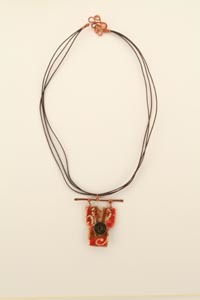
Copper Kimono Necklace
Create this Copper Kimono Necklace from AMACO in 7 simple steps.
Materials Needed:
- AMACO® Friendly Plastic – Metallic Red/Black, Metallic Burnt Orange/Black, Metallic Orange Copper/Black
- AMACO® Rub ‘n Buff® – Gold Leaf
- AMACO® WireForm® Soft Metal Rods – Copper, 2” long
- AMACO® WireForm® Craft Wire – Copper, 20”
- AMACO® WireForm® Impression Mesh – Copper, 2” x 2”
- Distress Embossing Powder – Old Paper & Fired Brick
- Rubber stamp with image of choice
- Toggle of choice (copper)
- Clear Embossing ink
- Leather Cording
- White tacky craft glue
- Small piece of black card stock
- Small Asian Coin
Tools :
- AMACO® Poly Roller
- Non-stick work surface
- Scissors
- Pliers
- Heat Embossing Gun
- Electric Skillet with water
- Bowl of cold water
- Oil: either vegetable, mineral or baby oil
- Aluminum foil
Steps:
- Heat water to 140 °F (60°C) in skillet. Apply clear embossing ink to stamp. Stamp design directly onto Red/black strip of Friendly Plastic®. Sprinkle embossing powders onto plastic, remove excess and heat with embossing tool. Cool in water.
- Apply oil to PolyRoller and a drop to work surface. Lay Friendly Plastic® onto work surface color side up. Heat with heat gun for 0 seconds until the Friendly Plastic® is very soft. Gently roll over design to slightly stretch and crackle. Cool in water. Repeat this step with the orange/black strip.
- Draw pattern onto back of plastic and cut out. Apply a ¼” wide strip of mesh down the front center. Working on foil, lay Kimono cut out face up.
- Cut two ¼” wide strips from orange and black Friendly Plastic®. Lay over mesh in a “V” pattern. Cut an angled triangle from orange black and apply for waistband. Apply these strips to kimono. Float aluminum foil with kimono design on water to melt all pieces together. This may take a couple of minutes. Remove from water with pliers.
- Using a toothpick, round out a hole in the upper left and upper right corner for wire to attach. Dip in cold water to set plastic. Hammer piece of wire flat. Hammer harder on the ends to create a somewhat rounded look.
- Cut wire in into 4” sections. Thread thru hole on kimono leaving a 2” extension. Wrap end around several times to secure. Wrap remaining end around copper wire two times. Wrap remaining end around wire base. Repeat for other side.
- Wrap remaining wire around center leaving a 2” extension. Form a loop and wrap wire around to secure. Thread leather cording through wire and secure by wrapping wire around the ends until 2” remains. Loop and wrap remaining wire. Attach to toggles of choice.
- Glue coin to front and allow to dry.
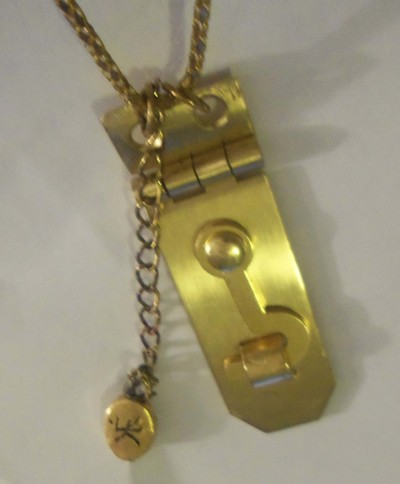
Read NextBrass Hardware Eternity Pendant