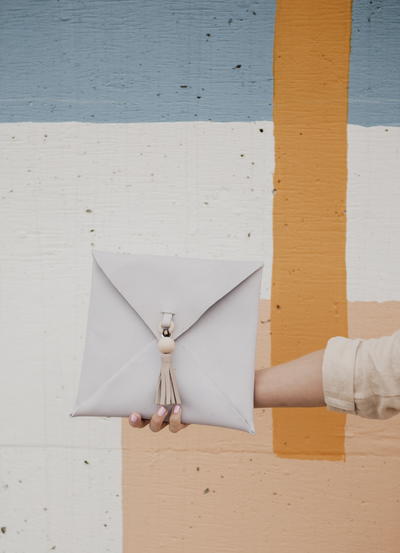
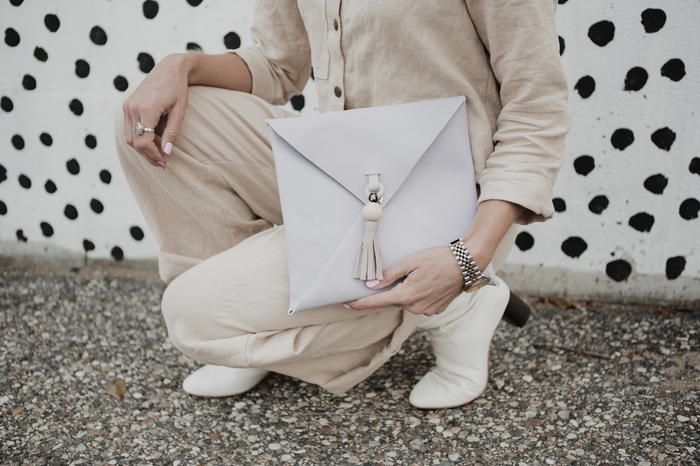
How to Make a Leather Envelope Clutch
This envelope clutch tutorial requires no sewing!

Learn how to make a leather envelope clutch without a sewing machine. This bag is perfect to add a pop of color to an outfit for any special occasion!
From the Designer: A homemade clutch is easier to make than you might think. Select your materials and tools and get creating! This project will show you how to make a simple, designer-inspired clutch that allows for the option to add a bit of flair.
I used tools from the new DIY Precision tool line from Fiskars®. To start, choose between using either the Fiskars® PowerCut™ Shears, which are an amazing choice to power through thicker materials like leather, or the Fiskars® Heavy-duty Comfort Loop Rotary Cutter (65mm). If you’re a true beginner, I recommend the shears, otherwise feel free to try out the rotary which will give you even sharper and more precise cut lines for your leather bag.
To protect your work surface, especially if you’re using the rotary cutter, make sure you lay down the Fiskars® Cutting Mat – DIY (18” x 24”). To make the most accurate measurements, use the Fiskars® Metal Ruler (18”). The last two tools you’ll need are the Fiskars® Precision Hammer and Fiskars® Lia Griffith Low-Temp Cordless Glue Gun for adhering your leather and clasp together."
You’ll also need to gather materials. The most important element is your base – select either leather or faux leather in the color of your choice. You’ll also need a leather punch and snap kit to help adhere the leather to form your envelope shape, as well as wood beads (I used 1"), wood rings (I used 1/2") and a wax cord.
Time to CompleteIn an evening
Project TypeMake a Project
Materials List
- Fiskars PowerCut™ Shears (8”)
- Fiskars Heavy-duty Comfort Loop Rotary Cutter (65mm)
- Fiskars Cutting Mat – DIY (18” x 24”)
- Fiskars Metal Ruler (18”)
- Fiskars Lia Griffith Low-Temp Cordless Glue Gun
- Fiskars Precision Hammer (12 oz)
- Leather or faux leather
- Leather punch
- Snap kit
- 1” Wood beads
- ½” Wood rings
- Wax cord
- Glue sticks
Steps to Make an Envelope Clutch
-
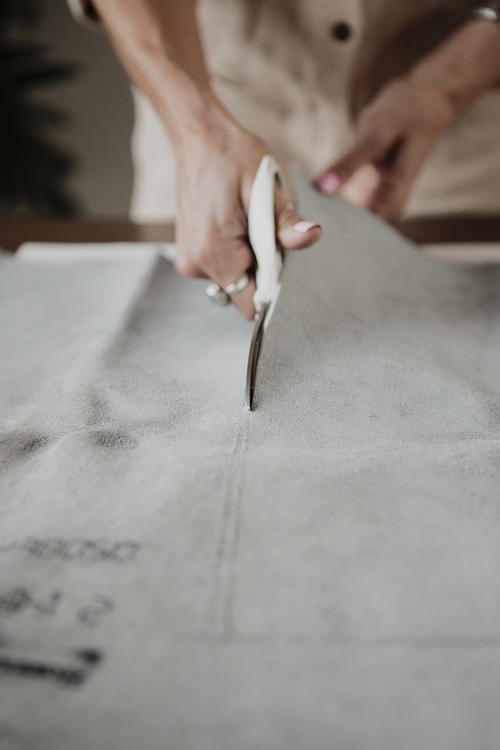
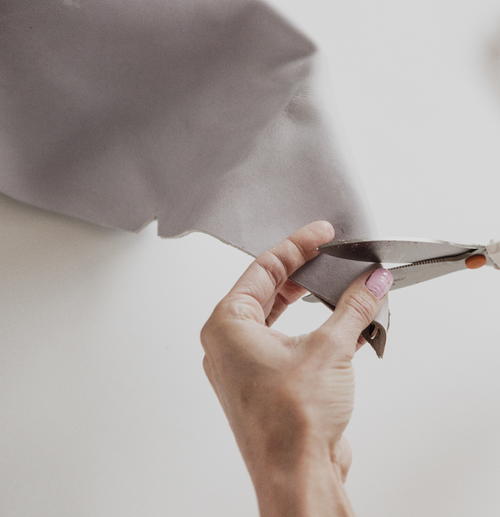
Step 1. Cut the leather. Use the shears or rotary cutter to cut your leather or faux leather to a 15" square. I used the ruler to measure this out on the back side of my material and drew a light line to help my cut straight.
Note: click any image to see a larger version. -
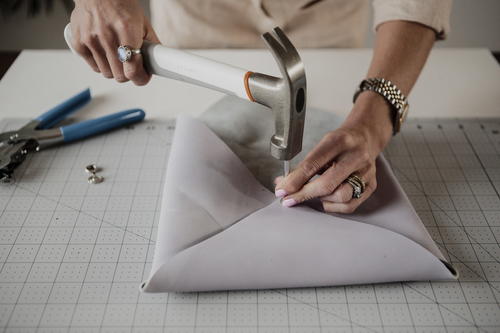
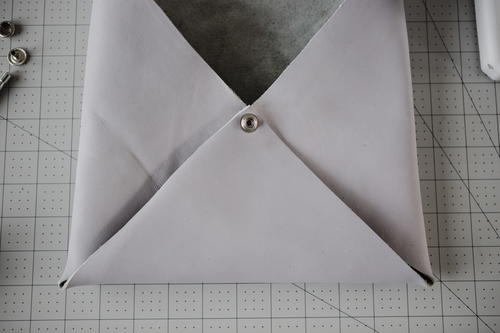
Step 2. Punch a hole. Fold three corners of the cut leather into the center of the material and punch a hole through all three corners. You may be able to punch all three together or, depending on how thick your material is, you may need to punch them separately - just make sure they all line up!
-
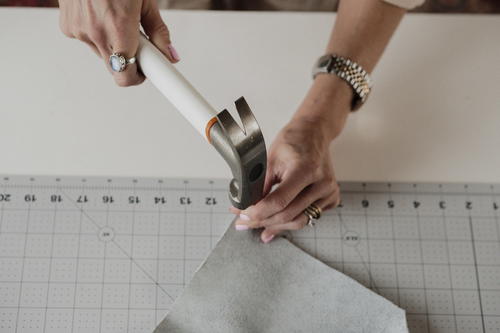
Step 3. Insert snap. Follow the directions on your snap kit to insert the male snap on the bottom of clutch. It will fit snuggly into the holes you just made in step 2. Once inserted, use the hammer to secure.
-
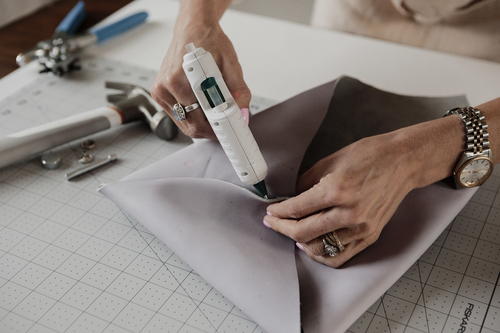
Step 4. Glue seams. Use your glue gun to glue the bottom seams together, leaving the top flap open. This step makes this project even easier!
-
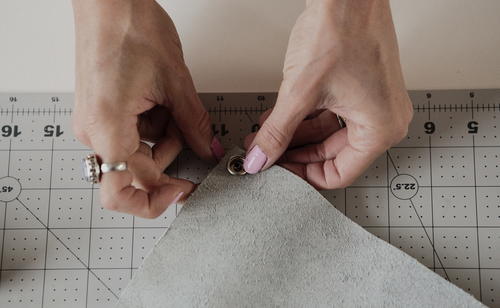
Step 5. Punch a hole. Use the leather punch to make a hole in the top flap. Be sure to place it far enough above the corner so that the entire snap will fit. This hole will need to match up with the first snap you inserted in step 3.
-
Step 6. Insert snap. Repeat Step 3, but this time follow the instructions to add the female snap to the top flap. Use the hammer again to secure the snap to the flap.
-
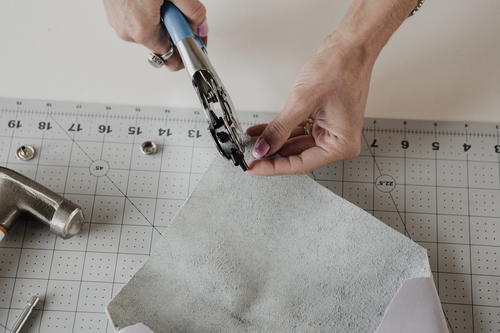
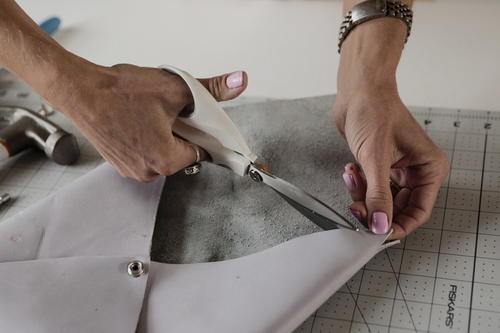
Step 7. Trim corners. Using the shears, trim the top two corners to smooth down the fabric when folded.
-
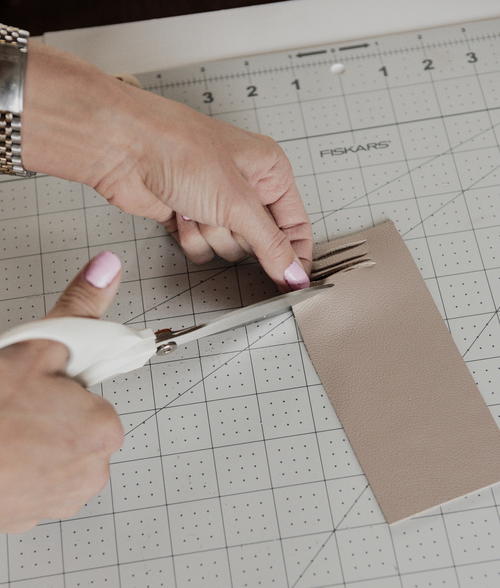
Step 8. Cut tassel material. Cut a 3" x 4" piece of leather for the tassel. You can use the same color to create a monochromatic look or try a new color to add more vibrancy.
-
Step 9. Cut fringe for tassel. Using the shears, cut strips about 1/4" wide into the leather, stopping about 1/2" from the top.
-
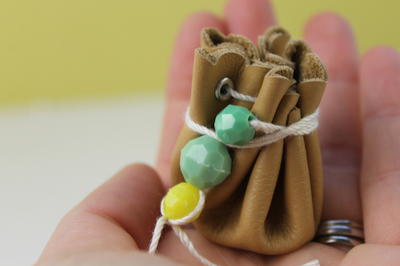
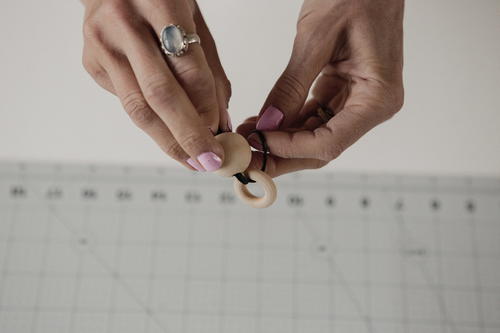
Step 10. String the bead. Loop a length of wax cord and string through the wood bead. Then, loop the wax cord around the wood ring.
-
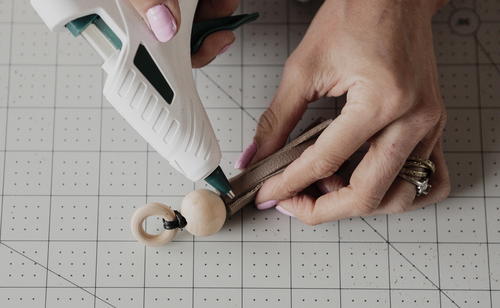
Step 11. Assemble the tassel. Place the wax cord tail at the end of your cut fringe – be sure the bead is close to the tassel material. Glue together and roll the tassel. The wax cord will end up in the middle of the tassel to help hold its shape.
-
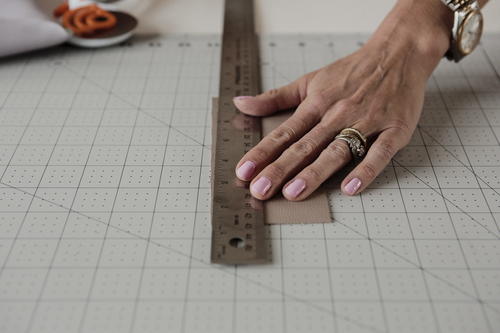
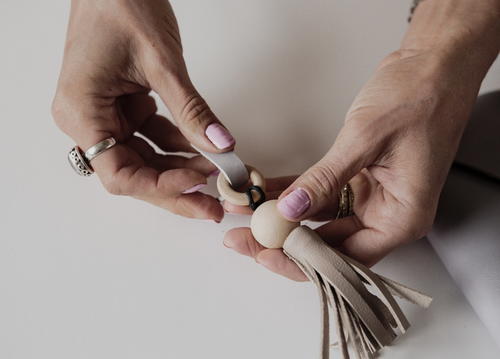
Step 12. Cut a tassel attachment. Cut a strip of leather to wrap around inside the wood ring and attach to the flap. Mine was about 1/4" wide and about 3" long.
-
Step 13. Cut a slit in the top flap. Gently fold the top flap in half, being careful to keep your material even. Make a small cut, unfold and cut more if necessary. This should fit the tassel attachment snuggly without puckering.
-
Step 14. Secure tassel. Add glue to the tassel attachment under the flap. This bag is perfect for a special occasion or can add a pop of color to a look for a night out.
-
Step 15. Enjoy!


Have you ever crafted with leather? What did you make?
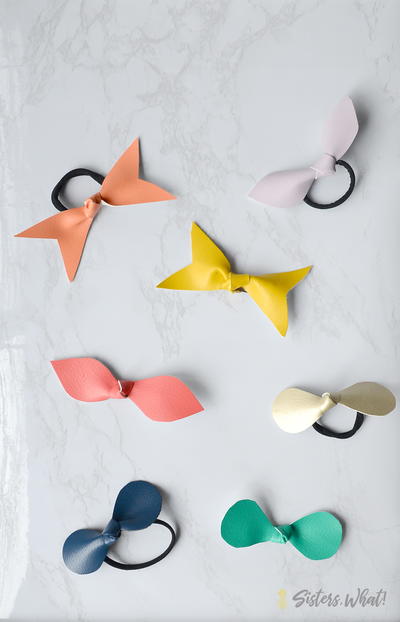
Read NextNo Sew Leather Hair Ties