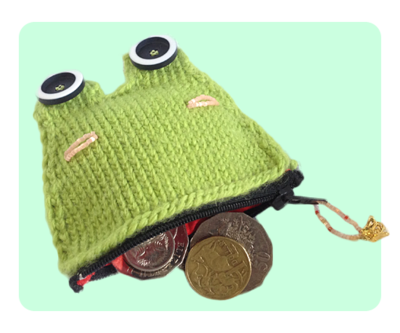
Frog Coin Purse
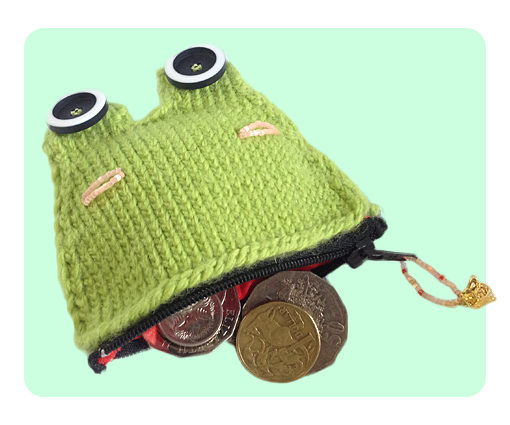
"This knitting project combines a little bit of sewing skill in installing the fabric lining and the zippers. The frog coin purse has a zipper where the mouth is located. I used straight needles so it's not difficult to make, and I have also included video tutorials in my website to help anyone who may be stuck."

Knitting Needle Size3 or 3.25 mm
Yarn Weight(3) Light/DK (21-24 stitches to 4 inches)
Gauge1 stitches, 2 rows, 3 inches. Gauge isn't used as it doesn't need to fit.
Materials List
- Lincraft Superwash 8ply in 3005 (dye lot #774749)
- Gold thread for sewing charm
-
2x buttons of your choice for eyes
- scraps of pink thread & pink beads for cheek
- Tapestry needle
- Sewing needle
- Crown charm for the end of the zipper
- Red Satin fabric lining
- Black zipper
- Red thread for sewing fabric lining
- Green thread for sewing buttons
Body (back side):
Starting from the bottom, CO 30 sts.
Row 1: K
I like to slip my 1st stitches to create a nice even edge which also makes it easier for seaming later on.
Row 2: Slip 1st stitch Purl wise, then P until end of row.
Row 3: Slip 1st stitch Knit wise, then K until end of row.
Repeat Row 2 & 3 until Row 10. So you will be working with the St St and at row 10, you will finish with Purl.
Row 11: Slip 1st stitch Knit wise, SSK, K24, K2tog, K1 (28 sts total)
Row 12: Slip 1st stitch Purl wise, then P until end of row.
Row 13: Slip 1st stitch Knit wise, then K until end of row.
Row 14: Slip 1st stitch Purl wise, then P until end of row.
Row 15: Slip 1st stitch Knit wise, SSK, K22, K2tog, K1 (26 sts total)
Row 16: Slip 1st stitch Purl wise, then P until end of row.
Row 17: Slip 1st stitch Knit wise, then K until end of row.
Row 18: Slip 1st stitch Purl wise, then P until end of row.
Row 19: Slip 1st stitch Knit wise, SSK, K20, K2tog, K1 (24 sts total)
Row 20: Slip 1st stitch Purl wise, then P until end of row.
Row 21: Slip 1st stitch Knit wise, SSK, K18, K2tog, K1 (22 sts total)
Row 22: Slip 1st stitch Purl wise, then P until end of row.
Row 23: Slip 1st stitch Knit wise, SSK, K16, K2tog, K1 (20 sts total)
Row 24: Slip 1st stitch Purl wise, then P until end of row.
Row 25: BO
Cut yarn.
Body (front side):
To knit the front side, repeat the pattern for the back side above from Row 1 – Row 24. But instead of binding off at row 25, we want to make the eyes. Right now you have 20 sts total in your needle, we will be working on these live stitches separately. We will start with the first 8 stitches to form the first eye.
To Knit the Eyes
- Slip 1st stitch Knit wise, K7.
- Rurn your needle around, Slip 1st stitch Purl wise, P7
- You are now back at the beginning, turn your needle around, Slip 1st stitch Knit wise, M1L, K6, M1R, K1 (10 sts total)
- Turn your needle around, Slip 1st stitch Purl wise, P9
- You are now back at the beginning, turn your needle around, Slip 1st stitch Knit wise, K9
- Turn your needle around, Slip 1st stitch Purl wise, P9
- You are now back at the beginning, turn your needle around, Slip 1st stitch Knit wise, SSK, K4, K2tog, K1 (8 sts total)
- Turn your needle around, Slip 1st stitch Purl wise, P2tog tbl, P2. P2tog, P1 (6 sts total)
- You are now back at the beginning, turn your needle around, Slip 1st stitch Knit wise, SSK, K2tog, K1 (4 sts total)
- Turn your needle around, P2tog tbl, P2tog (2 sts total)
- You are now back at the beginning, turn your needle around, K2tog (1 st remaining)
- You are now at the top and just finished shaping the eyes. You now want to bring that last live stitch down so it’s not so far away from all the remaining stitches. To do this, you will pick 5 stitches on the left edge and everytime you pick a stitch and you have 2 live stitches on the right needle, you will pass one stitch over so there is only 1 live stitch remaining at all times.
- Once you reach the bottom, BO 4 sts until you have 8 live stitches remaining. Now you are ready to do the second eye! To do the second eye:
- (Skip slipping the 1st stitch as you already have the first stitch on your right needle). K7
- Repeat Step 2 – 11.
- When you are at the top, you now want to bring that last live stitch down by picking stitches from the right edge instead of the left so the eye will mirror each other.
- Making up Step-by-Step: (*Important* Before you join the pieces together, block all knitted materials. To block, simply spray lightly with cold water and block materials into shape and pin them to a towel and leave them to dry.)
- Sew beads for cheek using 2 strands of pink thread (see: ”https://www.youtube.com/watch?v=D_zTTraQHdc”)
- Sew the buttons for eyes using 2 strands of green thread
- Frog with one eye sewn on
- Cut 2x fabric linings to the same shape as the back side of the body, but make the length of the bottom slightly longer as it will need to be sewn to the zipper.
- Cute fabric linings for frog coin purse
- Overlock the fabric linings
- Shorten the zipper if you need to, but don’t cut it off yet. (from here on, refer to video below)
- Using 2 strands of red thread sew both fabric linings to the zipper
- With the zipper on the wrong side and the fabric lining right side is outside, using 2 strands of red thread, whipstitch the zipper area over and over to secure it.
- Turn so the zipper is on the right side and the fabric lining wrong side is outside, using 2 strands of red thread, sew the 3 remaining sides using running back stitch.
- If you haven’t done so earlier, weave all ends of our knitted green frog.
- Time to sew both of the knitted green frog to the zipper using 2 strands of green thread.
- Finally, sew the remaining 3 sides shut using 2 strands of green thread, being careful not to sew the fabric lining by accident.
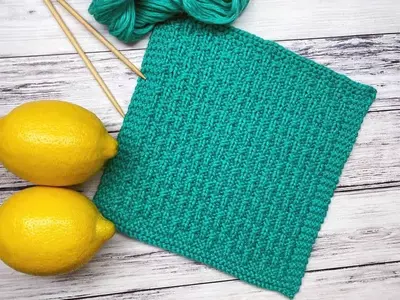
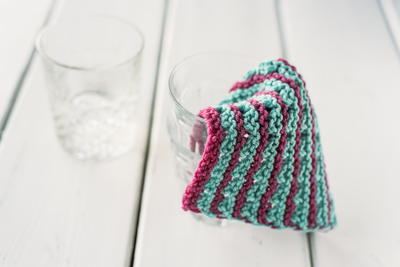
Read NextBasketweave Knitted Dishcloth
Your Recently Viewed Projects
Thanks for your comment. Don't forget to share!
quanahs 5032097
Mar 08, 2016
What a sweet little pattern. I don't know if kids play marbles anymore but this would be a perfect marble bag for a little boy. Do you all remember hanging around on the playground as a kid trying to best the rest of the marble players? Little girls would probably enjoy this little purse too.
Report Inappropriate Comment
Are you sure you would like to report this comment? It will be flagged for our moderators to take action.
Thank you for taking the time to improve the content on our site.