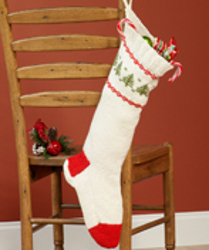
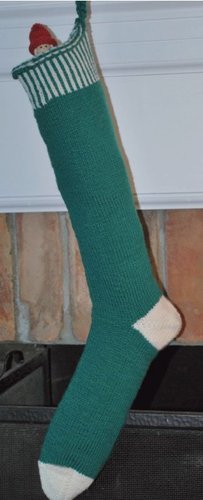
Striped Christmas Stocking
Knit Christmas stocking patterns are perfect for the holidays. This Striped Christmas Stocking from Authentic Knitting Board will help create a festive atmosphere anywhere you place it - on the mantel, next to the tree or hanging outside on your front door.

Materials:
- Yarn: 215 yards of DK weight yarn in MC and 45 yards of DK weight yarn in CC. Schuss-Plus yarn in Holly Green and White was used in the sample.
- Knitting Loom: AKB Sock Loom
- Notions: Tapestry Needle, Knitting tool, Crochet hook (size I), Two pieces of scrap yarn in a contrasting color (optional)
Gauge: Not important
Abbreviations: FS-Flat Stitch, CO-Cast On, BOBind
Off, MC-Main Color, CC-Contrast Color
Pattern Notes:
The FS was used on this stocking. It is important to make sure that you do not pull the yarn too tightly. If you do, the stitches will be very difficult to pick over. To help make the FS looser, after picking over the stitch, pull the stitch away from the pin slightly. If you have too much trouble with tight stitches, use the knit stitch instead of the FS. When creating the short rows in the heel and toe, lift the wraps over before you lift the stitch over on the wrapped pins. This will give the sock a nicer look. The toe of the sock can be closed in a couple of different ways. You may close as directed in the DVD, by binding the sock off and then sewing the opening closed. An alternative method is to slip the first half of the stitches on to
a contrasting piece of sock yarn. Slip the second half of the stitches onto another piece of sock yarn. Cut the working yarn, leaving a long tail. Thread the yarn tail onto a yarn needle. Starting with the first stitch (the side closest to the toe) take
the needle through the stitch from right to left, being careful not to catch the waste yarn. Now, take the needle over to the other piece of scrap yarn and through the first stitch on the second side, going from left to right. Continue weaving from one side to the other until all the stitches have been woven. Remove the scrap yarn, gently pull on working yarn to tighten the toe stitches and weave in loose end. I prefer the second method as it makes a less bulky seam. If desired, the Kitchner Stitch (used in hand knitting) could also be used, but is a bit more complicated. There are many online tutorials on this method if you are interested in trying it.
Instructions:
- CO entire loom with MC(green) (60 pins), using the Cable CO.
- Attach CC(white) by knotting it loosely with the MC and leaving a tail to weave in later. You will be removing this knot, so just make it firm enough so that the yarn won’t pull loose on the first couple of rows. After that, you can remove the knot.
- Using the FS and the CC, wrap and hook over every other pin, starting with Pin #1. Take the yarn behind the pegs that are not being wrapped. Now, using the FS and the MC, wrap and hook over every other pin, starting with Pin #2. Take the yarn behind the pegs that are not being wrapped. When picking up the MC, remember to bring it under and then over the CC. This will twist the yarns and keep a hole from forming. Remember to wrap loosely. Repeat until 2.5” have been knitted from the edge.
- Cut CC, leaving a tail for weaving in, and knit in FS with the MC until stocking measures 12” from beginning.
- Attach CC, but do NOT cut MC. Turn heel using short row shaping and the CC as described in the DVD or in the link in the Pattern Notes section. You will have 10 unwrapped stitches when finishing the decreasing.
- Cut the CC, leaving a tail for weaving in, twist MC and CC, and then knit in FS with the MC until foot measures 7”. Cut MC, leaving a tail for weaving in.
- Attach CC and knit 1 row, then repeat the heel instructions to form the toe.
- Close toe as described in the Pattern Notes section.
- Using a size I crochet hook and 4 strand of MC, crochet a chain 4” long.
- Attach to stocking at center back.
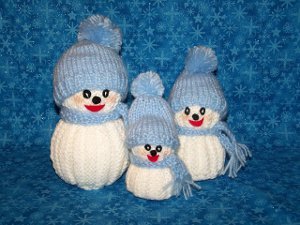
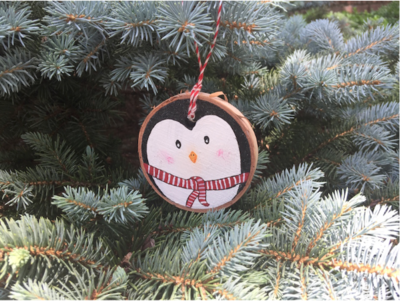
Read NextKnit Snowman Family


Thanks for your comment. Don't forget to share!
Pipann 7931193
Jul 08, 2013
This must be the worse pattern I've come across .No idea what you are talking about ,and I've been knitting for yrs.Do not not have any pattern just for plain knitters.
fayeda 1396492
May 27, 2011
It is fairly clear but I don't know how to do the FS (flat stitch) Can I just knit 2 purl two in alternate colours to get the stripe effect ?
Report Inappropriate Comment
Are you sure you would like to report this comment? It will be flagged for our moderators to take action.
Thank you for taking the time to improve the content on our site.