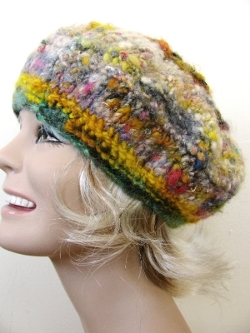
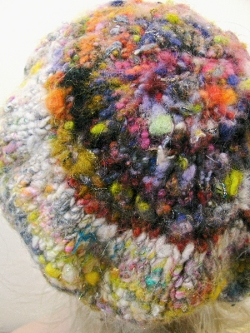
Mismatched Yarn Felted Beret
Use bulky mismatched yarn, preferably handspun yarn, to knit and felt a beret. This free form knitting pattern is a great way to use up scrap yarns and experiment with color combination. Great for men and women alike, this crochet hat pattern can help you clean out your yarn stash in practically no time at all.

Materials:
-
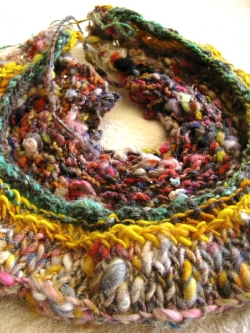
1-3 or more bulky spun 7-9 WPI or so mismatched skeins of different textures. The idea isn't to match everything. Try contrasts, or what you think are weird color combo's. Like lime and pink, with a hint of tan. *Handspun yarn is very easy to find, especially on www.etsy.com just get anything as long as it's not superwash! Picture below of handspun yarn available from www.atomicblue.etsy.com.

- Size 13, 18" circular knitting needles (I use the bamboo Takumi style)
- Oversize embroidery needle
- Thin elastic cord (I used black, because it blended in)
- Basic knitting skills
- Patience, and fearlessness
Instructions:
This is a free form pattern. It helps if you’ve made berets before, but is not essential. This was the first beret I’d ever made! If you feel the beret is not going the way you want, either take out the stitches and start over, or just go with it. I cast on about 80 stitches. Filling the whole 18" flexible cord. (Although I used circular needles, I can’t “knit in the round” yet!.) I like circular needles, because you can hold up your project, and try on what you're working on.)
-
I worked in the basic garter stitch, K for a few rows, then I changed my yarn color. I knitted the ends in, and then K for a few more rows. Then, I switched to the handspun yarn I made (about 52 yards).
-
I K one row, P the other it for the classic stockinette for about 3", then I started gradually decreasing. It was this hat that I taught myself to decrease. See I told you, it was a off the map adventure!
-
I added in another yarn, as I had run out of my handspun. This yarn was a plied style yarn that I bought from knittydirtygirl. I started, to decrease every 5 stitches. The a row or two later, I started decreasing every 4, then gradually every 3 until I had a rough beret shape.
-
I then cast off, using a bit of tension to make my stitches gather up a bit. Leave a 8-10" tail of yarn intact on your beret.
-
Using the embroidery needle, thread the yarn tail, and gather the top of the beret using long slip stitches. Gently gather it together, I made two passes for strength. I then, used the tail from casting on stitch up the side of the beret. I stitched from the inside, using the mattress stitch, which is kind of like lacing up a shoe. I tried on the beret, realizing it was too big! I took some elastic cord, wrapped it about my head to see what length to cut it, adding about 4". I then stitched it from the inside using a large slip stitch.
-
It was about 11pm at night, and everyone had gone to bed. I decided to do a load of towels, and throw the beret in the washer with them. I let the washer do it's first agitation cycle, and looked over the beret. It was near to the size I wanted, so I took a risk. I let it go the rest of the way! (it's very important to check your project during the first round of agitation) When finished, I took it out, and blocked it flat. The next day, I had a half dried gorgeous hat!
- Try the free formed idea, you don't have to make the same exact beret. Just keep in mind my project shrunk about 30% so try a bigger design, and test it out in the washer, you might be pleasantly surprised!
Read NextFaveHat