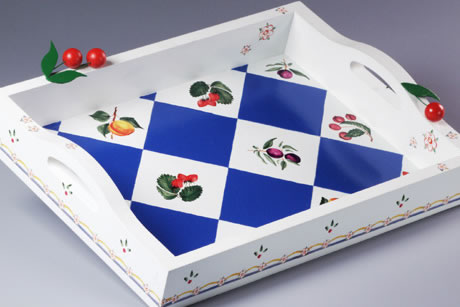
Fruit Serving Tray
Retro fruit designs and checkerboard pattern create a tray perfect for a hostess gift or for entertaining at home.
Materials:
- Krylon Indoor/Outdoor Primer - White (#51315)
- Krylon Indoor/Outdoor Paint - White (#51501)
- Krylon Indoor/Outdoor Paint - True Blue (#51910)
- Krylon Indoor/Outdoor Paint - Banner Red (#52108)
- Krylon Indoor/Outdoor Paint - Emerald Green (#52016)
- Krylon Crystal Clear Acrylic - Clear (#1303)
- Wood Serving Tray
- Fruit pattern Rub-On’s (project used Chartpak® #CSL021 Orchard Opulence)
- 3 – Wood balls, 1 inch diameter
- 20 gauge green wire, (1) 3-1/2 inch and (1) 1-1/2 inch lengths
- Dremel® Moto-Tool® with 1/16 inch bit and a 1/8 inch spherical cutter
- Coping saw or similar tool
- Craft Glue
- Newspaper
- Sandpaper – fine and very fine grain
- Tack cloth
- Painter’s tape – 2” wide
- Pencil
- Scissors
- Ruler
- Wire cutters
- Craft knife
Instructions:
-
Read and follow all instructions and warnings on all paint products.
-
Painting Tray: Sand all surfaces with fine and then very fine sandpaper. Wipe clean with tack cloth.
-
Spray entire tray with White Primer. Let dry.
-
Spray entire tray with Gloss White. Let dry completely.
-
Adding Checkerboard to tray bottom: Cover entire bottom of tray with painter’s tape, overlapping each strip about 1/4". Using ruler and pencil, draw checkerboard pattern on tape, referring to photo for design. Carefully cut through tape along all of the drawn lines with a sharp craft knife. Pull off every other square to create painting surface. Use a fingernail to press firmly along all tape edges to be sure edges are firmly adhered.
-
Mask sides of tray inside and out with painter’s tape. Spray tray with several light coats of True Blue until checkerboard pattern is covered completely. Let dry completely and carefully remove tape.
-
Adding Rub-Ons: Follow instructions on packaging and refer to photo. Cut a border strip with leaf and dot attached. Apply to outsides of tray with bottom of border 1/4" from bottom of tray. Select and apply fruit images inside white squares. For corners and partial squares, trim fruit images to fit. Apply floral images to insides and top edge as desired.
-
Spray tray with several light coats of Crystal Clear.
-
Making Cherries: Using drill with 1/16" bit, drill a 3/8" deep hole in wood balls. Using 1/8" cutter, make an indentation in ball at hole. Wipe any dust away with tack cloth. Place balls on toothpicks, spray with Banner Red. (Tip: to make painting the wood balls easier, stand toothpicks in a scrap of Styrofoam and put wood balls on the toothpicks). Let dry completely.
-
Draw 3 leaves on the craft stick included in the Rub-On package. Use coping saw to cut them out. Wipe any dust away with tack cloth. Spray both sides of each leaf with Emerald Green. Let dry completely.
- Fold the 3 1/2" length of wire so that when a cherry is glued in to each end they are offset. Glue green wire stems and leaves to cherries and cherries to top edge of tray. Let dry.
For more project ideas, please visit www.krylon.com/projects.
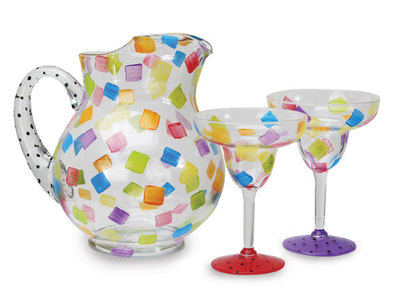
Read NextRetro Pitcher and Glasses