Rugged Camper Cooking Set
Use stash yarns to create a sturdy heat-resistant wool mitt and panhandle cover for camping. The mitt and panhandle cover are easy knitting patterns for beginners, and these practical knit items will really last. This thrifty set makes a perfect gift for Father's Day or the other guys on your list. This project comes to us from Marie-Jolie of Permission to Unwind. You can also download a printable pdf for this project [pdf].


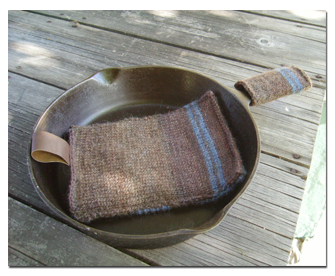
Wool Mitt
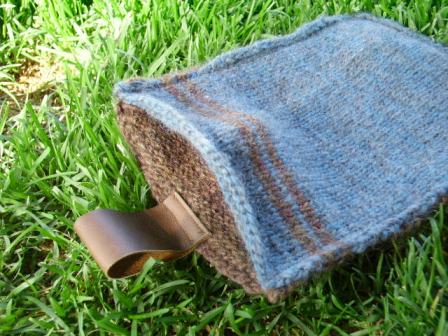
This rugged, no-frills camp mitt is surprisingly durable and heat-resistant. Its double thickness provides added protection as a potholder, or can be used as a mitt with the hand slipped inside. This, in combination with the Panhandle Cozy, could be given with a cast-iron skillet and a bag of gourmet fish fry breading or chili seasoning to round off the gift for your favorite camper.
Note: This set is worked on smaller needles than would normally be suggested for this weight of yarn. This is done intentionally. The denseness of the design provides better heat protection, therefore larger needles are not recommended.
Materials:
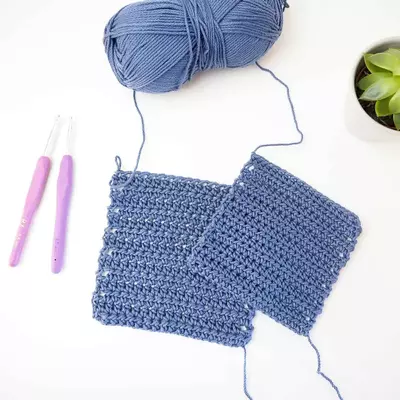
- Two partial skeins of worsted weight yarn: 1 blue, 1 brown –or- Instead of using worsted yarn, knit with 1 strand of fingering weight and 1 strand of light worsted or DK weight (in similar colors), held together as one strand to create a heathered look. This is a great way to use stash yarns!
MC (Main Color): Blue
SC (Secondary Color): Brown
- Size 5 straight needles
- 1 small piece of leather 1 ¼” wide x 5” long (I only use leather in projects if I am re-purposing it from another source- any medium weight leather will work)
- Sewing machine, or yarn needle
Instructions:
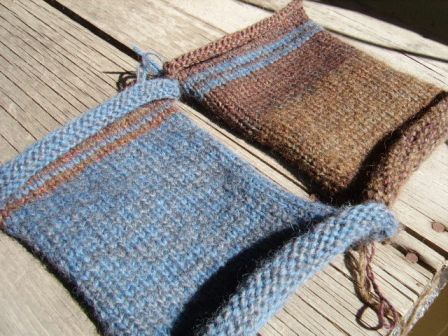
- Cast on 30 stitches in MC and work in stockinette stitch (knit the right side rows, purl the wrong side rows) for 6 ½”. Attach SC and work two rows, then reattach MC and knit one row, then work two more rows in SC (cutting or reattaching yarn as necessary), and finish the piece with 1 more inch of MC and bind off.
- Repeat this process, reversing the colors, to create the opposite side of the mitt. You should have two finished pieces roughly 6” x 8 1/4” long.
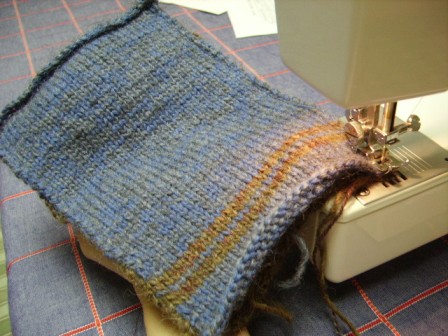
- Weave in the loose ends on the wrong side. Place wrong sides together, and stitch ¼” around the outer edges on three sides, leaving one short end open.
- This can be done on a regular sewing machine with a neutral color thread (I used brown), or with a yarn needle matching yarn.
- Fold leather band in half and stitch in the center of the back side of the mitt (with the leather piece on the inside of the mitt), approximately ½” below the top edge. Stitch a double seam for added durability.
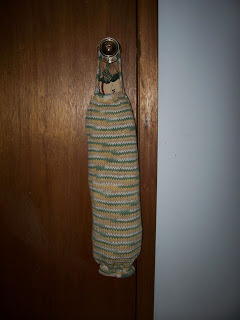
Panhandle Cozy
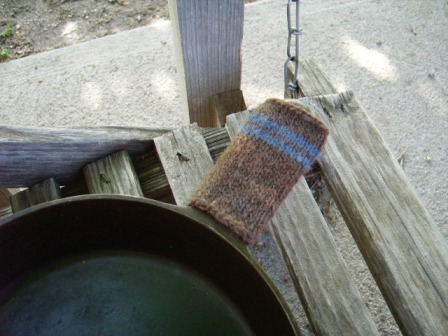
A simple solution for hot handles. Tell your favorite guy it’s a “hot handle grabber”, but between you and me- it’s a Panhandle Cozy.
Materials:
- Size 4 double point needles
- Same yarns as listed above
- Size E or F crochet hook, if desired
Instructions:
- Cast-on 25 stitches in MC and knit once across.
- Join in the round, dividing stitches roughly equally among three needles and working in the round with a fourth needle.
- Knit every round in MC for four rounds, then attach SC and knit two rows, then work one row in MC, then two more rows in SC.
- Cut off the SC strands with a few inches dangling (to weave in later), and continue to knit in the round using MC until piece measures 3-3/4”.
- Bind off all stitches knit-wise.
- Weave in ends, and use crochet hook (if desired) with an additional strand of MC yarn to crochet a stabilizing edge around the bottom of the cozy. This is an optional step.
Read NextEasy Dishcloth Knitting Pattern
Your Recently Viewed Projects
Thanks for your comment. Don't forget to share!
quanahs 5032097
Mar 16, 2016
I think the oven mitt would be a great way to practice knitting in the round on double pointed needles or with the magic loop technique. That way you would end up with no side seams and would only have to close one end. Simply cast on 60 stitches and break into 20 stitches per needle. I would also go with a double strand of wool then give the mitt a hot bath and a trip through the dryer to felt it which will increase the thickness of the fabric.
DJM Bowmanville O N CANADA
Jun 05, 2010
Please be very careful what kind of yarn you use for these items. I saw a display at a wool show where they showed how fast different yarns burn. Some burn very quickly. It would be a good idea to check you yarn by putting a match to a short piece, maybe holding it with tongs and have a dish of water handy. Do this before you knit these items as camp stoves have open flames.
Report Inappropriate Comment
Are you sure you would like to report this comment? It will be flagged for our moderators to take action.
Thank you for taking the time to improve the content on our site.