Wish Upon A Star Crib
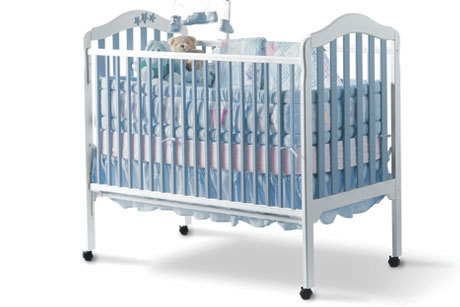
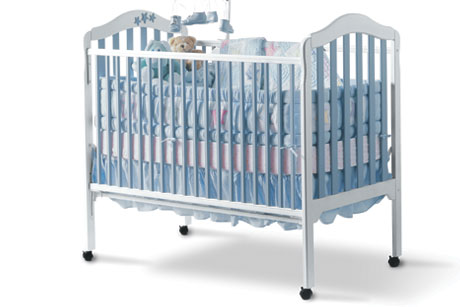
Fix up a crib with non-toxic paint and colorful star accents. If you're looking for cute baby room ideas, you can't go wrong with this Wish Upon a Star Crib. Discover a new way to wake up an old hand-me-down. Whether you're looking for baby girl room ideas or preparing for the arrival of a new little guy, this is a fun and functional project you can complete with plenty of time to spare. Feel free to experiment with paint and change colors to match your decor. When your little one arrives, you'll love spending time with them in their nursery and won't be afraid to tuck him or her in for the night.
Materials:
- Krylon H2O™ Latex - White Primer (#2614)
- Krylon H2O™ Latex - Arctic White (#2606)
- Krylon H2O™ Latex - Blue Danube (#2619)
- Krylon Glitter Spray - Shimmering Silver (#402)
- Wood Crib
- Wooden Star cutouts: 3 medium
- Newspaper
- Low tack masking tape
- Wood glue
- Tack cloth
- Sandpaper
Surface Preparation:
- Unfinished Wood: Sand smooth and wipe clean with a tack cloth. Apply Primer to seal the surface.
- Previously Painted Wood: Clean any dirt and loose paint from surface. Sand any imperfections smooth and wipe clean with tack cloth. Apply Primer to seal the surface.
- Previously Stained Wood: Clean any dirt and loose paint from surface. Sand any imperfections smooth and wipe clean with tack cloth. Apply a stain-blocking primer, such as Krylon H2O Primer, to prevent the wood stain from bleeding through your paint finish.
Instructions:
- Place primed crib on newspaper to protect your work area.
- Spray entire crib with several light coats of Artic White. Let dry completely.
- Mask off edges of crib (everything you want to remain white) with low tack tape, leaving railings exposed on sides, head and foot of crib. Spray railings and stars with several light coats of Blue Danube. Let dry completely.
- Spray stars with several light coats of Shimmering Silver to add sparkle to your project. Let dry completely.
- Determine placement of stars (refer to photo for example) and glue in place. Let glue dry completely.

