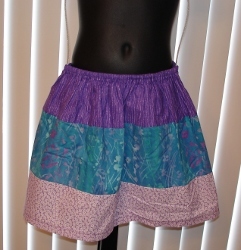
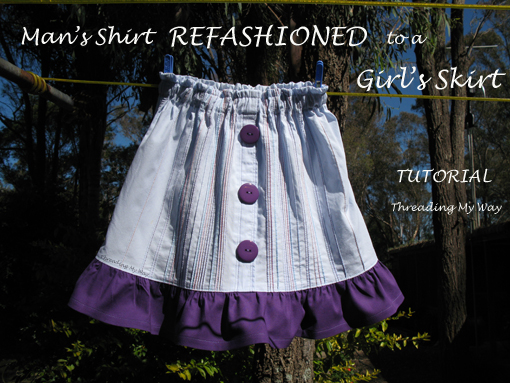
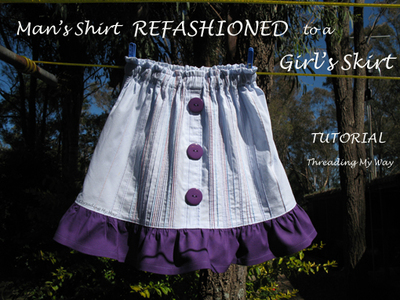
Cute Button Shirt to Skirt
You can make a skirt that any little girl will love by refashioning and sewing an old button shirt. Your little girl will have a look no one can copy with this DIY skirt.
Materials:
- Man's dress shirt
- 3/4" elastic
- Fabric for ruffle
- Buttons
Notes:
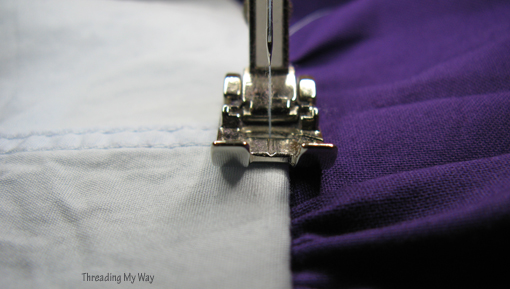
The front of this shirt has rows of pintucks sewn with different coloured threads. They only show on the inside of the shirt. The outside of the shirt shows the pintucks as seams. I want to feature the pintucks, so I am turning the fabric around and am using the inside of the shirt as the outside of the skirt.
The seams on the shirt are flat felled, so both sides look OK.

You will need to take two measurements before you begin.
- waist
- waist to calf (or desired length of the skirt)
Instructions:
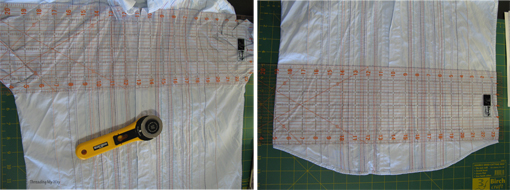
1. Cut shirt:
- Cut the shirt at the underarm.
- Cut off the curved edge at the bottom
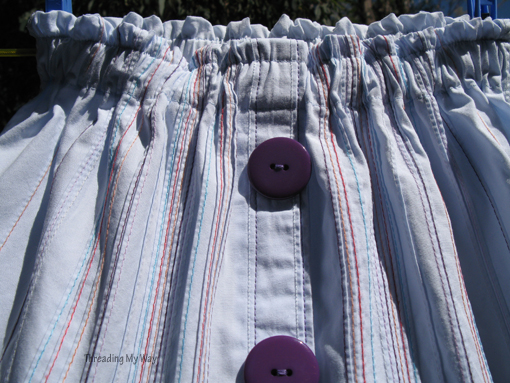
2. Close buttonhole placket:
- Remove buttons
- Stitch the buttonhole placket closed with two rows of stitching. I have used a contrasting coloured thread to fit in with the coloured threads on the pintucks.

3. Casing for the elastic:
- Turn under 1/4" and press or stitch.
- Turn 1.5".
- Baste (hand sew) to hold in place.
- Stitch as close as you can to the hem of the casing, leaving a 2" opening to feed the elastic into.
- Sew another row of stitching 1/2" from the top of the skirt.
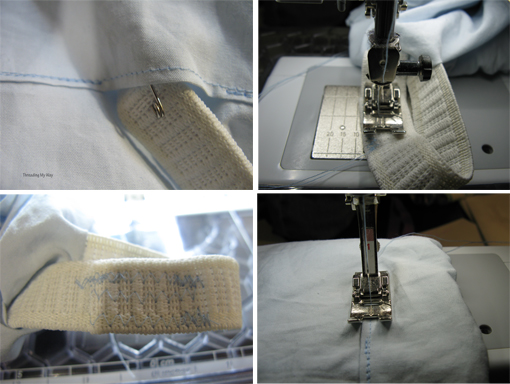
4. Inserting the elastic: I cut the elastic about 1" to 1.5" shorter than the waist measurement.
- Attach a safety pin to the end of the elastic.
- Feed the elastic into the casing through the opening, making sure you leave the end sticking out of the opening.
- Remove the safety pin and stitch the elastic ends together. Overlap about 1".
- Push the ends back into the casing.
- Spread out the elastic so it is even all the way around.
- Stitch the gap closed.
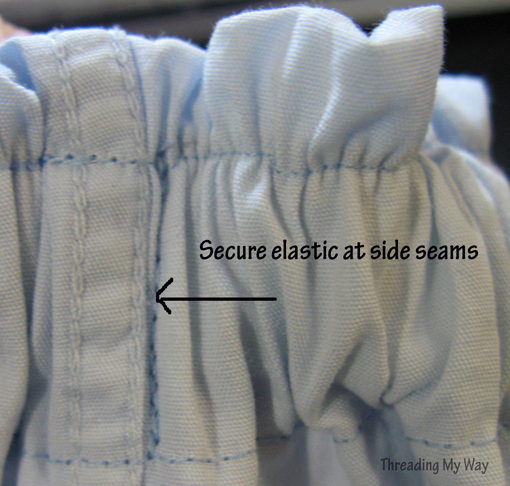
- Sew through the casing and elastic at the side seams. This will prevent the elastic from twisting in the casing.
5. Determine the length:
- Ruffle + skirt = length from waist to calf
- Decide how wide the ruffle will be.
- Cut the skirt to the desired length.
- Cut extra for seam allowances and hem.
6. Ruffle:
- Cut the ruffle 1.5 to 2 x the width of the skirt. Mine is 1.5 x the width.
- Join the short ends of the ruffle to form a tube. Neaten edges.
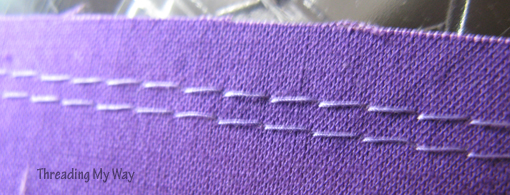
7. Gathering stitches:
- Set your machine to the longest straight stitch (machine basting stitch)
- Do NOT backstitch and leave the threads hanging.
- Sew a row of stitching 1/4" from the edge, going from one side seam to the second side seam on the ruffle
- Sew a row of stitching 1/4" from the edge, going from the second side seam back to the first side seam on the ruffle
- Sew a second row of stitching 3/8" from the edge, going from one side seam to the second side seam on the ruffle
- Sew a second row of stitching 3/8" from the edge, going from the second side seam back to the first side seam on the ruffle.
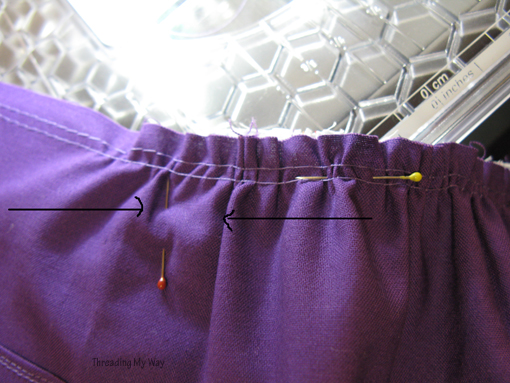
8. Pin ruffle to skirt:
- Mark the centre front and centre back of the skirt.
- Mark the centre front and centre back of the ruffle.
- With right sides together, pin the ruffle to the skirt at the side seams, the centre front and the centre back.
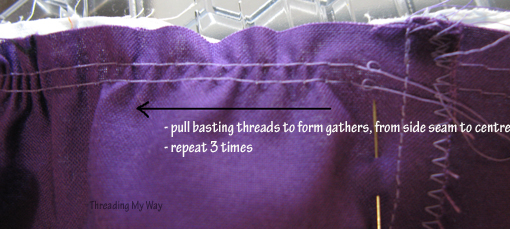
9. Making the gathers:
- Pull the two bobbin threads and move the fabric towards the centre front.
- Pull until the fabric is the same length as the skirt.
- Tie a knot in the two bobbin threads.
- Even out the gathers and pin.
10. Repeat three times pulling the threads from each side seam to the centre.
11. Sew ruffle to skirt:
- With needle and thread, sew the ruffle to the skirt, with long stitches (hand basting stitch).
- Remove all pins.
- Set machine back to normal stitch length for straight stitch.
- Sew between the two lines of machine basting.
- Remove both rows of machine basting (bobbin and upper threads) and the hand basting.
- Neaten the edges by overlocking (serging) or zig zag.
Sewing two lines of machine basting, makes it less likely for the thread to break as you pull the gathers and it also makes it easy to sew over the gathers so they remain neat.

12. Topstitching:
- Press the seam towards the skirt.
- Set machine stitch slightly longer than normal. My topstitching is 2.8.
- On the right side of the skirt, sew a row of stitching about 1/8" from the seam. This will hold the seam in place and gives a nice finish.
13. Hem the bottom edge of the ruffle:
- Turn under 1/4" and either press or stitch.
- Turn under 1/2" and stitch.
14. Buttons: As they are only decorative, I have chosen buttons which are obviously larger than the original buttons. These buttons came from a pre-loved cardigan, which is now in the dress up box. Sew the buttons onto the buttonhole placket, covering the buttonholes.
Your refashion is finished!

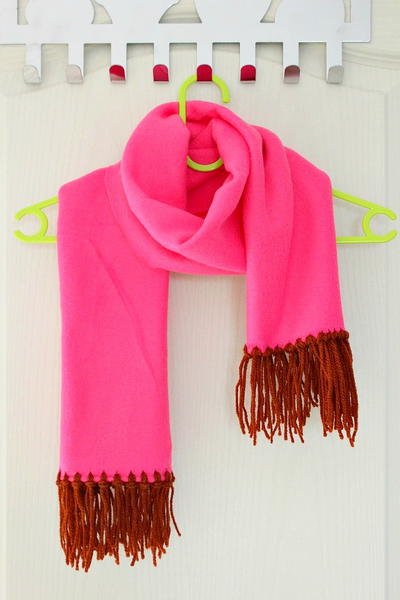
Read NextNo-Sew Fleece Scarf
Your Recently Viewed Projects
Thanks for your comment. Don't forget to share!
flowergirl
Jul 20, 2018
What a neat idea for a kid's skirt. It saves you material for the skirt which is so small anyways and you can get the shirts from good will. I think I'd love a plain shirt because I can embroider it and add some patches to make it trendy. The buttons make this shirt look super cute though.
Report Inappropriate Comment
Are you sure you would like to report this comment? It will be flagged for our moderators to take action.
Thank you for taking the time to improve the content on our site.