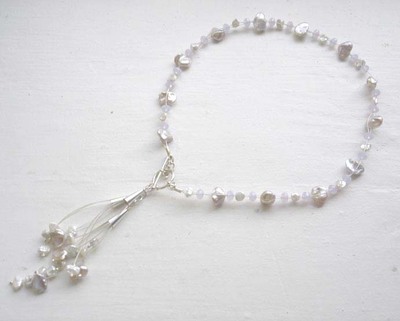
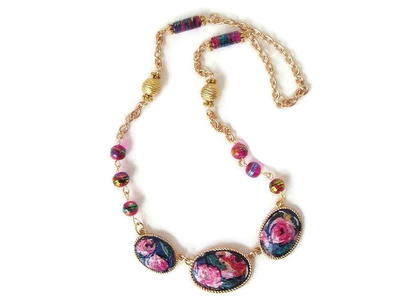
Triton's Net Necklace Project
This spectacular necklace captures iridescent potato chip freshwater pearls and opalescent violet crystals in a diaphanous net of Beadalon™ silver color wire. Wear the toggle clasp and cascading pearls to the side or to the front for a simply stunning effect.

Materials:
- 16 8x12mm soft pink potato chip freshwater pearls
- 27 6mm white potato chip freshwater pearls
- 25 6mm violet opal Swarovski™ rondelles
- 3 357B-010 silver plated cones
- 1 423G-020 EZ Crimp silver plated toggle ring
- 5 341B-003 4mm silver plated jump rings
- 3 310B-013 silver plated eye pins
- 14 Size #1 JFC1S silver plated crimp beads
- JW03S .018 7 strand silver color Beadalon™ wire
- 202E-020 Designer Ergo Chain Nose Pliers
- 202E-030 Designer Ergo Round Nose Pliers
- 202E-005 Designer Ergo Cutter
- JTEZCRIMP Designer EZ Crimp Pliers
- JTCRIMP1 Designer Crimper
Steps:
- Remove wire sections from spool as follows: 2-20” sections, 3-4” sections, 3-5” sections and 1-6” section. Place to side.
- Attach the toggle circle end of the EZ Crimp to the two 20” wire sections to create the core necklace using EZ Crimp pliers. Clip off excess wire inside of crimp with cutters.
- Weave the first wire into a 6mm potato chip pearl, weave both wires into a pacific opal rondelle, weave the opposing wire from the first pearl into a 12mm pearl, weave both strands into a rondelle...continue this pattern alternating between the two sizes of pearls with the two strands going into the rondelles.
- The rondelles serve as anchors to create tension in the design. As you weave, slide the beads together to maintain the tension between them. If you slide them too close, the design will be too stiff. Keep some drape or fluidity to the design. Each beaded section from rondelle to rondelle should be approximately ¾”.
- When you reach the final rondelle thread on one last 12mm pearl and slide both strands into the bar end side of the toggle clasp EZ crimp end. Use EZ Crimp tool to secure wires and clip off excess with cutters.
- The waterfall is made up of cones threaded with beaded wire strands that run through eye pins. To create the cones begin by using a crimp bead at the end of the strand to keep the pearls from sliding off.
- Place 1-3 pearls on the strand and thread it into the eye pin. Place 1-3 more pearls on the other side of the wire and finish the end with a crimp bead.
- Create two cones with two beaded wires and one cone with three.
- Slide the beaded eye pins into the cone moving the wires inside with the beaded ends hanging down. (Note: You can make the ends even or vary the lengths.)
- Use round nose pliers to create a coil topped eye pin dangle for each cone.
- Create a chain of five 4mm jump rings. Thread the top ring into the circle end of the toggle clasp.
- Attach the beaded cones to the 1st, 3rd and 5th rings.