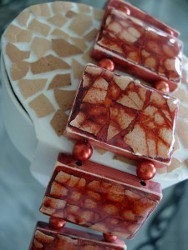
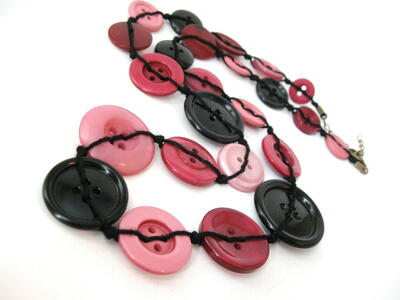
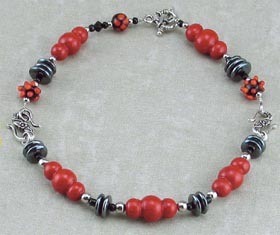
Sizzling Hot Beaded Necklace
Metallic red and glass lamp work beads help this Sizzling Hot Beaded Necklace stand out from the crowd. Free necklace patterns will help you get creative and discover new talents. Best of all, the design isn't too complicated, so you won't lose your mind trying to complete it. The best part of this project is that you make the beads yourself. Make beaded jewelry patterns require hard-to-find beads that can get lost of damaged, but in this case, you create the beads using clay. Get creative and think outside the box - you won't regret your extra time and effort.

Materials:
- AMACO Polymer Clay & Craft Oven
- AMACO Professional Bead Roller with Baking Pins, Set #3 (used for tri-oval bead shape shown)
- AMACO Professional Bead Baking Rack
- FIMO Soft Polymer Clay — Metallic Red
- FIMO Gloss Lacquer
- Ruler with Raised Numbers (recommended)
- 32" Length, 49 Strand Bead Stringing Wire from Beadalon
- 2 Silver “S” Hook Style Bracelet Clasps
- 4 Silver Attachment Rings for “S” Hooks
- (or 9mm jump rings)
- Silver-Toned Round Toggle Clasp
- 3 Black and Red Glass Lamp Work Beads
- 14 Hematite 12mm Disk Beads from Darice
- 16 Black Size “E” Beads
- 10 Silver (4mm) Round Beads
- 6 Silver (5mm) Round Beads
- 1 Black (5mm) Bicone Bead
- 12 silver Crimp Beads
- Crimping Pliers
- Wire nippers
Instructions:
- Preheat oven to 265ºF (130ºC). Knead Metallic Red FIMO to condition. Follow instructions provided with bead rolling tool to measure clay size needed for each bead shape. Ruler with raised numbers is pressed onto clay filled top of bead rolling tool to mark. Remove clay then cut to length needed.
- Roll measured clay sections in bead roller to form five 13 x 27mm tri-oval beads. Insert piercing pin as directed to create hole needed for stringing. Place beaded piercing pins onto AMACO Professional Bead Baking Rack and bake in oven for 40 minutes. Remove from oven and let cool completely.
- Brush beads with lacquer while still on baking pins. Place back onto baking rack to suspend until dry. Repeat to apply two additional coats of FIMO gloss lacquer. Let dry completely then remove from baking pins. Tip: Remove any small traces of lacquer from baking pins by rubbing lightly with fine grit sandpaper.
- String two crimp beads 1/2" from end of a 12" length of beading wire; place wire end through loop on round bracelet clasp and back through both crimp beads. Use crimping pliers to flatten crimp beads approximately 1/16" from loop; securing the bracelet clasp to wire.
- String beads onto beading wire for this section of necklace in the following order: Black “E” bead, 4mm silver bead, lamp work bead, 4mm silver bead, Black “E” bead, Black 5mm bicone bead, Black “E” bead, 4mm silver bead, Metallic Red tri-oval clay bead, 4mm silver bead, Black “E” bead, three 12mm hematite disks, Black “E” bead, 4mm silver bead, lamp work bead, 4mm silver bead, then two crimp beads.
- Insert wire end through an “S” hook attachment ring (or 9mm jump ring) then back through crimp beads. Pull excess wire until crimp beads are approximately 1/16" from attachment ring and flatten crimp beads with crimping pliers to end this section. Trim excess wire with wire nippers.
- Follow instruction #4 to begin second section of necklace; substituting an attachment ring (or 9mm jump ring) for the round bracelet clasp.
- String beads onto wire for second section as follows: Black size “E”, two 12mm Hematite disks, Black “E”, 5mm Silver, Metallic Red trioval clay bead, 5mm Silver, Black “E”, two 12mm Hematite disks, Black “E”, 5mm Silver, Metallic Red tri-oval clay bead, 5mm Silver, Black “E”, two 12mm Hematite disks, Black “E”, 5mm Silver, Metallic Red tri-oval clay bead, 5mm Silver, Black “E”, two 12mm Hematite disks, Black “E”, then two crimp beads. Follow instruction #6 to attach an “S” hook attachment ring (or 9mm jump ring) to end this section.
- Using remaining 8" length of beading wire, follow instruction #4 to begin third section of necklace; substituting an attachment ring (or 9mm jump ring) for the round bracelet clasp.
- String beads onto wire for third section as follows: 4mm Silver bead, lamp work bead, 4mm Silver, black “E”, three 12mm Hematite disks, Black “E”, 4mm Silver, Metallic Red tri-oval clay bead, 4mm Silver, Black “E” bead then two crimp beads. Follow instruction #6; substituting bar shaped toggle end of round clasp for the attachment ring used on previous sections.
- Connect second section to first and third sections using “S” hook. For best results press “S” hook closed to prevent necklace from becoming unhooked. Use toggle ends to connect necklace when worn.
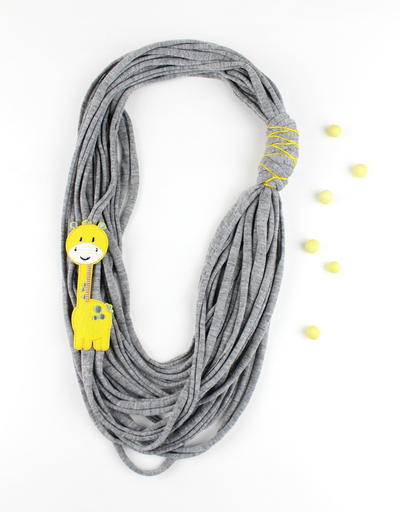
Read NextNo Sew Fabric Necklace
Your Recently Viewed Projects
Thanks for your comment. Don't forget to share!
Marilyn B
Jun 03, 2017
Thank you for the super detailed instructions on making this fantastic looking necklace. It does seem that it might take some effort to put together, as well as gathering the materials and supplies, but the final result is stunning and when you make it yourself, you can tweak it a bit to suit your look, especially regarding the overall length. Super pretty project!
Report Inappropriate Comment
Are you sure you would like to report this comment? It will be flagged for our moderators to take action.
Thank you for taking the time to improve the content on our site.