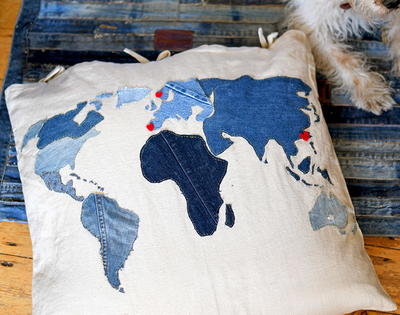
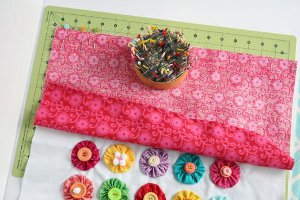
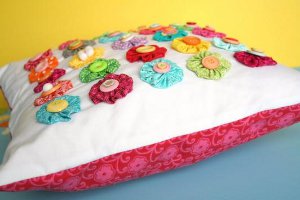
Yo Yo Pillow
 Perfect for your living room or bedroom, these Yo Yo Pillows from Fiskars are great for adding some color and texture to your decor. Grab a whole bunch of fabric scraps and a handful of your favorite buttons to make these adorable pillows. Even beginning sewists can make these colorful pillows. This is a great way to use up those yo-yo's that you have lying around your craft stash...and these pillows also make great gifts for people moving into their first home or apartment.
Materials:
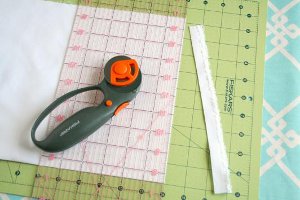
- Cutting Mat 12" x 18"
- Coastal Colors Acrylic Ruler 6" x 24"
- Straight Rotary Blade 45 mm
- The Original Orange-Handled Scissors 8
- Fabric squares (or ready made yo-yo's) if you need to buy fabric, you'll need 1/8 of a yard of several coordinating patterns of fabric
- Buttons
- Pompoms
- Pen
- Smallest circle from the Super Sized Circles Shape Templates
- Embroidery needle
- 2-3 skeins of embroidery floss
- 2 1/2 yard cuts of fabric (for pillow)
- Fabric Pins
- Two 18" X 12" pieces of fabric
- Pillow stuffing or pillow form
- Sewing machine and supplies
- Iron
Instructions:
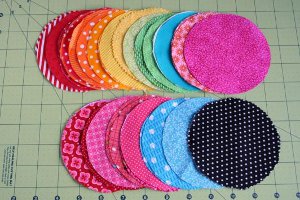
- For the pillow shown you’ll need to trace and cut 25 circles of fabric. I recommend making a few extras, in case you don’t like the combination of patterns when you go to lie out your yo-yos, so you can quickly replace one or two.
- To stitch up each yo-yo, cut a 12" length of embroidery floss--you’ll be using all 6 strands. (Note: You can substitute 24" of all purpose-sewing thread and use it doubled.) Thread one end of your floss onto your needle leaving a 3" tail. Tie 2 or 3 knots in the other end.
- Hold the circle of fabric in your non-dominant hand with the wrong side facing up. Holding the needle in your dominant hand, insert the needle into the fabric approximately 1/8" from the edge.
- Bring the needle back up through the fabric approximately ¼" from the point of insertion. Again, it isn’t an exact science so it can be a little more or a little less than ¼" spaced stitches.
- Continue stitching with a ¼" straight stitch all the way around the perimeter of the circle. As you go along your stitches will start to gather a bit simply because your thread is only 12" long.
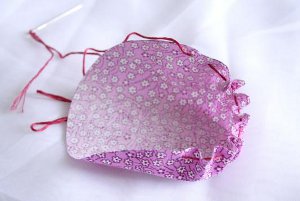
- When you reach full-circle, you’ll want to pull your thread taut to gather the stitches, allowing the material to gather in the center.
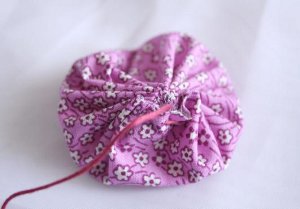
- You will need to loosen and adjust a bit to flatten the yo-yo out for a more visually appealing yo-yo.
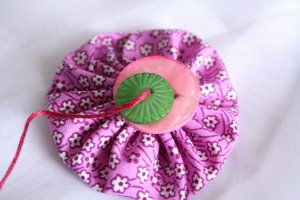
- Add buttons or pom-poms using the same thread to sew them on. Knot thread off with a few knots on the back of the yo-yo. Trim excess thread.
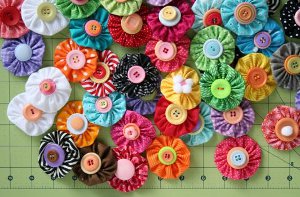
- Now repeat that 24 more times until you end up with a whole mess of yo-yos.
- Set those aside and prepare your pillow fabrics.
- First you’ll need two ½ yard cuts of fabric. For the pillow front you’ll want to select a bottom-weight, canvas, or duck cloth fabric. For the back you’ll need to select a coordinating home décor or corduroy print.
- Cut off the selvage edge and square up your fabric for the pillow front to 18" square using your cutting mat, quilting ruler and rotary cutter.
- Fold your square in half vertically, then again horizontally to find the center of your fabric. Pin your first yo-yo in the center, then place two more on each side of the center spaced approximately ½" apart to create a horizontal line of yo-yos.
- Repeat going vertically.
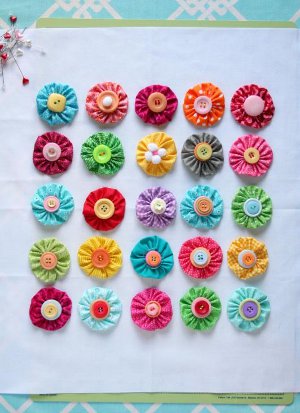
- Then use your ruler to fill in the rest of the grid. Once all are place, you can baste each yo-yo, one at a time to the pillow front, making sure to just catch the back of the yo-yo fabric in your stitches so they remain unseen from the front.
- For the pillow back fabric you need two pieces cut to 18" x 12" to create your slipcover/envelope closure.
- Hem one 18” side on both pieces by folding over ¼" of the fabric and pressing with a warm iron, then folding over ¼" again. Using your machine, stitch a straight stitch along the length of the fold.
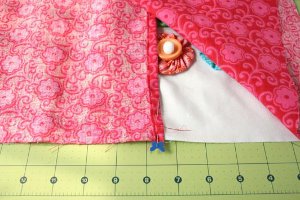
- Then, pin one un-hemmed side of the back to the pillow front right sides together.
- Next, flatten out the crease, and pin the hemmed ends to the pillow and fill in the sides with more pins.
- Repeat for the remaining piece.
- Then, start stitching around the perimeter of your pillow with a ½" seam allowance. I recommend starting where the envelope closure overlaps so your backstitching when you start and stop will add extra reinforcement.
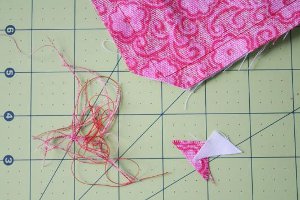
- Once your have your seam sewn, clip your corners and threads. Clipping the corners helps create a crisp point at the corners when you turn your pillow right-side out. Inserting the point of your scissors or the blunt end of a skewer into the corner and gently pushing outward will help create your point.
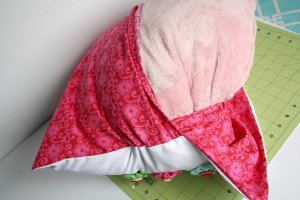
- Now, insert your pillow form into your slipcover and fluff!
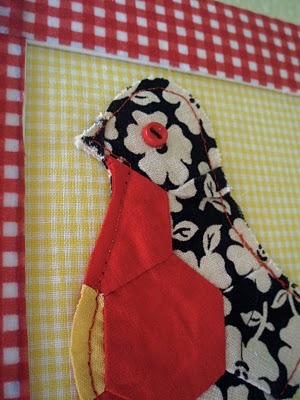
Read NextFabric Scraps Chicken Wall Art
Your Recently Viewed Projects

Thanks for your comment. Don't forget to share!
shilohdana
Feb 11, 2017
I am a big fan of yo-yos and made a full size quilt of them a few years ago. This pillow is so cute and would be the perfect addition to the bed that has the quilt on it! Yo-yos are fun to make and the perfect "keep your hands busy" craft for watching movies. I like addition of buttons too, it makes the yo-yos really special.
pineyday 2661592
May 06, 2014
I am thinking about making this pillow. What size are the circles? Thanks
Melissa Ryan
May 07, 2014
Hi PineyDay...thanks for your comment. It appears that the designer didn't specify the circle sizes. We suggest measuring the width of your pillow and then dividing by how many circles you'd like to appear in each row...so if your pillow is 12" wide, and you want 6 circles per row, the circles shouldn't be more than 2". Hope that helps!
akwilla8 8276794
Sep 09, 2013
love it will be doing a few of these for my newly decorated room thanks for this
mindy53
Nov 18, 2012
I love this idea-I made a lot of yo yos out of leftover fabric for a quilt-now I will make pillows with the leftovers-thanks for sharing
Report Inappropriate Comment
Are you sure you would like to report this comment? It will be flagged for our moderators to take action.
Thank you for taking the time to improve the content on our site.