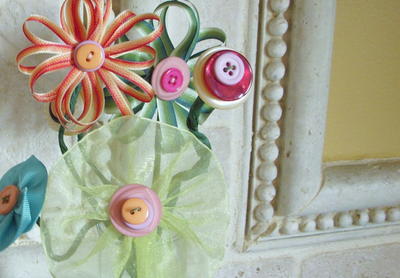
Spring Bouquet: Ribbon and Button Flowers

In the Designer’s Words: “Is spring taking it's own sweet time in your neck of the woods? Well, it is here. I crave color and life; I want to see green grass and flowers! On this sunny 27 degree day in Pittsburgh, I have to settle for some crafty flowers instead. Do you have ribbon or buttons lying around? Okay, let's get to work.”
If you are looking to add flower crafts to your DIY home décor, these stunning little flowers are a great way to spring up your space. You do not have to water these flowers, but you will certainly want to show them a lot of love. Absolutely adorable and subtlety colorful, the Spring Bouquet: Ribbon and Button Flowers is a stunning DIY craft that is perfect for your mantle, coffee table, or kitchen table. Made entirely out of ribbons, buttons, and a few other materials, you probably already have all you need to make these DIY flowers stashed in your craft room.

Find even more how to make flowers tutorials and floral DIY crafts in our spring-inspired collection of craft project ideas. You are sure to find a beautiful bloom to love in 81 Printable Flower Patterns.
How to Make DIY Flowers
Materials:
- Ribbon
- Buttons
- Floral wire
- Floral tape
- Needle
- Thread
- Scissors
- Glue gun
Note: You can use any width of ribbon; just vary the number of ribbons used to adjust for thicker or thinner ribbon.
Steps:
- Here, I'm using a thin ribbon, so I cut 8 pieces, 6 inches long. Arrange the ribbons as shown with the centers overlapping. Put a small stitch or two through the center to hold them in place.

- Now, take the free ends and bring them into the center, like this, and secure with another stitch or two to hold them in place.

- Secure a button or two to the center either with a stitch or hot glue.

- Bend the floral wire in half and slide it under the stitches on the back of the flower to form a stem.

- Wrap the wire with floral tape to finish

- The next style of ribbon flower uses a thicker ribbon. I used 1 inch grosgrain, but any style of ribbon will do. You can see in the bouquet I also used a 2 inch sheer ribbon and it worked out just as well.

- Sew a basting stitch along the edge of the ribbon, like this:

- When you pull on the thread, the ribbon naturally gathers to form a flower. See?

- Thread a piece of floral wire through the holes in the button(s) and slide it through the center of the ribbon "flower". You can dot some hot glue onto the back of the button to secure it to the ribbon. Then, wrap the wire with floral tape, as before.

- Bonus Button Flower Tutorial: Stack your extra buttons in interesting combinations and thread them onto the extra floral wire for a button flower to accent your ribbon flower bouquet. Wrap the wire with floral tape as described previously.

- Place your bouquet on the nearest shelf, sip some lemonade, and dream of spring...


Read more about Jennifer, author of this craft tutorial, a Featured Craft Designer at FaveCrafts!
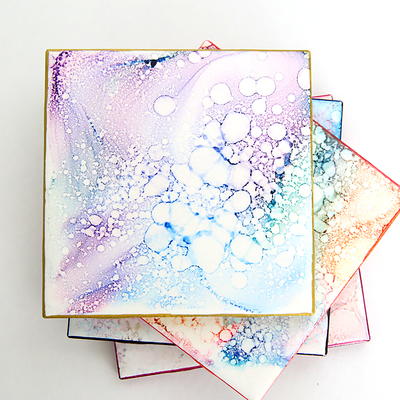
Read NextMason Jar Lid DIY Coaster
Your Recently Viewed Projects
Thanks for your comment. Don't forget to share!
mulberrygalprinces s
Jul 08, 2016
Another inexpensive, easy and extremely cute idea. All my favorite words. I have drawers of ribbon and I can't say how many buttons or someone will come with a net and take me away. Let's just say it's in the four digit numbers. Thank you for sharing this great idea
pugmaster 0366913
Jul 09, 2013
What a great idea. I have just the ribbon to use. Thanks for sharing that. Cant wait to try.
Vicki123
May 28, 2012
I like the first flower will be sure to make some with youth summer activites
carolynhoxton 4606 948
Apr 02, 2011
This is such a clever idea, and most sewers or crafters have both buttons and ribbon on hand, I may have to invest in florist wire, that that is pretty simple, thanks so much for sharing, these are darling. Carolyn H
geriatriclime 3573 712
Mar 20, 2011
Chances are, if you have leftover buttons and ribbon, you have some leftover lace trim. Using the same procedure as above for grosgrain ribbon, gather the lace and secure with a few stitches. Put a button or bow in the center and you have another flower. You could also sew velcro to the back and use in the hair of children. These are so cute.
anjjce63
Apr 25, 2010
i would to see more craft projects like this one. i volenteer once a week they do crafts and need help doing the crafts they make. This is a wonderful site to get ideas for this group. THANK YOU VERY MUCH anjjce63
DK Jones
Apr 21, 2010
I am brand new to this site. Just registered this morning. If all instructions are put together this well, I will have no problems. This looks fun and interesting. Thanks.
Patuli
Apr 13, 2010
I thought the photos were very well done with this article and the the instructions were simple yet thorough. Well done!
deer RACK Crafts
Apr 13, 2010
I made a spring vest with these type of flowers on them. Just stitch them on the fabric where you like and make stems out of fabric and stitch on. It made a real nice vest to ware for spring.
rosebud1950
Apr 09, 2010
Yeah! Let's see more projects like this one with step by step illustrations! Very helpful!!
Report Inappropriate Comment
Are you sure you would like to report this comment? It will be flagged for our moderators to take action.
Thank you for taking the time to improve the content on our site.