Thanksgiving Turkey Bead Earrings
Follow this step-by-step photo tutorial to create beaded turkey earrings perfect for Thanksgiving. You can also turn the beaded turkeys into wine charms. For more information about Rings & Things and where you can find the materials for these beaded turkeys, see Rings & Things. Once you learn how to bead turkeys, you will want to make a pair of earrings for each of your friends. Learning how to make beaded turkeys is a fun craft that will surely put you in the Thanksgiving spirit.

If you love beading projects and ideas, check out our massive collection of 101+ Free Beading Patterns for projects just like this one!
Materials:
- Japanese Seed Beads, size 11/0:
- #20-228-013, White Ceylon
- #20-228-021, Black
- #20-228-108, Topaz SilverLined (a shiny Gold color)
- #20-228-112, Smoky Topaz (a Brown color)
- #20-228-118, Smoky Topaz SilverLined (a shiny Brown)
- #20-228-191, Orange
- #20-228-258, Siam SilverLined (a Ruby color)
- #20-303-058, 7mm Bugle Beads- Gold SilverLined
- 100" #61-119, Nymo Cord
- 1 ea. #65-030-12, Needle, size 12 "Sharp"
- 1 pr. #34-223-2, Surgical Stainless Steel Ear Wire- Yellow
Instructions:
Images are bigger than actual size for clarity.
Making the body
- Using half the cord (50"), thread needle and loosely anchor a bead about 1" from the end of the cord by stringing any bead and tying it in place with a half-hitch (the knot that loosely anchors your shoes before you tie the bow). Do not knot firmly; this bead is supposed to come off at the end of the project. This anchor bead will make holding the project easier and stop beads from falling off. This will be considered the left side of the project.

- Starting in the widest part of the Turkey's body (Row 1), string 7 Topaz beads. Make a "Ladder Stitch". *Note: for the body, we'll just call the color of the beads Topaz (though it should be Smoky Topaz), so as not to confuse it with Smoky Topaz SL which are for the feathers.*

This stitch is the foundation for the Brick Stitch which is used for this earring. Push the beads towards the end of the cord, about ½" from the anchor bead. Now string back through the second bead from the end of the working cord (the end with the needle). Be sure to go through the left side of that bead.
- Now continue going through each bead in line. Be sure to go in the left side hole first. When finished, the working cord should be next to the anchor bead.

- Pull tight. Beads should now be in skinny row with their holes up and down.

Start the Brick Stitch
- The next row (Row 2) will have 6 Topaz beads. String a bead and take the needle through the cord of the above row, just between the 1st and 2nd beads. Gently pull partway tight, but make sure you can still see where the cord goes through the bead.
- Now string back down into that bead, going in the same hole that the needle just came out of. Gently pull tight.
- Pick up another bead and continue down the row until 6 beads are in the row. Notice this stitch decreases with each row.
- Repeat with Row 3; it will have 5 Topaz beads.
Making the legs
- Cord should now be coming out of the last bead on Row 3. From here, string 4 Orange beads, loop back up into the second bead, and out.
- String another Orange bead here, and then thread back through the 2 remaining beads and up into the second Topaz bead in Row 3. Pull tight so that the added bead pushes out past the others, making the heel of his foot.
- From Row 3, thread up into the third bead in Row 2, across to the fourth bead in, and back down to the fourth bead of Row 3, which is the second bead in from the right side.
- Again string 4 Orange beads to make the other leg. Bring in the bead for the heel, and pull needle into the last bead of Row 3.
Finishing the body
- From Row 3, work back up to the first bead in Row 1 on the left side, the side with the 1½" anchor piece. Tie a knot using the two cords and trim the old anchor cord. Be careful so you do not cut the working cord.
- Continue the Brick Stitch (working up now) with 6 Topaz beads for Row 4.
- Row 5 has 5 beads.
- Row 6 has 4 beads.
- Row 7 has 3 beads.
- Needle should now be coming out of the last bead in the left side of Row 7. This next row (Row 8) needs 4 beads, one at the beginning and end of this row. This is called "adding" beads. Start by stringing 2 Topaz beads, then thread the needle through the cord between the last 2 beads of the below row.
- Then go back through the hole of the second bead strung (go through the hole you came out of). Notice that this pushed the first bead out past the end bead on Row 7.
- Brick Stitch another Topaz bead and then "add" a Siam bead (for the wattle) to the end of this row. Do this by stringing the siam bead, then pulling needle down into the last bead in Row 7, out the side and back up into the Siam bead.
- Row 9 is a normal "decreasing" row, with a Siam, one Orange (for his beak), and a Topaz.
- Make Row 10 exactly like in steps 4c-e by "adding" beads. Use a Topaz, 2 Orange, and a Siam.
- The next row up (Row 11) will also need beads "added". This row has a Siam, 3 Orange, and a Topaz.
- And again with Row 12 "add" beads at the beginning and end. Use 3 Topaz and 3 Siam.
- Continue now with the normal Brick Stitch decreasing the number of beads in Row 13 to five.
-Row 13 has a Topaz, Black (for the eyes), a Topaz, another Black, and another Topaz.
-Row 14 has 4 Topaz.
-Row 15 has 3 Topaz.
Making the feathers:
- Cord is now on the left side of the Turkey's head. Work the cord down through beads of the head and body, coming out the bottom of the 1st bead on Row 2.
- Now string a Bugle bead, a Smoky Topaz SL, a Topaz SL, another Sm. Topaz SL, 3 White Ceylon, a Sm. Topaz SL, a Topaz SL, a Sm. Topaz SL, a Bugle bead, and another Sm. Topaz SL. Thread needle into the bottom hole of the end bead on Row 1, out of the top of the hole, and back into the Sm. Topaz SL, Bugle bead, Sm. Topaz SL, Topaz SL, and Sm. Topaz SL. Stop before going into the 3 Whites.
- Add 3 more Whites and work back down with a Sm. Topaz SL, Topaz SL, Sm. Topaz SL, Bugle, and 2 Sm. Topaz SL's. Attach to Row 5, and come back out the brown feather beads (stopping before the white beads).
- Continue the above steps, but the next group will have 3 Sm. Topaz SL's at the end and it will attach on Row 8.
- The next eight groups of feathers are all alike but will NOT have any Sm. Topaz SL beads at the bottom of the Bugle bead
- Attach feathers to the ends of Rows 11, 13, and 15.
- Add the 3 white beads to the top of the feather that came out of #15, and attach another feather to the cord between the 1st and 2nd beads on the top of Row 15. Instead of 3 White beads, string 5. This will be the center of the feathers, where an ear wire will be attached. Hook the other end of this feather to the thread between the 2nd and 3rd beads on that same row.
- Going down the opposite side of the turkey, attach a feather to the other end of Row 15 and one on Rows 13 and 11.
- This next group has the 3 Sm. Topaz SL beads at the end of the Bugle and it attaches to Row 8.
- A group with 2 Sm. Topaz SL beads is attached to Row 5, and one with only 1 Sm. Topaz SL at the end will go on Row 3.
- Attach the last feather to Row 2. It does not have a bead after the Bugle.
- To finish off the cording, Zig Zag the needle around through many beads in different rows, going up and down. This will secure the cord. Trim excess cord. *Note: Cording can also be added by doing this step, in case your cord is too short.*
- Attach feathers to the ends of Rows 11, 13, and 15.
Attach the ear wire by opening the loop at the bottom of the ear wire.
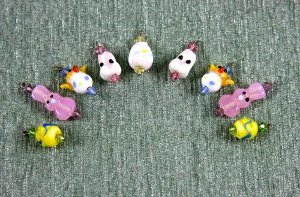
Repeat steps for other earring. The finished product: Beaded turkey earrings, another free jewelry project from Rings & Things
Now that you have found the perfect holiday accessory, we've gathered 19 Ideas for Your Thanksgiving Table Settings to help you put the finishing touches on your perfect Thanksgiving feast.
Your Recently Viewed Projects
Thanks for your comment. Don't forget to share!
dbstory
Oct 27, 2012
The detail in these directions are great! I can't wait to try them. Thank you!
Judie
Nov 26, 2009
Made these for my granddaughters...they loved them. gave my friends some they also loved them. All are wearing hem on Thanksgiving day....what a joy to give to others things that are made with love from the heart....God Bless you all. Looking forward to Christmas jewelry to make with see beads......
Crafter 17323
Nov 17, 2009
I made these earrings in hours. The directions were perfect and easy to follow. My mom, sister received earrings and her mother-in-law received a necklace of these adorable turkeys. Now I need to find a christmas earring pattern.
twinkle
Nov 09, 2009
its beautifyl..! looks easy and fun to make.. will try making it very soon
kittyjo
Nov 07, 2009
This little Turkey is adorable. Thank you. Maybe I will have me some made by next Thanksgiving
Report Inappropriate Comment
Are you sure you would like to report this comment? It will be flagged for our moderators to take action.
Thank you for taking the time to improve the content on our site.