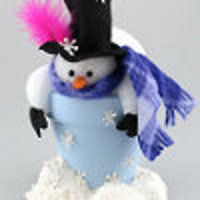
Clay Pot Snowman
Frosty is enjoying the winter scenery in this snowy wonderland. But for you there is also a reason to enjoy this craft - the hidden fresh-scent Renuzit air freshener.

Materials:
- STYROFOAM Brand Foam:
- Balls, one each: 4"; 2-1/2"
- Renuzit® LongLast® Adjustable Air Freshener
- Clay pot, 4-1/2"
- Wooden items: dowel, 3/8" diameter; craft stick
- Acrylic paints: light blue; orange
- White textured snow paint
- White pearl-finish dimensional paint
- Black felt, 9" x 12" sheet
- Blue plaid polar fleece, 1" x 15-1/2" strip
- Half-round black beads, 6mm, two
- Pink feather
- Lightweight cardboard, 8-1/2" x 11" sheets, two
- Gallon-size plastic bag
- Serrated knife
- Candle stub or paraffin
- Pencil
- Pencil sharpener
- Ruler
- Compass or small circle template
- Transparent tape or stapler with staples
- Metal tablespoon
- Medium flat paintbrush
- Disposable palette
- Water basin
- Paper towels
- Old toothbrush
- Household sponge
- Scissors
- Hand saw
- Sandpaper
- Low-temp glue gun and glue sticks
Steps:
- Tape or staple plastic bag over one cardboard sheet. Use pearl-finish dimensional paint to "draw" 18 snowflakes of various sizes (5/8" to 3/4") onto bag. Let dry.
- Paint clay pot light blue; let dry. Apply second coat; let dry. Open air freshener and place in pot.
- Wax serrated knife with candle stub or paraffin. Cut 2-1/4"-diameter circle from bottom of 4" foam ball; save foam scrap for snowy base. Use spoon to carve out foam from inside ball, until it fits over top of air freshener; save foam scraps. Place body over air freshener.
- Cut 2-1/2" foam ball in half; reserve one half for a future project. Place half-ball (head) flat side down on work surface. Cut a 1/2"-wide slice from one edge; newly cut edge is "chin." Slightly shape flat back of head to fit around body.
- Cut patterns and following pieces from black felt: hat crown, 2" x 5" strip; top of hat, 1- 5/8" circle; hat brim, 3" circle with 1" circle removed from center. Roll and glue hat crown into a tube, with 2" edges slightly overlapping. Glue inner edge of hat brim to inside bottom edge of crown. Glue top onto crown; let dry.
- Place hat onto head, leaving three-quarters of face exposed; glue to secure. At back of head, fold hat brim up and glue to head. Glue head to body with hat sandwiched between. Lower edge of head should rest 1/2" above pot rim. Glue feather to hat brim as shown.
- Press and glue flat side of beads into face for eyes. For nose, sharpen one end of dowel in pencil sharpener; sand lightly to remove sharp tip. Use hand saw to cut 1-1/2" from pointed end of dowel. Paint nose orange; let dry. Glue nose into head.
- For scarf, cut 1" fringe into each end of fleece strip, 1/8" apart. Tie scarf around neck.
- Cut 2" foam ball in half. Place half-balls rounded side up on work surface. Measure and cut 1-1/4"-wide section from center of each half-ball for arms. Use fingertips to round cut foam edges. To ensure arms will rest on pot rim, remove 1/4"-deep, 1"-long section from flat side of each arm, measuring from one end. Glue arms to body as shown with cut-out area against pot rim.
- Cut a 1/4"-deep slit into center bottom of each arm. Glue and insert mittens into slits with thumbs facing each other.
- Cut 4-1/2" x 5-1/2" oval shape from cardboard sheet. Glue bottom of pot to oval. Arrange and glue remaining foam scraps to cardboard around pot to look like snow mounds. Shape foam as needed with knife or fingers.
- Follow manufacturer's instructions to apply snow paint to mounds with craft stick; let dry. Carefully peel snowflakes from plastic and glue to hat, pot, and snow mounds.
- When gel is depleted, replace with a new air freshener.
®™ Trademark of The Dow Chemical Company ("Dow") or an affiliated company of Dow. For more project ideas, please see styrofoamstyle.com.
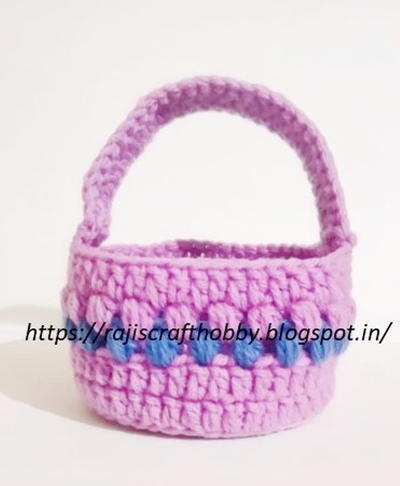
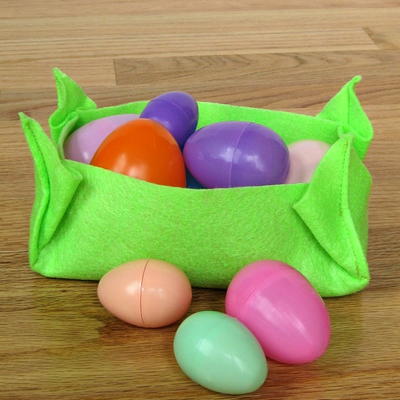
Read NextLast Minute Felt Easter Basket
Your Recently Viewed Projects
Thanks for your comment. Don't forget to share!
eveh
Nov 04, 2012
Wow...I can't beleive the list of supplies needed for this little craft. You can use things around the house for most of it and buy little snowflakes at the dollar store. This can be made in a much more simple way.
sweetmama3
Sep 28, 2011
I thing this article was great i am going to use it for achristmas party sweetmama3
Report Inappropriate Comment
Are you sure you would like to report this comment? It will be flagged for our moderators to take action.
Thank you for taking the time to improve the content on our site.