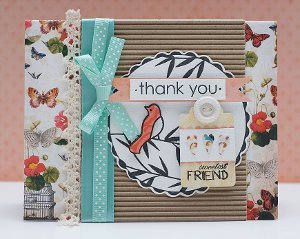
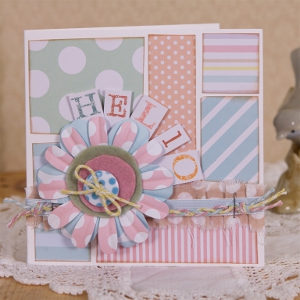
Daisy Block Card
The sweet pastels and shapes of this Daisy Block Card make it great for a first birthday card or a baby announcement. Handmade card ideas like this are easy to alter to suit your needs and work up quickly so they're great if you need to make more than one.
Materials:
- 12 x 12” Designstax (48pk) - Capsule - Spots & Stripes Pastels
- 20m Bakers Twine (3pcs) - Capsule - Spots & Stripes Pastels
- Large Buttons (4pcs) - Capsule - Spots & Stripes Pastels - Blue
- Fat Quarters (5pcs) - Capsule - Spots & Stripes Pastels
- Felt Bundle (7pcs) - Capsule - Spots & Stripes Pastels
- 1m Ribbon (6pcs) - Capsule - Spots & Stripes Pastels
- Big Bloomers (32pcs) - Capsule - Spots & Stripes Pastels
- Rub-on Alphabets - Vintage Notes
- Square Cards/ Envelopes (10pk, 300gsm) - White
Instructions:
-
Trim small panels of the various papers from the Capsule Pastel Spots and Stripes Designstax and arrange onto a square card blank leaving an even gap between them.
-
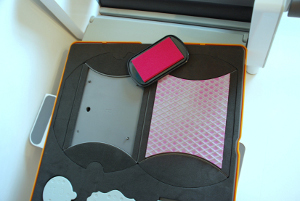
Ink the edges of each piece with brown ink and glue in place onto the card blank.
-
To make the frayed fabric strip. Snip into one side of the fabric with scissors and then tear the strip away. Repeat to make a border strip. Apply double sided tape to the reverse and pleat in an irregular fashion. Adhere to the card front.
-
Wrap coordinating Capsule ribbon around and secure on the reverse.
-
Knot the three colours of Baker’s Twine together and plait. Once at your preferred length, knot at the other end.
-
Affix to the card using a staple to secure decoratively on the right hand side.
-
Apply the Vintage Notes rub-on lettering to spell out your greeting onto individual strips of paper. Trim each to leave a ‘tail’. Tip – Trim the individual letters from the sheet before applying so you do not accidentally rub on neighbouring letters.
-
Layer some Capsule Big Bloomers together. Use glue to secure the letter strips behind the flowers so they appear to fan out from behind.
-
Freehand cut some circles of the pink and green felt. Layer on top of the Bloomers.
- Thread some yellow Baker’s Twine through the blue spotty button and add on top.
Read NextFoiled Butterfly Notecards