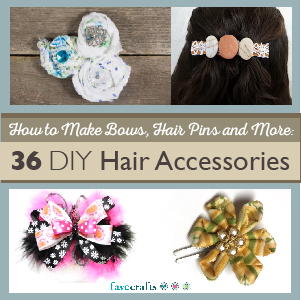
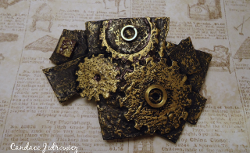
Steampunk Barette
If you're looking for crafts to make and wear for any occasions, consider creating your own Steampunk Barrette from Candace Jedrowicz. This project shows that you can create a DIY hair accessory that's both fun to wear and completely unlike anything else in stores.
Materials:
- Aleene’s Original Tacky Glue
- Hot glue
- Paint brush
- Brown paper bag
- Barrette back
- Candle
- Needle nose pliers
- 1-3/4″ round punch
- 1-1/8″ round punch
- 1/8″ hole punch
- 1/4″ hole punch
- Lighter
- Water
- Paper towel or moist wipe
- Metallic paste – I used Rub N-Buff gold
- Small washers, nuts and embellishments
Instructions:
-
Cut the paper bag into four 8″ x 8″ squares and glue together. Allow to dry.
-
Punch 1 circle using the 1-3/4″ punch and 1 using the 1-1/8″ punch.
-
Punch a 1/8″ hole in the center of the smaller circle and a 1/4″ hole in the center of the larger circle.
-
Use the 1/8″ punch to cut semi circles around the edge of the smaller circle. Keep the punch half off the paper edge to create a gear look.
-
Repeat using the 1/4″ punch make make the larger gear. I had a large circle gear cut that didn’t work out so I punched a smaller circle from it and the remaining piece looked very cool, so I added it to the assemblage.
-
Cut the rest of the paper into different shapes and play with them to get the look you want.
-
Glue all the pieces together and apply a generous even coat of glue to the whole front of the assemblage.
-
While the glue is still wet, hold the wet glue side over your lit candle, burning the glue until it’s dry. Expect sizzling and bubbles. The glue is dry when it’s no longer shiny. Work on a hard, non flammable surface and keep your water handy. If the piece catches fire and you can’t blow it out, set it down and spray with water.
-
Repeat on the back of the assemblage. Allow to cool.
-
Use a paper towel or moist wipe to gently remove the soot.
-
Gently bend the piece to match the curve of the barrette back and glue in place using both the hot glue and Tacky glue. Hold in place until the hot glue cools.
-
Glue your embellishments and accents where you want them.
- With a small amount of Rub-N-Buff on your finger and lightly rub over the surface until you get the look you want.
Read NextBlinged-Out DIY Headband