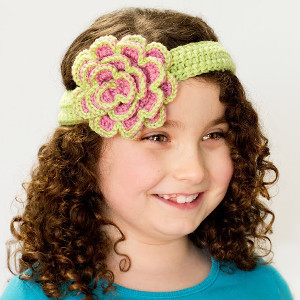
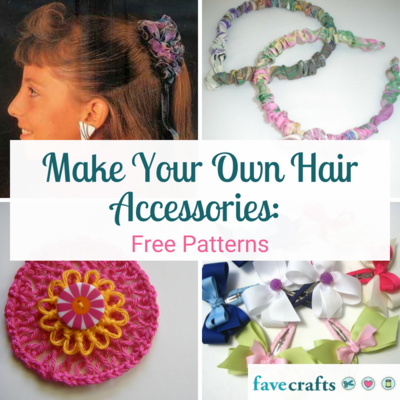
Easy DIY Crochet Headband
These two lovely patterns will show you how to crochet a flower as well as how to crochet a headband in no time at all. This Easy DIY Crochet Headband is a simple hair accessory that looks great in the springtime. With flowers in your hair, you'll feel footloose and fancy free, and your friends will love the cheeriness of your new accessory. Learning how to crochet flowers is a fun task that will put your mind at ease and help you feel ready to conquer any other tasks of the day.

Materials:
- 5.00mm Crochet Hook
- 4.50mm Crochet Hook
- 2 Colors of 50g 8ply {DK} Yarn
- Scissors
- Tapestry/Wool Needle
Size:
- This headband fits all sizes.
Instructions:
Headband
- Start of by taking your 5.00mm crochet hook and making a Slip Knot, then crochet 75 Chains. You can easily adjust this headband for a child by only chaining 61 chains.
- Row 1 Chain 2, skip 2 chains from your hook, then crochet Half Double Crochets all across into every chain.
- Row 2, 3, 4 Chain 2, half double crochet into every stitch across.
- When you've completed all the rows, connect the two ends of the band together to create a circle and Slip Stitch them together.
- Fasten off, and weave in loose ends.
Flower
- Start off by taking your 4.50mm crochet hook and making a Slip Knot, then crochet 76 Chains. {If you'd like your flower to be larger simply add sets of 3 chains till you've reached your desired length.}
- Row 1 Chain 2, skip 2 chains from your hook, then crochet Half Double Crochets all across into every chain.
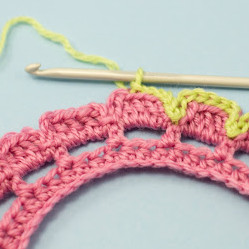
- Row 2 Chain 4, skip 2 stitches and then crochet a half double crochet into the third stitch.
- Chain 3, skip 2 stitches and then crochet a half double crochet into the third stitch. Repeat the last step all across.
- Row 3 Chain 3 then crochet 3 Double Crochets into the first loop you made in the previous row. Chain 3 then slip stitch down into the loop. Then make a slip stitch into the next loop. Keep repeating this order of stitches all across finishing off with a slip stitch. These will be your rose petals.
- After doing the last double crochet of your last petal, chain three and do a slip stitch down into the loop.
- Fasten off but make sure to cut the strand of yarn at about 30cm {You'll need it later on}.
- Now taking a different color, make a slip knot and push your crochet hook into the first stitch of the long flower strip you just created. Then Slip Stitch into every single stitch till you reach the end of the flower strip.
- On your last slip stitch, fasten off and weave in any loose ends.
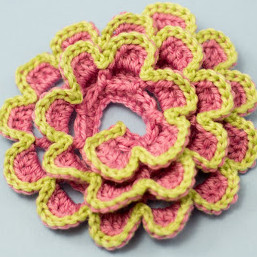
- Now lay your long strip of petals down in a circle, working your way in. If you want the flower flattish, make it quite open and loose, almost as loose as the one in the photo below, or if you want it thicker and chunkier you'll have to lay it tighter and more on top of each other. When you've decided which way you'd like it, take your wool needle and just start sewing it together using the 30cm strand of yarn you leftover before.
- Once you've sewed your flower together take your wool/tapestry needle and work the flower over the slip stitched part of the headband. This will give the bow a good base while hiding the slip stitches.
- Fasten off, and weave in loose ends.