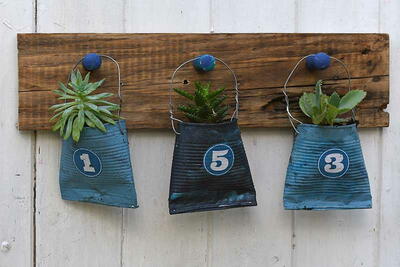
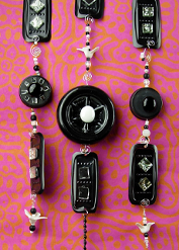
Water Bottle Room Divider
Add depth and dimension to any room with a Water Bottle Room Divider from Heidi Borchers. This craft is extremely inexpensive to make and looks store-bought. Recycled plastic bottle crafts are a great way to reduce, reuse and recycle!

Materials:
- Plastic drink bottles
- Craft knife
- Scissors
- Acrylic paint (colors of your choice)
- Cosmetic sponge (for applying paint)
- Drill with 1/16″ drill bit
- Hole punch
- 22 gauge wire (colors of your choice)
- Round nose pliers
- Wire cutters
- Beads
- Mirror and tile pieces
Instructions:
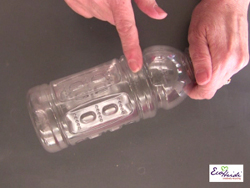
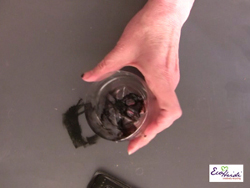
- I love to find plastic drink bottles that have intriguing designs embossed onto the sides! I don’t drink sodas so I ask my friends to keep their eyes open for fun bottles!
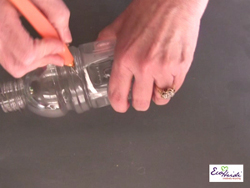
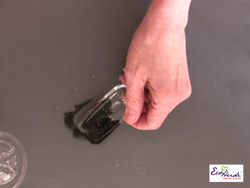
- Use a craft knife to puncture the side of the bottle and cut apart.
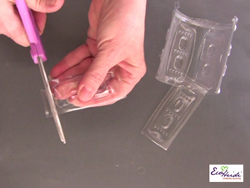
- Use scissors to cut out the side panel pieces and to clean up the cut edges of the bottle tops and the bottoms.
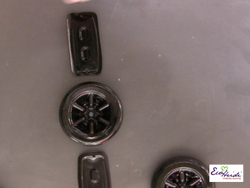
- Apply acrylic paint with cosmetic sponge by dabbing onto the inside (wrong side) of the plastic bottle. It may take several coats of paint to get a solid opaque coverage.
- Use the same painting procedure to paint the inside of the bottle bottom.
- Arrange the bottle pieces in desired pattern. Punch or drill holes into the pieces.
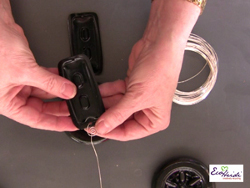
- To create the swirl in the end of the wire, use pliers to roll end and then continue to roll with fingers until you have created swirl of desired size. Cut wire to desired length to join two pieces together.
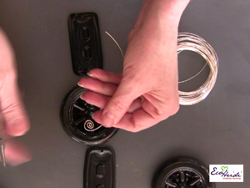
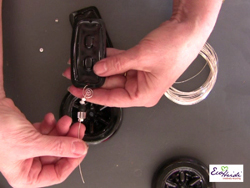
- Insert cut end of wire through punched hole in water bottle. Loop wire around swirl to secure.
- Add beads to wire.
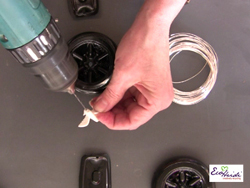
- If desired add other embellishments to wire. I found these doves at the dollar store. I drilled through them to turn them into beads.
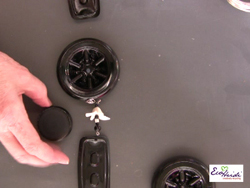
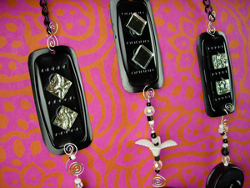
- Secure both ends of beaded and embellished wire to bottle pieces. Continue add more pieces to create desired length. I join my pieces together for wall hangings by looping the top wire onto a dowel stick.
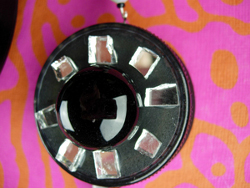
- Here’s a close up of a bottle cap. I glued mirror tiles and a flat backed marble to the top.
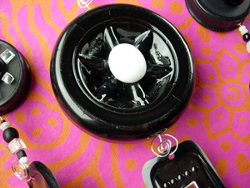
- On the bottle bottom, I glued a white flat backed marble.
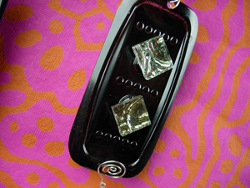
- On the bottle side piece, I glued vintage look mirror tiles.
- You can arrange rows and rows of these to create wall art or keep going and make a room divider!
For a comprehensive video tutorial of this project, check out How to Make a Drink Bottle Room Divider.
Read NextRecycled Cans DIY Candle Holder
Your Recently Viewed Projects
Thanks for your comment. Don't forget to share!
flowergirl
Apr 27, 2018
This projects checks all my boxes when it comes to a great project. It's got step by step picture aids and recyclable material which makes it inexpensive. I love how the author gets super creactive while embellishing hers so it inspires me to channel my inner crafter.
slaughterfamily200 2yahoocom
Dec 26, 2016
This is one of the neatest ideas for water bottles, the one in the instructions is a gatoraid bottle, which we aquire a lot of in a sports centered house hold. This could work great as a "window dressing over blinds in several different rooms woth color or other "themes" Love itttttt!
Toby K Editor
Jul 26, 2016
This is an amazing idea! You'd never even know they were made from water bottles.
ladonasmile 955836 5
Apr 08, 2014
oh my gosh I love the idea, I always admire the design on those bottles and wonder what could be done with them cause it is nice, so what i see you did there to make a room divider is Genius. How bottles did you use to make one?
FaveCrafts Editor JL
Apr 08, 2014
Hi there, Since Heidi does not specify the amount of water bottles, I suggest contacting her via her designer profile. Thanks!
corinnerconstable 3586135
Jan 09, 2013
This is very clever! Great project for teens too! They can customize it for their own rooms. Thank you for sharing! Love being a Greenie crc 1/9/13
bibisaccessories 1 022820
May 06, 2012
luv it I'm always recycling these bottles thks for the inspiration
Report Inappropriate Comment
Are you sure you would like to report this comment? It will be flagged for our moderators to take action.
Thank you for taking the time to improve the content on our site.