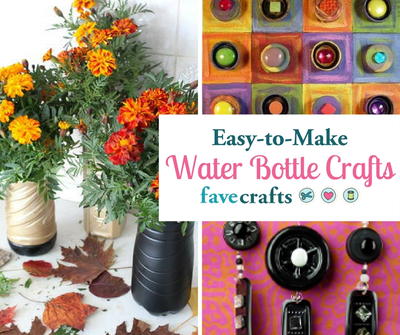
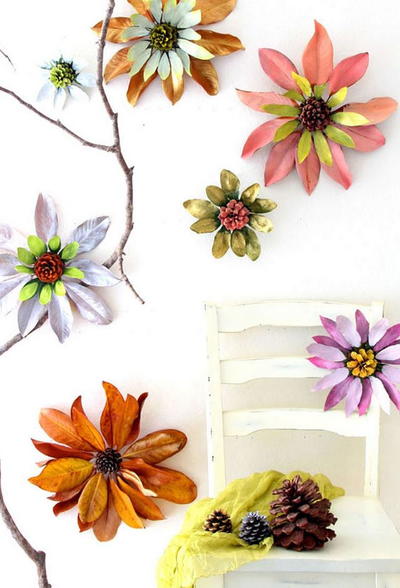
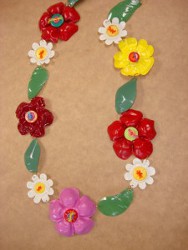
Water Bottle Jewelry
Want to look good but don't have a lot of cash to spend? Make Water Bottle Jewelry from Heidi Borchers! This is a fun recycled craft that everyone will love.
Materials:
- Plastic water bottle bottoms
- Scissors
- Craft knife
- Metal knitting needle (to help hold plastic while heating)
- Paint (Krylon makes a spray paint for plastic or you can use acrylic paints by using a cosmetic sponge to apply acrylic paints to plastic – apply several coats)
- Hole punch 1/8”
- Jump rings
- Buttons
- Embroidery floss – each flower needs approx 6” to 8” to tie on button centers (Here’s a special designer hint from me to you: Apply a small amount of Aleene’s Tacky Glue to the ends of your embroidery floss. Let set several minutes and then thread through buttons. The glue helps to hold the ends of the floss together.)
- Heat gun
- Tile or heat resistant surface
- Drill with 1/16” drill bit
- Needle nose pliers
Instructions:
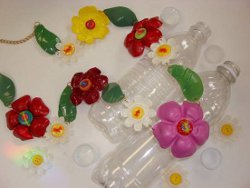
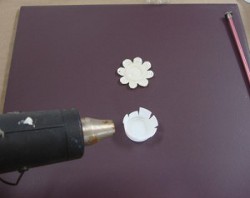
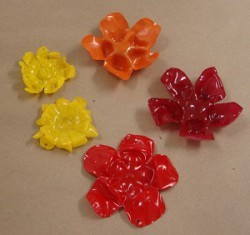
- Cut the petals into the sides of the bottom of the plastic water bottle. Photo shows bottoms before cutting on the bottom row and petals already cut on the top row in photo. Punch sides of two petals (opposite sides) with the hole punch for fastening jump rings later.
- Place pre-cut and pre-punched flowers onto heat resistant surface. Hold the middle of the flower with knitting needle and heat carefully with heat gun.
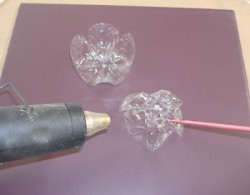
- The edges of the petals will curl up as you heat, so remove heat when you reach desired shape of petals.
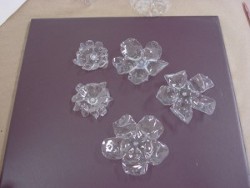
- Paint all flowers. Let paint dry. (Note that it is not necessary to paint both sides of the flowers because the color will show through the clear bottle. The painted side will tend to be more of a matte finish and the other side will be glossy.)

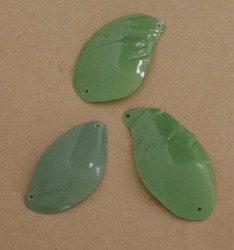
- To create leaves, cut from sides of plastic water bottles. Paint in same manner as flowers. Drill hole on each end.
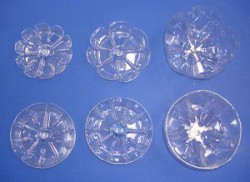
- To make the bottle cap daisies, cut the cap using a craft knife. You will need to evenly space the cuts to create the petals.
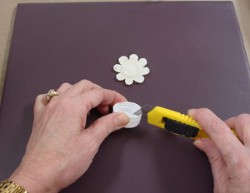
- Using a heat gun and holding with the metal knitting needle, carefully heat the pre-cut cap. You will have to help shape each flower.
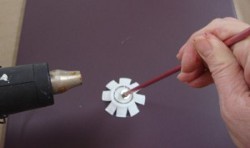
- Let the cap/flower cool slightly, then help to shape with fingers. If it cools too fast, reheat and repeat until all petals are laying flat.
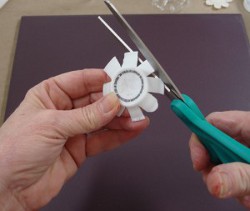
- Using scissors, carefully cut and round off each petal.
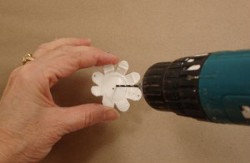
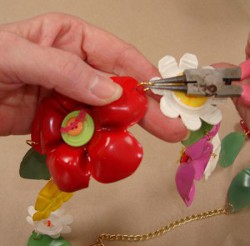
- Drill holes into edges of opposite petals. Drill two holes in the middle.
- Using 8” piece of embroidery floss, thread button onto each flower for flower centers. Tie floss in knot to hold button in place.
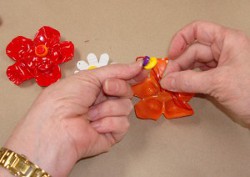
- Using needle nose pliers, attach flowers together using large jump rings.
- Assemble leaves and flowers with jump rings to desired length.
Check out this Water Bottle Flower Necklace Video and watch a video tutorial for this project.
Take your eco-friendly crafting to the next level with these 14 Easy to Make Water Bottle Crafts, including more jewelry ideas and some great home decor items!

Thanks for your comment. Don't forget to share!
mulberrygalprinces s
May 27, 2018
These are beautiful. Who would believe they came from old soda bottles? I must admit I was having trouble following the written directions. Then I saw the video tutorial and that was just perfect. It really shows you different angles and it makes it so much easier to follow along.
pariwashugbbahcom
May 08, 2011
I really liked it alot, I have sooo many plastic caps for water bottles, I will try them now
BoiseMadhatter
Apr 20, 2011
this is a great idea.. I also like randilea idea of attaching them to purses.
randilea
Apr 20, 2011
i never would have thought of this. i'm going to try this. but i think i might attach them to purses i make from t-shirts. total upcycle!
Report Inappropriate Comment
Are you sure you would like to report this comment? It will be flagged for our moderators to take action.
Thank you for taking the time to improve the content on our site.