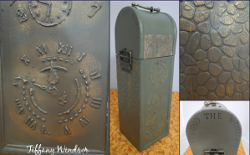
Stenciled Wine Box
Go green this season with upcycled crafts. Make a Stenciled Wine Box from Tiffany Windsor using acrylic paint and stamps and more. Save a wine box and turn it into a cool and crafty package. Bring one along to your next party for a fun hostess gift.
Materials:
- Wine box
- Acrylic paint – color of your choice
- Aleene’s Snow (texture medium)
- Palette knife
- Stencil (The Crafter’s Workshop)
- Rub ‘n Buff – gold
- Wax paper
- Wet wipe(s)
- Glitter tape
- Alphabet rubber stamps
- Staz-On Black Ink
Instructions:
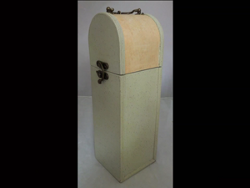
- You can use any solid surface for this stencil project. I found this wine box at the local thrift store.
- For this stencil how-to, I cut apart a tissue box so that I could show how you can stencil on any design. You don’t need a plain surface for this project because you will be painting over the entire surface.
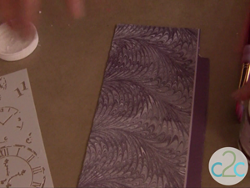
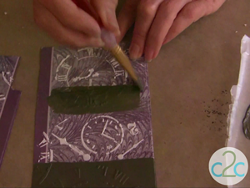
- Lay stencil in place over surface. Pick up texture paste with back of palette knife.
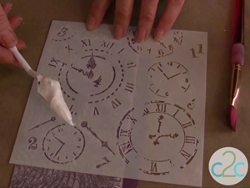
- Smooth texture paste over stencil with palette knife. Add more texture paste as needed. Note on this example that you can barely see the stencil design because I have applied the texture paste in a generous coat.
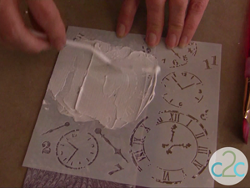
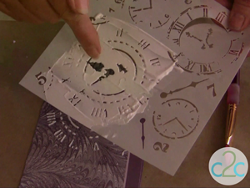
- Lift stencil to reveal stenciled design. Let texture paste dry completely.
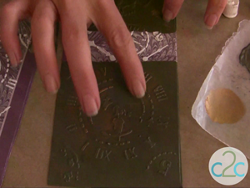
- Be sure to clean all the excess paste from stencil and return excess to container. Use wet wipe or water and paper towel to wipe all paste from stencil.
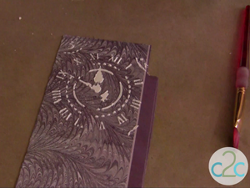
- When texture paste is completely dry, brush acrylic paint over entire surface. Let dry.
- Dab Rub ‘n Buff onto wax paper. Use finger to lighty apply over stenciled design.
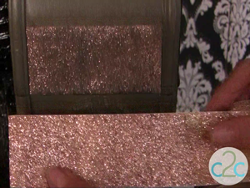
- I wanted to add a more decorative touch to the top of my box so I used self adhesive glitter tape. I dry brushed over the tape with my acrylic paint to dull the surface.
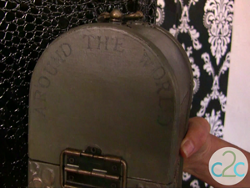
- For the last step, I stamped the wording “AROUND THE WORLD” on the side of my box.
For a comprehensive video tutorial of this project, check out How to Make a Tick Tock Stenciled Box.
Read NextGold DIY Mason Jar Flower Vase