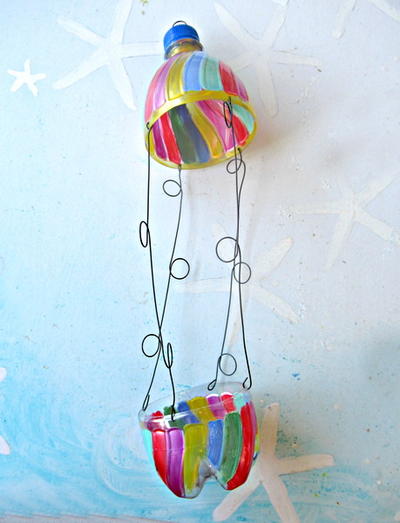
Reverse Painted Water Bottle Necklace
Looking for ways to spice up your wardrobe and stand out from the crowd? Create a Water Bottle Necklace from Heidi Borchers - it's an easy way to accessorize! Recycled plastic bottle crafts are an ideal way to show your creativity and save the planet at the same time.
Materials:
- Plastic water bottle
- Craft knife
- Scissors
- Acrylic paints – white, red,black
- Toothpicks
- Small brush
- Paper punch – 1/8”
- Aleene’s Matte Spray Sealer Finish
- Miscellaneous to make into necklace: Braid or chain, beads, jump rings, eye pins, metal clamp for the end of braid, lobster claw closure, needle nose pliers, wire cutters
Instructions:
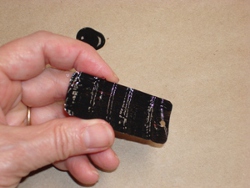
- Using a craft knife, cut the top 2” from the plastic water bottle.
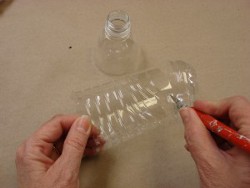
- To make the pieces for the necklace, cut up the sides of the plastic water bottle.
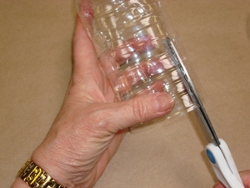
- Cut each piece approximately 1” wide x 2-½” long.Using a paper punch, punch a hole at one end.

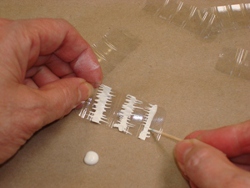
- The outside of the plastic water bottle will be the right side of the necklace piece when done. All of the painting will be in reverse on the inside or back of piece.With a toothpick apply the first color, white, to several places on the piece. With a clean toothpick, draw through the wet paint to create a design. Continue until the design with the white paint is complete. Let paint dry completely.
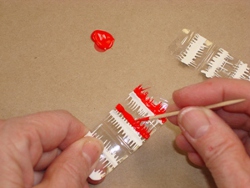
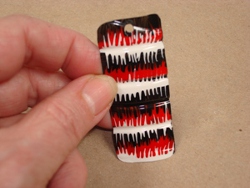
- Apply the second color of paint, red, over the dried white. Pull a clean toothpick through to create the design. Let paint dry completely.
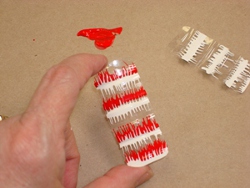
- Turning over the piece to see what the white and red paint look like from the right side.
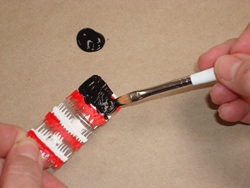
- With a brush, brush the black paint over the entire back of the piece. Be careful that the paint doesn’t seep to the right side. Let the paint dry completely.
- Spray the sealer on the back side when completely painted and paint is dry. Let the sealer dry.
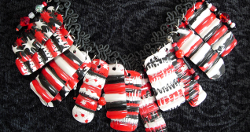
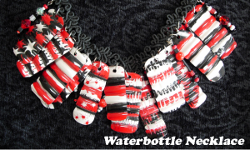
- Now that you have completed your first piece, repeat the above steps to create approximately 14 pieces.
- The finished necklace is made from a 22” piece of braid.Attach a jump ring to each plastic piece, then attach to the braid. To create hanging beads, place desired amount of beads onto an eye pin. Trim excess eye pin with wire cutters and twist into a loop with the needle nose pliers. Attach to the braid.Add closures to the end of the braid to complete the necklace.
For a comprehensive video tutorial of this project, check out How to Make a Reverse Painted Water Bottle Necklace.