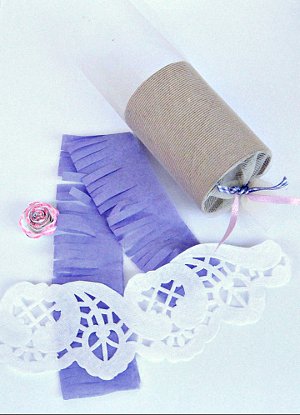
Paper Tube Lavender Sachet
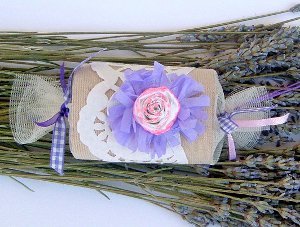
This Paper Tube Lavender Sachet from Maria Chatzi is a great way to use up items around your home. These handmade sachets work well in your drawer or closet and make wonderful gifts for loved ones.

Materials:
- A piece of white tulle, 5.9 inches long and about 11.6 inches wide
- Four ribbons, 2.8 long each, any purple (dark or light) will do - they could also be checked or striped
- A piece of purple waxed jewelry string, 9,8 long
- A round bead (any color), with a hole big enough for your waxed string to go through it if folded in half
- A long embroidery needle with a large hole
- A small paper rose, color: white
- Pink glitter glue
- A small bunch of natural lavender
- A strip of purple paper tissue, 9.8 long and 2.4 wide
- Small white paper heart
- Large purple wrinkled heart (made of paper tissue or recycled handmade paper)
- A piece of white paper doily design – cut out from a paper doily you use for your cakes
- Scissors
- Craft knife
- Pencil
- Ruler
- Glue
Instructions:
-
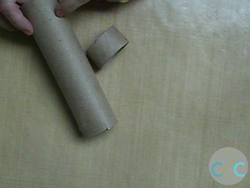
Take the toilet paper tube and measure 2/3 of its length. Use your pencil to mark a line there, all around the tube. Using your craft knife, follow this line to cut the 1/3 of your paper tube away – you will need only the 2/3 part for this craft.
-
Make a white paper rose (or get a readymade one) and put some pink glitter glue on the edges of all its petals. Let it dry.
-
Fold your strip of purple paper tissue in half, lengthwise. Use your scissors to cut a fringe on the folded edge, leaving 0.5 inches free space on the other long edge.
-
With your scissors, cut out a piece of paper doily design that fits to be wrapped around your toilet paper tube. To measure the length you need, you could use a piece of string – just wrap it around your paper tube and cut it where ends meet. If you would like doily edges to overlap add 0.25 inches length to your measurements.
-
Put the purple paper tissue fringe, the doily design and the paper rose aside for a while. You will return to these later, when your lavender tube sachet is ready to be decorated.
-
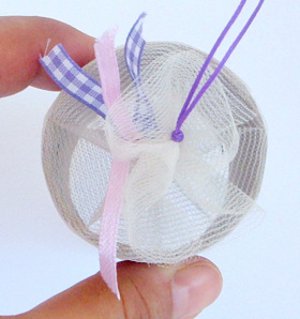
Now take your tulle and wrap it around your paper tube, leaving free tulle ends on both sides of your paper tube – these tulle ends should measure the same. Make sure you secure the beginning and the end of your wrapping with some glue. Wait till the glue is completely dry before you proceed.
-
After the glue has dried, wrap and knot tie two of your ribbons on one free tulle end – like a candy bar. You should tie the ribbons securely enough to hold the tulle end but do not tie them very tightly, as there should be a small opening (like a small hole) left in the centre (for your needle with the string to pass through later on).
-
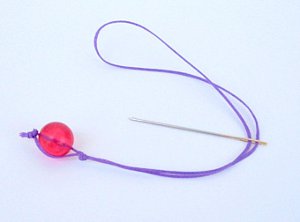
Thread your bead (the bead should be quite larger than the small opening you’ve left when tying the tulle end with the ribbons) – we don’t want it to slip through this hole and get out on the other side. Tie the two ends of your waxed string together in a double knot. Then secure your bead between two knots, as shown in the photo. You should be left with a loop on the other side. Pass this loop through the needle hole.
-
Now take your threaded needle and guide it, from the inside of the paper tube, to the small hole you’ve left when tying the tulle end with the ribbons. Pass it through this small opening and pull it out from the other side. The bead should stay inside the toilet paper tube, trapped by the tulle tied with the ribbons. The loop should be out – this is where you’re going to hang your lavender sachet from. Put away the needle, as it won’t be needed any more.
-
Double knot your waxed string near the hole with the bead.
-
Hang the tube sachet from a hook and, as the bead shows from the small opening under the knots you’ve just made, put a good blob of glue on it (so it would remain attached to the tulle when the glue dries – this is IMPORTANT to do, because if you don’t fill the small opening with glue the lavender you will later put in the sachet may be falling out of it whenever the bead moves down).

-
Fill your paper tube sachet with natural lavender and tie the other tulle end with the other two ribbons you’ve got left (same procedure as when you’ve tied the first tulle end). IMPORTANT: tie this end tightly, as your not putting a bead here. Your sachet is full of lavender now and ready to be decorated.
-
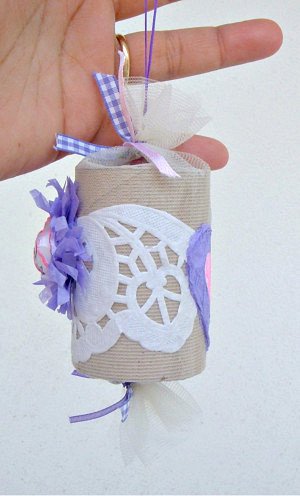
Wrap and glue the paper doily design on your paper tube lavender sachet, over the tulle its wrapped in.
-
Make a fuzzy flower with the purple tissue fringe strip. To create this, wrap the whole strip holding it from the edge that doesn’t have the fringe. When you’ve finished wrapping, decide where you want to place it on the paper doily design. Then put a little glue on the bottom/back side and press it gently on the tube. Hold it there for a minute or two to make sure the glue has dried and it’s secured in its place. Press the center of this fuzzy flower gently with your fingers to lower it and make space for the paper rose.
-
Glue the paper rose onto the purple fuzzy flower. Wait till the glue has dried completely before you proceed.
-
Now turn your lavender sachet to the back side, where the ends of the paper doily meet or overlap. Glue the wrinkled purple heart here and then glue the smaller white heart on it. Use the pink glitter glue to decorate the white heart. Wait till the glue hardens.
-
Your paper tube lavender sachet is ready to hang in your closet or car or place in a drawer. It could be used both as a decorative air-freshener and a moth repellent.
Tips
- The longer the needle, the easier it would be for you to work inside the paper tube. Mine is short and it has made it difficult for me to reach the other end of the tube (which I had tied with the ribbons). I only posted the picture to show you how you should thread and secure the bead and how the string loop should go through the needle hole.
- The paper rose I used was handcrafted by my daughter Joanne. If you’re interested in learning how to make paper flowers there are plenty of free tutorials online. An alternative could be a small readymade fabric rose.
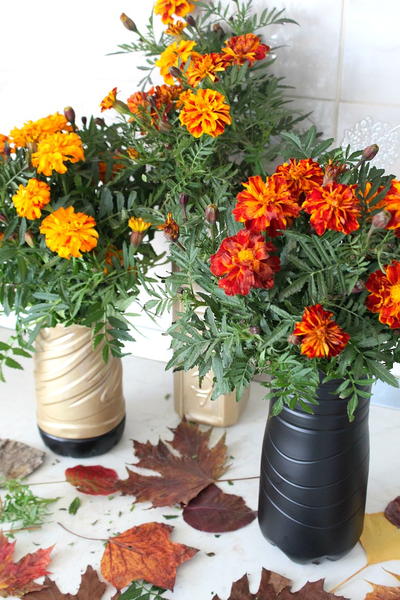
Read NextSecretly Cheap DIY Flower Vase