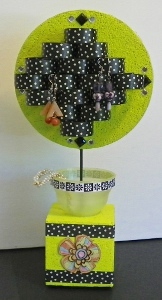
Paper Towel Jewelry and Earring Holder
No need to recycle that cardboard tube - use it to create your own Paper Towel Jewelry and Earring Holder. Make your own DIY jewelry stand using paint, washi tape and other easy-to-find supplies. Now you can display your favorite baubles with pride - be sure to include your favorite homemade jewelry along with store-bought pieces. Save money and help the Earth by using recycled materials for this project.

Materials:
- Paper towel core
- Smooth foam 3” cube
- Smooth foam 5” disc
- Craft paint and brush
- Washi tape (contrasting color to the paint)
- Hot glue gun
- 1/2” wide ribbon
- Scissors
- 12” wood skewers
- Paint marker (coordinating color with washi tape)
- Exacto blade
- Plastic cup (saved from the fro-yo shop)
- Flat-back gems
- Chipboard flower die-cuts
- 2” metal washer
- Two dome-style brads
- 1” ball-head straight pins
Instructions:
-
Paint the smooth foam disc and cube with 1-2 coats of craft paint; set aside to dry.
-
Paint the outside of the paper towel core the same color; allow to dry.
-
Cut the core open vertically along one side.
-
Wrap a strip of washi tape around the end of the core, keeping it flush to the edge.
-
Trim the strip off the core and add washi tape to the back side.
-
Repeat steps 4-5 until the whole core is cut into rings.
-
Smooth out any creases in the tape and gently curl the edges of each ring with your fingers.
-
Color the edges of each ring with a paint marker.
-
Glue the ends of each ring together with some overlap.
-
Push the end of a skewer into the edge of the painted disc, up 2-3” toward the center. Color the exposed end of the skewer with the paint marker.
-
Starting in the center of the disc, glue the rings down in alternating rows, nested closely together.
-
Push a straight pin through each ring into the foam for extra stability.
-
Trim the painted cube with washi tape around the sides at the top and bottom. Poke a starter hole in the top of the cube with a skewer and remove.
-
Glue ribbon around the edge of the disc and the top of the plastic cup.
-
Poke a small hole in the bottom of the cup with an Exacto blade.
-
Glue the cup to the top of the cube, then push the end of the skewered disc down into the cup, through the cube down to the bottom.
-
Glue a large metal washer to the bottom of the cube, toward the back, to counter the weight of the rings on the disc.
-
Poke two domed brads into the bottom front corners of the cube, like little feet.
- Embellish the cube and disc as desired with gems and flower die-cuts.
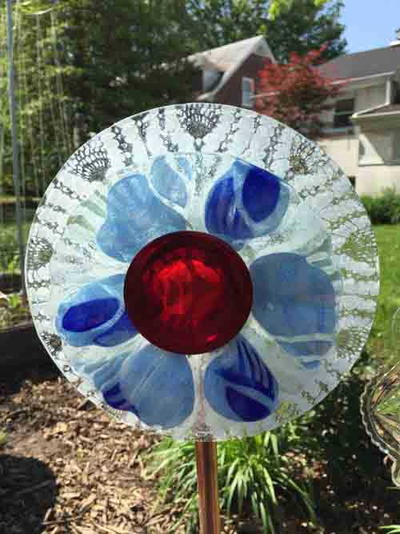
Read NextGarden Dish Flowers
Your Recently Viewed Projects
Thanks for your comment. Don't forget to share!
bustedinnc 0512678
Jan 27, 2017
I love the idea of using a paper towel roll, and a cup for storage ideas. But, It would have to be a large washer to counter-weight the jewelry. I think I'd have more luck using this same technique with a recycled frame. Maybe flip a few of the roll pieces in the opposite direction, only secure one end for necklaces, bangles, and rings.
Report Inappropriate Comment
Are you sure you would like to report this comment? It will be flagged for our moderators to take action.
Thank you for taking the time to improve the content on our site.