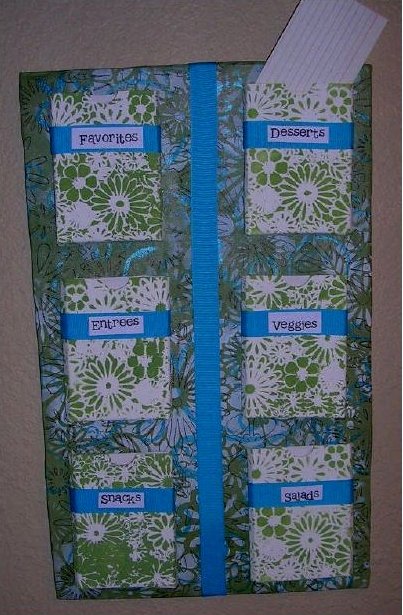
Floral Wall Organizer
Learn how to make a fabric wall hanging organizer with this handy tutorial from Earth Safe Finishes. This Floral Wall Organizer is great for storing recipes, mail or whatever else needs some order.
Materials:
- 12 ½” x 20” foamboard
- 6- Scoreboard™ notebook pockets- http://www.sizzix.com/decorateyourlife
- 15” x 24” piece of muslin or colored cotton fabric
- Earth Safe Finishes products: www.earthsafefinishes.com
- Sage Colorant™
- FabricMagic™
- Teal Shimmer™
- GlacierWhite Generation Green acrylic paint
- Tackifier™
- Black fine line permanent marker (OR fill a Coptic Marker with Black Colorant)
- 2 yards 1” wide teal grosgrain ribbon
- Gel Medium
- 1 sheet sticker paper
- Double stick tape
- Wood slat at least 9” long
- Picture hanger
- Paper towels
- 1”-2” wide paintbrush, wash brush
- Stencil brush
- Flower Frenzy 12” and 6” stencil from www.thecraftersworkshop.com
- Capricious 12” stencil
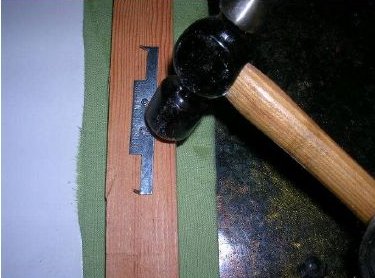
- Hammer
- Scissors
- If dyeing your own fabric you will also need a mixing container and an iron.
Instructions:
- To custom dye plain muslin fabric is quick and easy. Place a few drops of Colorant in a bowl with 2-3 drops of FabricMagic and about ¼ cup of water. Mix then dunk in your fabric, swirl around for a few seconds then squeeze out any excess. Allow the fabric to dry then press with an iron. Tada, a fabric base that will perfectly match.
- Brush a layer of gel medium over one side of the foamboard. Center and smooth fabric on wet gel medium making sure the fabric overhangs on all sides. Allow to dry then flip over to the back. Brush on gel medium around the edges then tightly fold the fabric edges to the back.

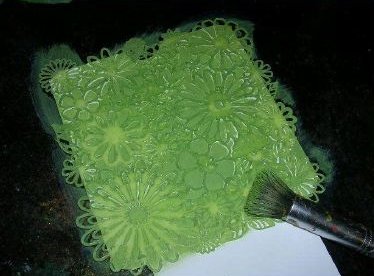
- Apply Tackifier to the backs of all stencils using a scrap of paper towel or a cosmetic sponge. Allow the Tackifier to dry. Now you have stencils that will stay in place for numerous repeats.
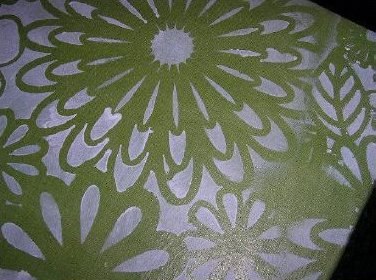
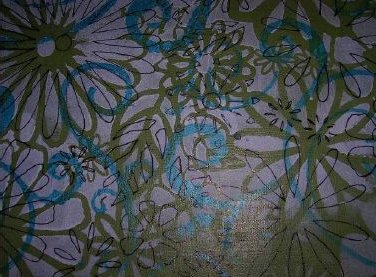
- Place 12” Flower Frenzy on front of foamboard. Pour out a small amount of Glacier White onto a palette; I use lids from yogurt containers. Dip your stencil brush into the paint then dab up and down over the stencil openings. Move stencil and repeat to cover front of foamboard.
- While you have GlacierWhite out paint the inside backs of the notebook pockets white.
- Place Capricious stencil on foamboard. Use teal Shimmer with your stencil brush to add another layer
of design. Allow this to dry.
- Place large Flower Frenzy back on foam board then use a black marker to draw along the stencil
openings.
- Glue wood slat to top back of foamboard. When dry affix picture hanger.
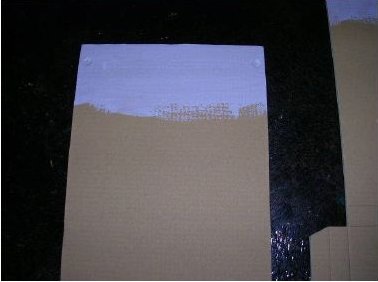
- Mix Sage Colorant with a dab of GlacierWhite paint. Place smaller Flower Frenzy stencil on fronts of notebook pockets. Apply Sage paint mix over stencil. Allow paint to dry.
- Print labels on sticker paper using your favorite font. Cut and trim to fit on 1” ribbon. You could also use premade labels or rubberstamp.
- Assemble notebook pockets by folding along score lines and securing with double stick tape. Wrap ribbon around pockets securing with double stick tape. Press labels onto ribbons.
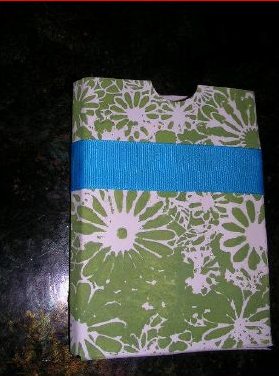
- Use double stick tape to adhere pockets and ribbon trim onto foamboard.
- Now you have a lightweight but sturdy wall organizer that can be personalized with number of pockets,
labels, and colors to fit your style and your life.
Read NextTin Can Transformed


![Pill Bottle Crafts: Reuse Pill Bottles [15 Ideas]](http://irepo.primecp.com/2017/06/334076/PILL-BOTTLE-CRAFTS-Header_Category-CategoryPageDefault_ID-2274135.jpg?v=2274135)