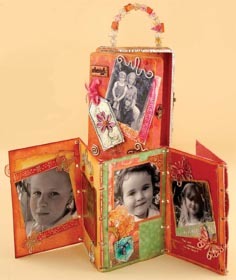
We Love Grandpa Frame
Show grandpa how much you care with this personalized picture frame.
Courtesy of Armour Products
Materials:
- 3oz Armour Etch Cream #15-0150
- 1 Pkg # 20-0450- Rub N Etch Stencils- Children’s drawings
- 1 Pkg #21-1607 Over N Over Stencils-Upper Case Letters
- 1 Pkg #21-1608 Over N Over Stencils- Lower Case Letters
- 1- 8x10 Picture Frame (must have glass window)
- 1- 8x10 Picture frame mat for 5x7 picture w/ oval opening (any med to dark color works best)
- White paper-1 sheet
- Scissors, Pencil, ruler
- Glass cleaner & lint-free paper towel
- 1/2” wide masking tape
- Plastic or rubber gloves
- Disposable craft brush
Steps:
- Carefully bend back or remove pins or staples from backside of picture frame. Take out the boards and remove glass. Set aside.
- Lay picture frame mat on white paper and draw a line around the inside of oval and the outside of the mat onto white paper. This defines where your stencils can go.
- Cut apart the Children’s drawings stencil pieces so you can play with them. Select which you plan to use and arrange on the paper, staying within the lines you drew. We used 3 children across the top and 3 across the bottom. Save the sides for the phrase. Use the picture as your guide or create your own scenario. Don’t try to crowd too much in! Less looks better. When your satisfied, remove stencils from paper and mark their placement on the paper. This is your placement guide.
- Place the cleaned glass on top of paper and center over the outside line. Lay stencil pieces on glass over placement marks and apply to the glass, following the instructions on package or from the website. Down the left side, apply the words “We Love”, and down the right side “Grandpa” or “Grandma” (or phrase of your choice), tilting one letter to the right and next one to the left.
- After all stencils pieces have been transferred to the glass, completely cover all exposed areas of glass with masking tape, overlapping all edges, including blue edges of stencils. Hold glass up to light and cover any missed areas.
- Etch with Armour Etch Cream according to package directions, rinse and dry glass.
Read NextNo Sew Fabric Bookmarks

