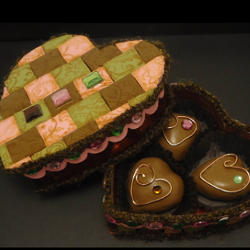
Heart Shaped Polymer Clay Tiled Chocolate Box
Want to make a pretty fun gift that will last forever? Create a Heart-Shaped Polymer Clay Tiled Chocolate Box from Candace Jedrowicz! Fill the box with polymer clay chocolates that can be displayed anywhere at anytime. This is a great gift that shows a friend you care.

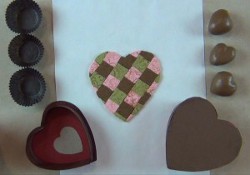
Materials:
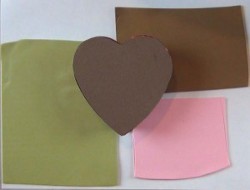
- Polymer clay – chocolate brown and two other colors
- Pasta roller or rolling pin
- Chocolate box
- Aleene’s Collage Pauge Matte sealer
- Aluminum foil
- Craft knife
- Dimensional Sealer
- Archival ink – brown
- Ink dabber or QTip
- Chocolate candy paper cups
- Aleene’s Original Tacky Glue
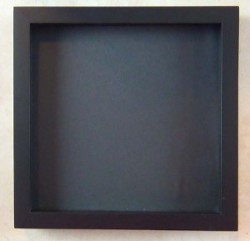
- Dimensional frame – I used an 8” x 8”
- Paper for the background
- Gems, wire and trims
Instructions:
- Roll out slabs of polymer clay in various colors.Cover the white surfaces of the box with brown paper and/or acrylic paint.
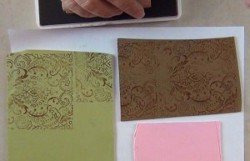
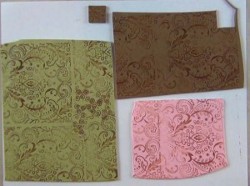
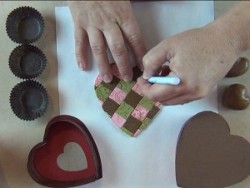
- Using brown ink, stamp clay with patterns, words or anything at all. Press hard enough to stamp the pattern into the clay.
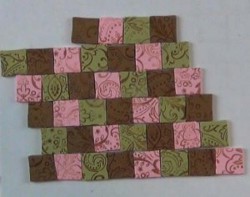
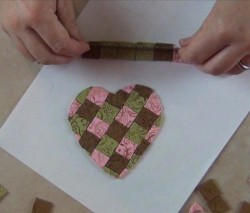
- Begin cutting tiles with 1″ square cookie cutter.
- Arrange the uncured tiles in a pleasing order.
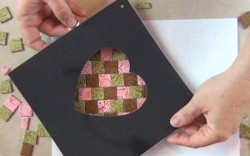
- If you have a template, you’ll be able to determine the best direction to lay the box top on the tiles.I cut and laminated my template to see how my surface decoration will look against a black background.
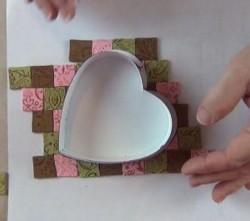
- Lay the box, top down, on the tiles and cut around it with a craft knife.
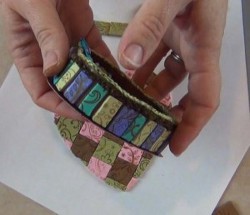
- Cut the rest of the uncured tiles in half.
- The half tiles will decorate the sides of the box.
- Shape balls of aluminum foil into small hearts or any shape you want to make your chocolates.
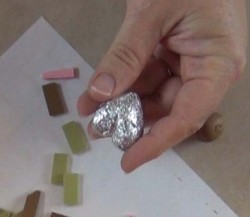
- Flatten small balls of brown clay to cover the foil shapes.
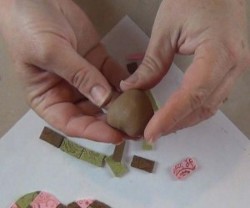
- Bake clay according to directions. Apply one coat of Collage Pauge Matte sealer to your chocolate pieces.
- Before gluing your tiles to the box, edge with brown ink using a dabber or QTip.
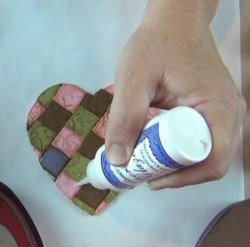
- Cover each tile with dimensional sealer. Allow to dry.
- Cover the background of your frame and remove the glass.
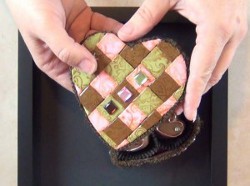
- Here you can see that I’ve glued the half tiles onto the outside of the box, added a paper trim, yarn on the op edge and gems.
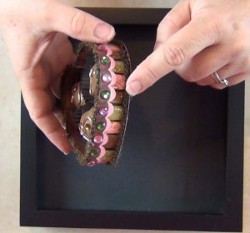
- To the top of the box, I’ve added three accent gems, yarn on the edge and paper trim with gems on the sides.
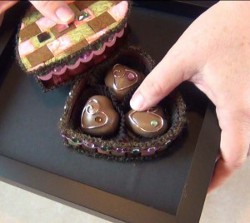
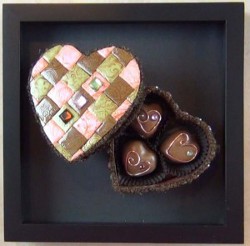
- Decorate your chocolates with wire, gems and anything else you want.

- Position the box top and bottom in the frame.I like to prop the top up to reveal the side decorations.
- Attach the top to the bottom on the propped edge by gluing a strip of card stock to the inside edge of the top and the outside edge of the bottom directly below. Position the two centering them in the frame.

- Glue into place.
For a comprehensive video tutorial of this project, check out How to Make a Polymer Clay Tiled Chocolates Box.
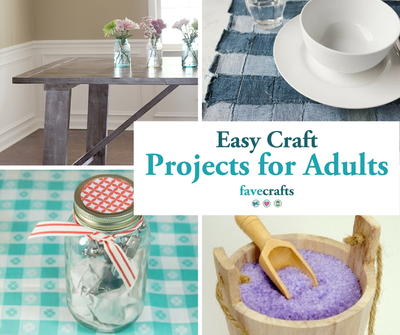
Read Next76 Easy Craft Projects for Adults