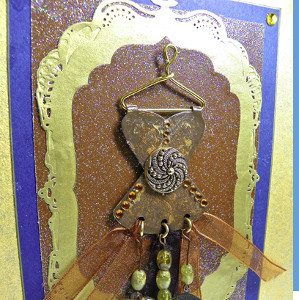
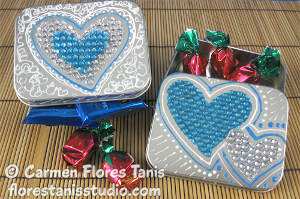
Dressed for Success Gift Box
Sometimes when constructing homemade gifts, it's easy to forget how you'll deliver your present. This Dressed for Success Gift Box from Lisa Fulmer will guarantee a gift-giving win. Whoever receives a gift from you in this lovely box will fall in love with it. Plus, by creating do-it-yourself gift boxes like this one, youll take the pressure off of what's inside your box. You'll love getting crafty with mixed materials like metallic paints and cardstock. This DIY gift box project is a crafter's dream.

Materials:
- Spellbinders Media Mixage metal dress #2 blank
- Spellbinders Media Mixage metal dress #2 die
- Spellbinders Nestabilities Gold Labels #4 dies
- Spellbinders Nestabilities Labels #4 dies
- Spellbinders Grand Calibur diecutting machine
- 8" x 8" x 4" paper maché box with lid
- Blue and metallic gold acrylic paints
- Iridescent medium
- Blue cardstock, glitter cardstock
- Gold paper, gold paint marker
- Rhinestones
- Decorative button
- Craft glue and metal glue
- Eye pins and jump rings
- Small beads and charms
- Sheer ribbons and large needle
- Heavy-gauge wire
- Round-nose and regular beading pliers
- Metal patina paint
- Heat gun
- Heavy-duty hole punch
- Dimensional and regular glue dots
- Sea sponge
- Paint brushes
- Parchment paper or non-stick craft mat
Instructions:
-
To create a mini wire hanger for the dress blank, use a pair of round-nose beading pliers to curve the tabs at the shoulders around to the back. Insert a piece of wire through the tabs and bend both ends up and around with pliers, cross them over and bend one end straight up and wrap the other end around the neck. Snip off any excess and use the pliers to curve a loop to finish off each end.
-
Punch out 3 small holes at the bottom of the dress.
-
Spread patina paint across the surface of the dress and then dab at it with the brush to randomly remove the excess so some of the metal shows through. Let it dry, then set it with the heat gun.
-
Decorate the dress with rhinestones and a button; adhere with metal glue.
-
Add some beads and a charm to an eye pin, then use the round-nose pliers to make a loop on the straight end of the eye pin, close it around a jump ring, then insert the jump ring through a hole in the dress. Repeat for the other two holes.
-
Thread ribbon through a large needle, run it through each hole, tie it with an overhand knot and trim the ends.
-
Blend 1 part paint with about 3 parts iridescent medium for each color. Paint the box inside and out with one coat of blue, paint the lid inside and out with one coat of gold; allow to dry.
-
To get extra texture and sparkle, dab a sea sponge lightly into plain gold paint and tap it randomly all over the surface of the box and lid.
-
To frame the dress, diecut a large gold label from gold paper and a medium label from glitter cardstock and layer on top of a rectangle cut from blue cardstock (use a gold marker to finish the edges of the blue stock). Use craft glue to adhere the layers together.
-
For a matching label on the inside of the lid, diecut a larger label from blue cardstock and a smaller label from gold paper and nest them together. Diecut another piece of glitter paper into a dress for the top, and glue the layers together inside the lid.
- Use dimensional glue dots to adhere the dress to the center of your frame on top of the lid. Use smaller glue dots to hold the charms and ribbons in position.
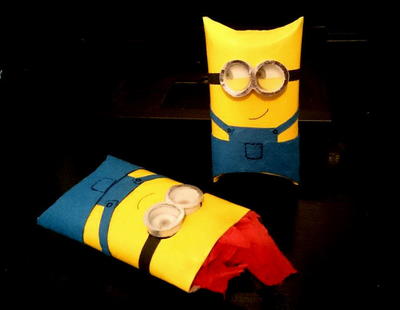
Read NextToilet Paper Roll Boxes