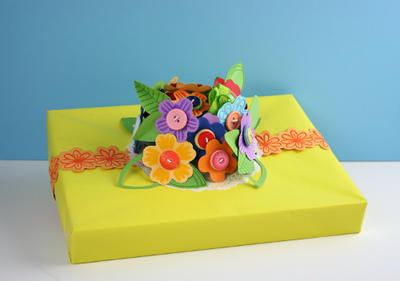
Bouquet Gift Topper
Every now and again you need that wrapped gift to have a little extra ‘WOW’ factor, and this Bouquet Gift Topper will give exactly that! It makes for the perfect Mother’s Day, bridal shower or even wedding gift wrap that can be customized to the bride and groom’s color scheme.

You can find this project, as well as many others, in our free downloadable eBook, Fuse Creativity System Project Guide: Fun Party Themes, Ideas for Handmade Cards, and More Paper Crafts from Fiskars!

Materials:
- Fuse Creativity System® Starter Set
- Mini Design Set 102400 - Flower
- Mini Expansion Pack 102500 - Flower
- Medium Design Set 100850 - Bird
- Medium Expansion Pack 100930 - Bird
- Border Design Set 101990 - Burst
- 1/8” Circle Hand Punch
- Cuts+More™ Scissors
- Adhesive - Mini Glue Dots®
- Buttons
- Cardstock - Bazzill Basics Paper
- Green ribbon
- Ink – Tsukineko StazOn
- Large paper doily
- Low-temp hot glue gun
- Low-temp hot glue gun sticks
- Solid wrapping paper
- Thread-wrapped floral wire
Instructions:
-
Use the Fiskars Fuse Creativity System® to die cut, die cut and emboss, and die cut and letterpress several flowers using a variety of cardstock colors with the Medium Design Set – Flower. Do the same with green cardstock and the Medium Design Set – Bird to create leaves for your floral bouquet.

-
Fold your floral wire in half. Layer two of your die cut flowers on top of one another and use your Fiskars 1/8” Circle Hand Punch to punch two holes ¼” apart in the center of your layered flowers. Thread the wire through a single button or stack of buttons, then down through the flowers. Twist the wire tightly on the underside of the flower and continue twisting to the ends of the wire.

-
Once you have a good amount assembled, group them together into two separate piles, making sure you have a good mix of colors in each group.

-
The size of your gift packaging will determine how long you’ll want to leave the twisted wire stems. Regardless, the process is the same. Tightly wrap each bundle with a 12” length of clear tape, and then use your Fiskars Cuts+More Scissors to cut the stems down just below the tape.

-
Use the Border Design Set – Burst to create a paper ribbon to wrap around your gift wrap.

-
You can create any length you need by overlapping the flowers at each end and adhering them together. Adhere the bouquet to the center of your wrapped gift using clear tape. Adhere a large doily over the center of your paper ribbon.

-
Crease your green leaves in half to give them some dimension. Create some larger leaves by cutting around the negative space left behind from die cutting them.

-
Adhere the two bundles of paper flowers to the center of the doily using a low-temperature hot glue gun. Manipulate the floral wire until your two bunches of flowers resemble a nice, full bouquet.

-
Lastly, add your leaves using Glue Dots®. Hot glue small loops of green ribbon as filler wherever needed.

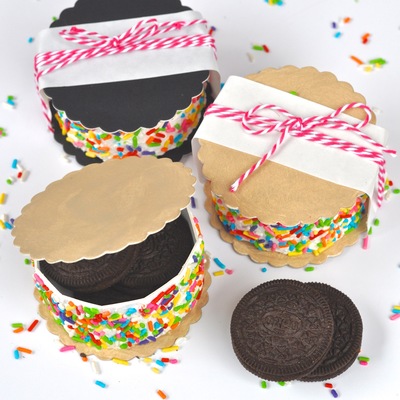
Read NextEmbellished Kraft Wrappings