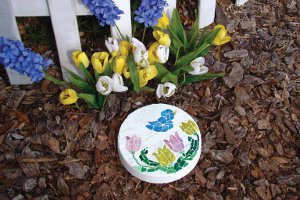
Spring Mosaic Garden Stone
Get a jump start on spring with this Spring Mosaic Garden Stone from Diamond Tech. Make one or more to add color to your garden. These mosaic stepping stones (patterns included) are sure to bring your garden to life!
Materials:
- 1 (of each color) 5 oz. package Jennifer’s™ Stained Glass Chips in pink, white, light blue, green, light green
- Jennifer’s™ Mosaics Outdoor Cement
- 8” Round Stepping Stone Mold
- 1 lb White Grout
- E6000® Glue or Clear Silicone
- Mixing Bowl and Spoon
- Paper Towels and Newspaper
- Wheeled Glass Nippers
- Sponge or Scrubby
- Carbon Paper & Pencil
- Pattern
Instructions:
- To protect work area, cover with newspaper.
- Mix the Outdoor Cement following the directions on the label. Wear a dust mask while mixing.
- Pour cement slowly and evenly into mold; gently tap sides of mold to release any air bubbles in cement.
- Do not move mold while the cement is drying. Wait approximately 24 hours (time may vary due to climate) for cement to harden. The cement will warm as it hardens.
- Once it has cooled and set, remove the stone by turning mold over and lifting up the edges of the mold (MOSAIC SHORTCUT: Use a premade stepping stone from you local hardware or garden center).
- Determine the center of the stepping stone by using a ruler and a pencil. Find the center of the stone. Align the center of the pattern with the center of your stone. Place carbon paper between the pattern and the stone, tape to hold in place. Trace the pattern onto the stepping stone and remove pattern and carbon paper.
- Use the picture as a guide and nip and arrange glass on the entire surface of the stone, leaving approximately 1/8” gap between pieces and at the outer edge. Nip glass pieces with a Wheeled Glass Nipper to fit inside pattern outline.
- Once you have achieved your desired look, lift each piece and apply a thin layer of glue to the back. Firmly press pieces onto the stone. Allow glue to dry according to the manufacturer’s instructions.
- To grout the stepping stone, measure 1 cup of grout into a plastic bowl, reserve a few tablespoons of grout and set aside. Adding 1 tablespoon of water at a time to remaining grout, mix with craft stick until the grout reaches “fudge-like” consistency. If it is too watery, add the reserved dry grout in small amounts until the consistency is correct.
- Wearing a disposable glove spread the grout onto the surface of the stepping stone and into all the spaces between the glass and tile. Wait about 15 minutes for grout to set.
- Gently wipe away the excess grout using a paper towel taking care not to pull grout out of tile spaces. It is very important to remove any grout from the tile surface before grout is completely dry.
- Use a soft cloth to buff the tiles to a clean shine.
- Allow 24 hours for the mosaic piece to dry.
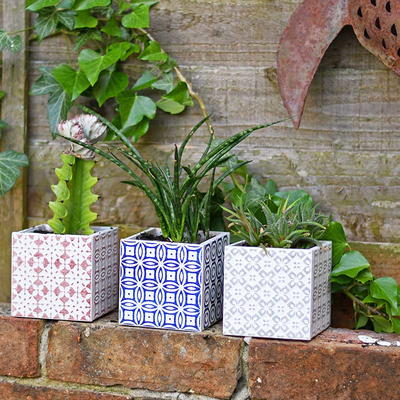
Read NextMini Succulent Planters
Your Recently Viewed Projects


Thanks for your comment. Don't forget to share!
BeckySue
Mar 02, 2016
I used this idea to make a decorative stepping stone as a focal point in a small flower garden where tulips come up in the early spring. The stepping stone adds a bright spot while I'm waiting for those tulips to pop up! Maybe I should add some Crocus, which come up even through the snow! So when I' m tired of winter, I'll have this bright spring-like spot to look at and chase the winter blues away!
Report Inappropriate Comment
Are you sure you would like to report this comment? It will be flagged for our moderators to take action.
Thank you for taking the time to improve the content on our site.