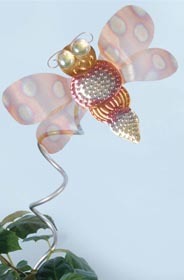
Bee Garden Stake
Make your garden buzzworthy with the wiremesh bee garden stake from AMACO. Use wire, foam and more to create cute bugs you'll actually want to see in your garden.

Materials:
- AMACO® ArtEmboss® — Medium Copper
- AMACO® WireMesh® — Copper
- AMACO® WireForm® WireRod — Aluminum
- AMACO® Fun Wire™ — Clear/Copper (22 Gauge)
- AMACO® Needle Tool
- AMACO® ArtEmboss® Tool Set
- ScottiCraft Ultimate Bond Tape
- Sheet
- Marble Accents Clear Lustre Gems
- E6000 Glue
- Fun Foam Sheet
- Heat Gun
- Metal Baking Sheet
- Scissors
- Brayer
- Pliers
- Pencil
- Black Permanent Marker
Instructions:
- Enlarge pattern pieces to the desired size, copy onto card stock and cut out.
- Trace around pattern pieces onto the Medium Copper ArtEmboss® sheet using a stylus from the ArtEmboss® Tool Set and cut out. Trace two bodies.
- Trace around the two wing patterns with a permanent marker onto the Copper WireMesh®. Cut out.
- Texture and emboss one of the body pieces as desired. Read the package instructions for tips on embossing with ArtEmboss®. To give a soft hammered texture, place the Medium Copper ArtEmboss® pieces onto a sheet of fun foam and lightly pound with the eraser end of a pencil. Gently roll over each piece with a brayer to flatten back out. Perforations can be made using the needle tool. Place the Medium Copper ArtEmboss® onto a metal baking sheet. Heat each of the pieces with a heat gun to create a patina finish. With prolonged heat in one area the copper will turn orange, then rust, then red, then blue, then gold. By moving the heat gun around, you can create some unusual patterns of color. To create the “dots” on the wings, keep the heat generated in one spot until the color changes, then lift the gun and move to another spot. Let the copper cool then continue with project.
- Trace the body pattern twice onto the tape sheet and cut out. Remove the white liner and adhere the tape to the wrong side of each copper body.
- Remove the red liner from the plain body and apply the large upper wings. Apply the small lower wings just below the upper wings making a small over lap. Press to secure.
- Cut and fold a 6" length of Clear/Copper Fun Wire™ in half for the antennae. Make a small spiral at each end of the wire. Adhere the folded portion of the wire to the center of the head. Remove the red liner from the textured body and adhere into place over the wings and antennae. Press to secure.
- Glue two clear flat backed marble gems onto the head as the eyes. Let glue dry.
- Cut a 1" x 21/2" piece of Medium Copper ArtEmboss® and wrap it around the end of the WireForm® WireRod Aluminum, forming a tube. Remove the tube and squeeze one end flat with pliers. Glue the tube to the back of the bee’s body, using E6000 glue. Let glue dry completely.
- Free form the WireForm® WireRod into desired shape. Place the bee onto the rod by sliding the rod into the tube on the back of the bee.
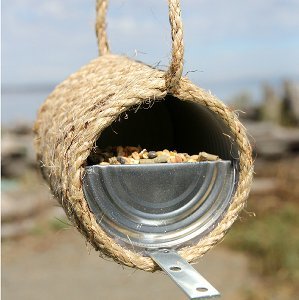
Read NextRope and Can Bird Feeder