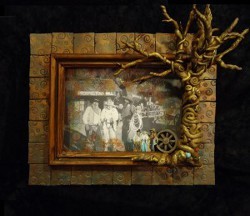
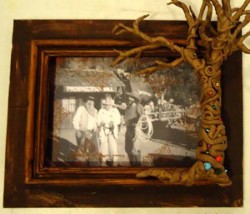
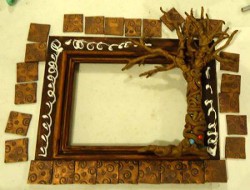
Wild West Adventure Frame
Use mixed media techniques and an old frame to create this upcycled project. You don't have to live in the country to enjoy this Wild West Adventure Frame from Candace Jedrowicz. Saddle up and have fun with this craft.

Materials:
- Wooden frame
- Photo to fit the frame and smaller version of the photo for the foreground
- Super Thick Tacky Glue, rubber cement and Pop Dots
- A whole bunch of polymer clay scraps - about a pound
- Aluminum foil and floral wire
- Sandpaper - medium grit
- Several different size beads
- Good craft scissors for cutting small details
- A medium size sponge brush
- Dark brown acrylic paint
- Pasta machine or rolling pin
- Hammer, screwdriver and whatever else you need to remove the hardware from the back of the frame
- A poster size piece of 1/4" thick foam core board
- Craft knife
- Metallic paste - I used copper and verdigris (blue green)
- Optional: rubber stamps and various ink colors, 2" square cookie cutter
Instructions:
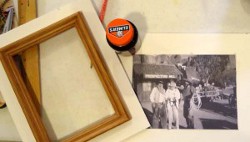
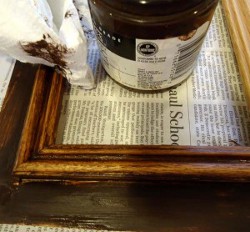
- Remove all the hardware, backing material and glass from the frame.
- Lay the frame on the foam core board and trace around the outside of the frame.
- Measure about 2" out from the edges of the frame and cut with a craft knife.
- Mark and cut out the center of the foam core board so the frame can sit inside of the board.
- Measure, mark and cut remaining foam core board to create a new back for the frame.
- Place the two pieces of foam core board together. Slide the frame in place and position the background photo.
- Secure the photo in place with rubber cement.
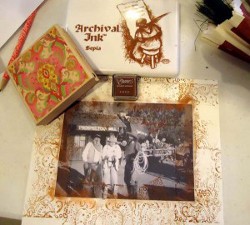
- Decorate the edges of the photo if desired.
- This is a good time to cut out the smaller image. You'll want to try different positions for it to be sure that you leave room for it.
- With the frame in it's place in the foam core board, paint both with dark brown paint, wiping some off on the frame.
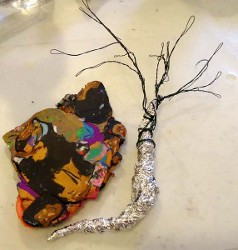
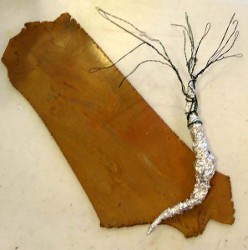
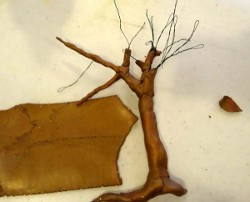
- Use a small amount of aluminum foil and floral wire to create the skeleton for your tree. It should be much smaller than the intended size of the finished tree.
- Gather up your polymer clay scraps and get ready to condition the clay. Chances are, if you have a pound of clay scraps, you also have a pasta machine to condition the clay. If you don't have a pasta machine, conditioning the clay involves rolling, squishing, twisting, rolling, squishing, etc. to blend all the colors together and make the clay soft enough to work with.
- When the clay is mostly one color, roll it out to an 1/8" thickness.
- As you begin to tear off bits of clay to cover the foil, check the look of the tree on the frame. If it doesn't look right to you, take some clay off.
- Continue wrapping the wire with torn bits of clay to form the branches.
- After the branches are wrapped, begin making small rolls of clay to wrap around some of the larger branches.
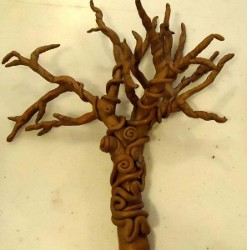
- Make graduated roles to spiral and meander down the tree.
- When the tree looks right to you, you can stop here, or you can add some beads by pushing them into the clay and lifting bits of the meandering roll to stash partially visible beads.
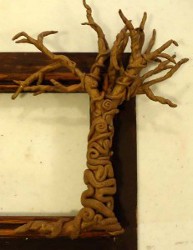
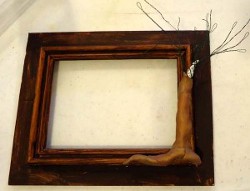
- Check the look of the finished tree with the photo before baking. Remove the frame from the foam core board and place the tree on the frame and set on a cookie sheet.
- At this point, you may wish to highlight the bark with copper metallic paste. Use your finger to gently rub the contours.
- Place folded bits of paper towel behind the back branches to lift them off the cookie sheet. This will ensure that those branches will have no pressure on them when the frame slides back down into the foam core board.
- Bake according to the clay package instructions.
- To make textured tiles to cover the foam core board outside of the frame, roll or stamp the clay to mark it. Using your finger, gently smear copper metallic paste over the clay. The finish should look worn.
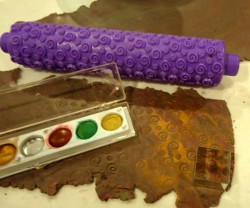
- Add just a touch of the verdigris to make highlights.
- Use a 2" square cookie cutter, or craft knife to cut the tiles.
- Bake the clay according to clay package instructions.
- Glue the frame into place in the top piece of foam core board.
- Glue the tree onto the frame.
- Glue the tiles into place.
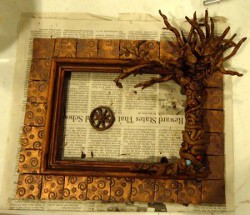
- I included a polymer clay wagon wheel as an accent. (See video for how I assembled the wagon wheel.)
- Using the sponge brush and dark brown acrylic paint, cover the tiles, frame, tree and any accent pieces, wiping excess off as you go to "age" the pieces.
- Before gluing the foam core boards together decide how you want the piece to hang - I pre-wired the back through grommets that I placed for extra strength.
- Attach your small photo cutout to a smaller piece of card stock using a Pop Dot and glue to the inside edge of the wooden frame.
- Now glue the foam core boards together and glue any accent pieces in place.
For a video tutorial, check out How to Make a Polymer Clay Tree on Frame.
Read NextSparkling Jeweled Photo Frames